

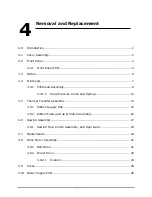
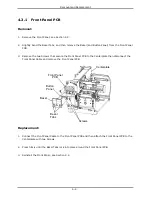


Removal and Replacement
4-6
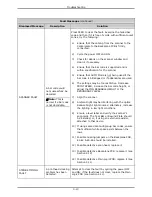
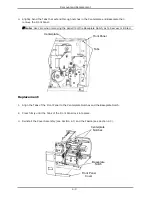
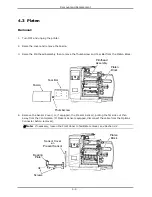
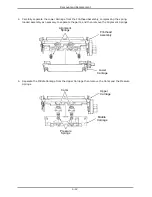
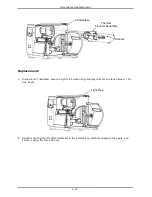
5.
Remove the two Screws that secure the Bearing Plate and then remove the Bearing Plate from
the Platen Block.
6. Remove the Platen Assembly from the Platen Block.
Platen
Block
Platen
Assembly
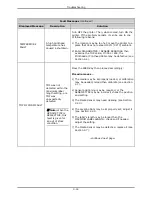
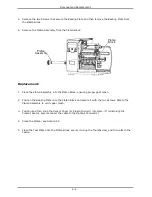
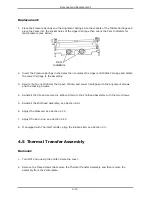
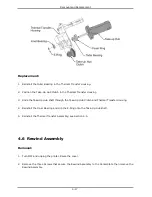
Replacement:
1. Place the Platen Assembly into the Platen Block, ensuring proper gear mesh.
2. Position the Bearing Plate onto the Platen Block and secure it with the two Screws. Rotate the
Platen Assembly to verify gear mesh.
3. Position and then snap the Sensor Cover (or Present Sensor) into place. (If reinstalling the
Present Sensor, also reconnect the cable to the Options Connector.)
4. Clean the Platen; see Section 4.3.
5. Place the Tear Plate onto the Platen Block, secure it using the Thumbscrew, and then attach the
Fascia.
Содержание I-Class
Страница 1: ...I Maintenance Manual...
Страница 3: ...i Contents 1 Overview 2 Adjustments and Maintenance 3 Troubleshooting 4 Removal and Replacement...
Страница 4: ...ii...
Страница 5: ...i 1 Overview 1 0 Introduction 1 1 1 About the Printer 2...
Страница 6: ...ii...
Страница 38: ...ii...
Страница 56: ...ii 4 11 Main Logic PCB 27 4 12 Backplane PCB 29...