


Adjustments and Maintenance
2-1
2.0
Introduction
This section covers the necessary maintenance and alignment procedures for the printer.
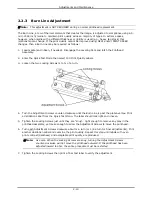
2.1 Media Sensor Calibration
This printer can use many different media compositions, configurations and colors. In addition to
adjusting the Media Sensor and selecting the SENSOR TYPE, calibration is required. There are three
different calibration methods.
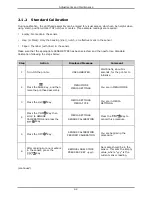
2.1.1
Quick Calibration
Note: This procedure is not required for continuous media unless UNCALIBRATED is displayed;
see Section 2.1.2.
This calibration method is effective for most media types. Perform Quick Calibration as follows:
1. Ensure that media is loaded, that the Media Sensor is adjusted and that the printer is idle.
2. Press and hold the
Key. The printer will advance media; allow at least one label gap or
mark to pass through the sensor.
Upon successful completion, CALIBRATION COMPLETE will be displayed, the printer will feed to the
next label TOF and READY will be displayed. (WARNING LOW BACKING may appear if using notched
media or media on a transparent liner; however, the calibration was successful).
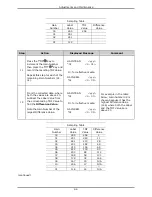
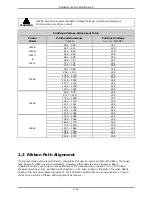
Note: Die-cut media containing large gaps may require a change in the PAPER OUT DISTANCE
setting; see the Operators Manual for details.
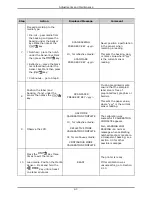
Calibration Hints
In certain cases, the printer may have trouble differentiating between the label and liner.
If CANNOT CALIBRATE is displayed, or if the printer stops feeding mid-label then try the following:
•
Press and hold the
Key to allow two gaps (or marks) to pass through under the sensor.
If CANNOT CALIBRATE is displayed again, or if the printer stops feeding mid-label, retry the
procedure -- this time allowing three or more gaps (or marks) to pass through the sensor;
otherwise, if this fails, see Section 2.1.2.
Содержание I-Class
Страница 1: ...I Maintenance Manual...
Страница 3: ...i Contents 1 Overview 2 Adjustments and Maintenance 3 Troubleshooting 4 Removal and Replacement...
Страница 4: ...ii...
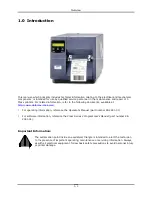
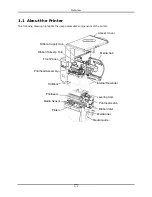
Страница 5: ...i 1 Overview 1 0 Introduction 1 1 1 About the Printer 2...
Страница 6: ...ii...
Страница 38: ...ii...
Страница 56: ...ii 4 11 Main Logic PCB 27 4 12 Backplane PCB 29...


