RAPID CONFIGURATION
5
1
STEP 3
– FOCUS THE SCANNER
The reading distance depends on the focus distance of the scanner and should be set
according to the application requirements. The Focus Position is set directly through the
focus adjustment screw on the front panel of the scanner. This screw moves the internal lens
of the scanner to change the focal point of the scanner. The setting is continuous but should
not be set beyond the limits "Too Far" or "Too Near" which appear on the display at the
extremes of the focus range. Although the scanner reads across the entire focus range, there
are three guaranteed positions which correspond to the reading diagrams in par. 6.4.
1. Power up the scanner.
For Subzero models,
At -35 °C, a 20-
minute warm-up period is required before the scanner is
ready to read barcodes, the Ready LED blinks.
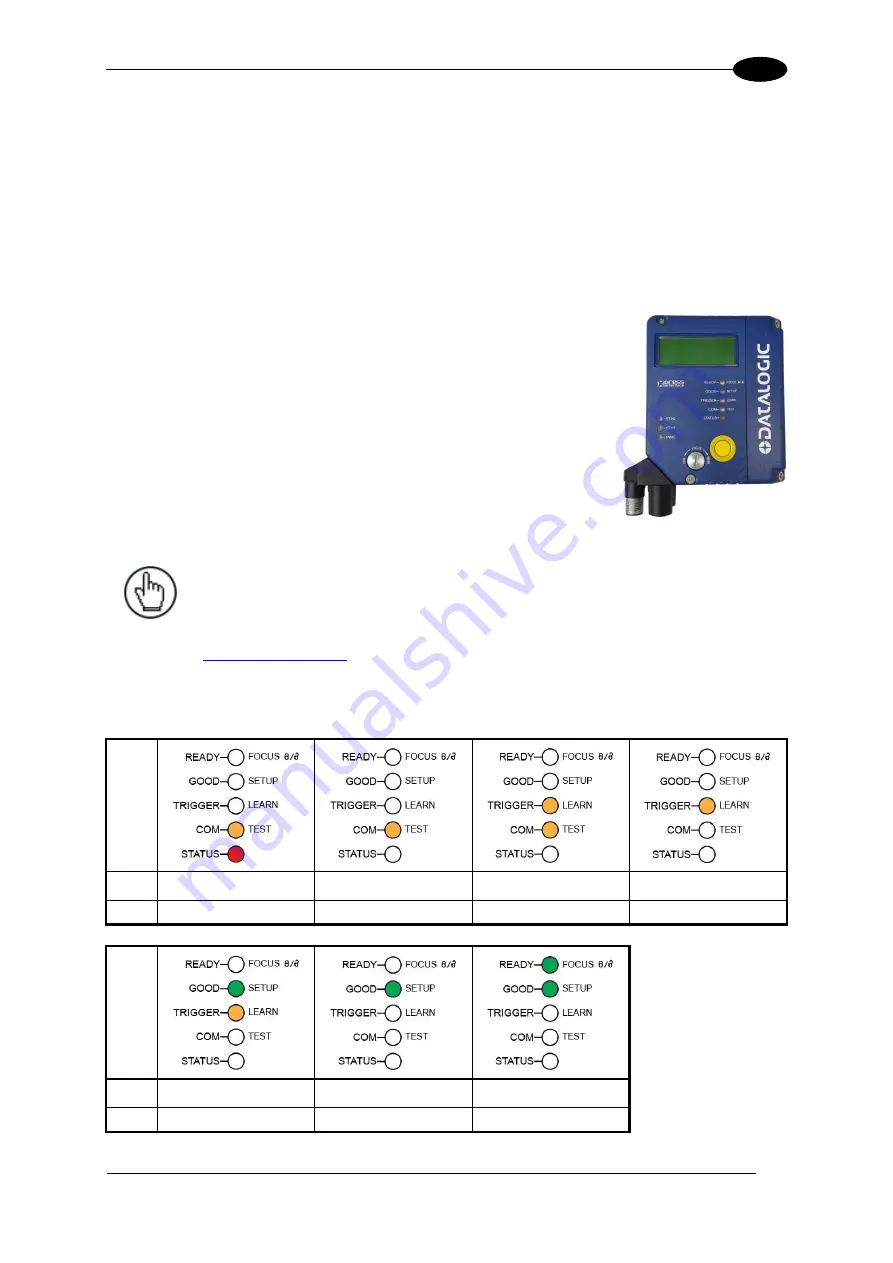
Wait for the
power up sequence to finish. By default the scanner focus is in
the Unlocked position. The alternating message on the display
shows the mechanical Focus Position as well as the message
“Please Lock Focus!” on the scanner display.
2. Using a screwdriver turn the focus adjustment screw in the
desired direction, clockwise (focus nearer to the scanner) or
counterclockwise (focus farther from the scanner). The focus
position in centimeters and inches is shown on the scanner
display.
NOTE:
After correctly focusing the scanner, it is strongly recommended to store
the value of the Focus Position in memory (Locked Position parameter). When
Locked, if the mechanical position changes by more than the allowed tolerance
of the value in memory, a diagnostic alarm will be sent to the display. See the
in step 4, X-PRESS Configuration.
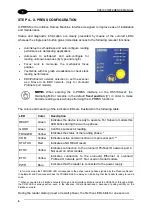
As an additional visual aid during focusing, the indicator LEDs show the relative focus
position as follows:
Model
1xxx
less than 30 cm
30 cm NEAR
32-38 cm
40 cm MEDIUM
2xxx
less than 45 cm
45 cm NEAR
47-63 cm
65 cm MEDIUM
Model
1xxx
42-58 cm
60 cm FAR
more than 60 cm
2xxx
67-73 cm
75 cm FAR
more than 75 cm
Содержание DS5100
Страница 1: ......
Страница 29: ...RAPID CONFIGURATION 13 1 b Operating mode selection and definition a Digital Inputs configuration...
Страница 30: ...DS5100 REFERENCE MANUAL 14 1 b Digital Outputs configuration c Hardware interface selection...
Страница 62: ...DS5100 REFERENCE MANUAL 46 3 Figure 18 DS5100 OM Serial Model Overall Dimensions...
Страница 78: ...DS5100 REFERENCE MANUAL 62 4 Figure 38 ID NET Network Connections with isolated power blocks...
Страница 79: ...ELECTRICAL INSTALLATION 63 4 Figure 39 ID NET Network Connections with Common Power Branch Network...
Страница 80: ...DS5100 REFERENCE MANUAL 64 4 Figure 40 ID NET Network Connections with Common Power Star Network...
Страница 97: ...TYPICAL LAYOUTS 81 5 7 Double click on the DS5100 scanner to configure it...
Страница 163: ...147 X X PRESS Human Machine Interface 23...
Страница 164: ......


