


VIP-4060 Quick Guide
2 of 6
DD1733958 Rev 05
02 March 2015
201 Daktronics Dr. P.O. Box 5128 Brookings, SD 57006
tel: 800-325-8766 fax: 605-697-4700
www.daktronics.com
Connecting to Network
1.
Connect one end of the RJ45 network cable to the network port. Refer
to
Figure 5
.
2.
Connect the other end of the cable to the computer or network.
Connecting Power
1.
Connect the power cord to the power jack. Refer to
Figure 6
.
2.
Plug the other end of the cord into an outlet.
Connecting Sensors
1.
Connect the sensor cable to the Light/Temp port. Refer to
Figure 7
.
2.
Rotate the connector
1
/
4
turn clockwise to lock.
Computer-to-VIP Communication Setup
Connecting to VIP-4060
1.
Dowload the DisplayFind application.
a.
Navigate to
dakfiles.daktronics.com
.
b.
Click
venus1500>Utils>DisplayFind>DisplayFind.exe
.
c.
Click
Run
to download the program or
Save
to save the file for
later use.
2.
Launch DisplayFind by double-clicking the
DisplayFind
icon. Refer to
Figure 8
.
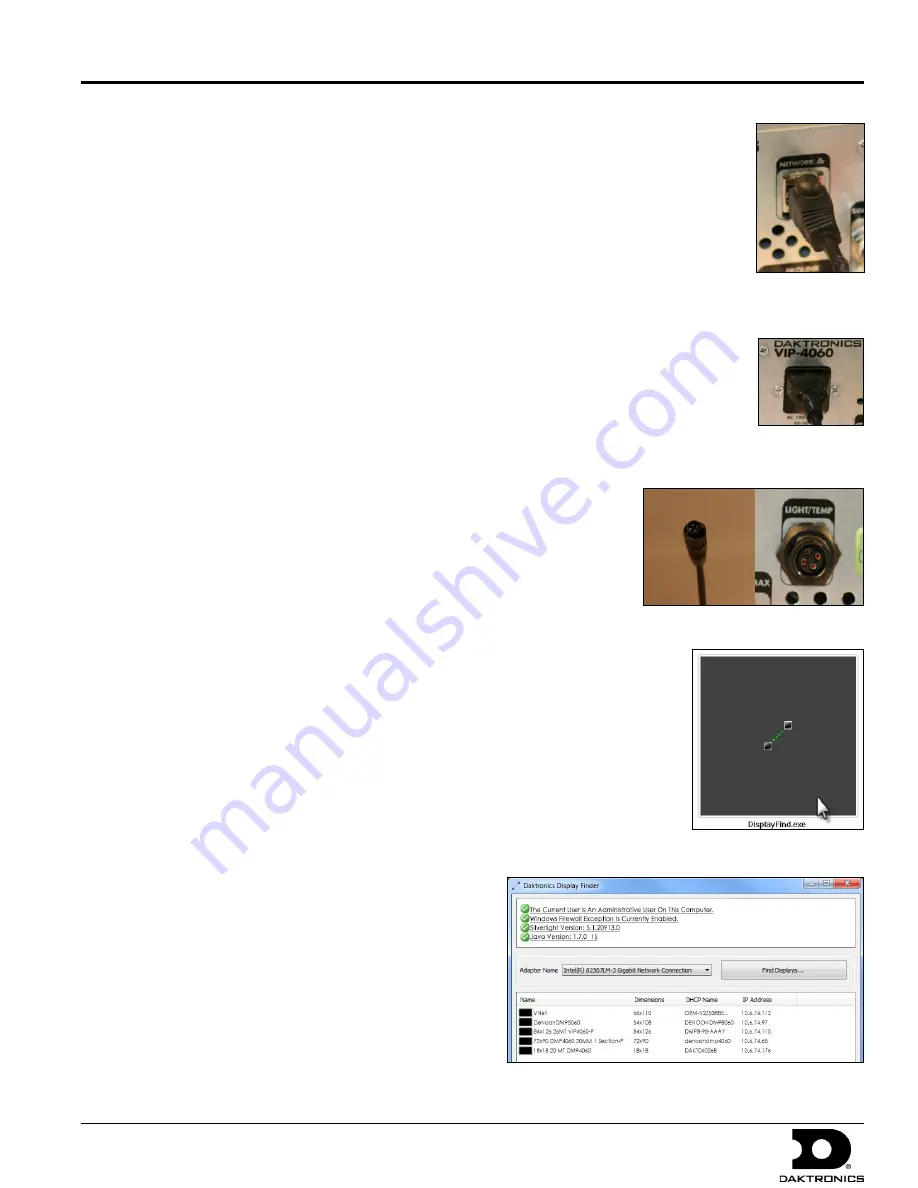
3.
Connect to the display using the DisplayFind utility.
a.
Select the appropriate
Network Adapter
.
b.
Click
Find Displays
to detect displays. Refer to
Figure 9
.
c.
Click the desired display to launch the configuration utility within a
web browser.
Note:
If multiple displays are found, use the IP
address or name to confirm the identity of the
correct display.
Figure 5:
Network
Input
Figure 6:
Power
Input
Figure 7:
Sensor Cable and Port
Figure 8:
DisplayFind Icon
Figure 9:
Daktronics Display Finder


