IOM 1281-2 • CENTRIFUGAL WATER CHILLERS 40 www.DaikinApplied.com
Operation
The Compressor State Information on the right side of the
screen is a compilation of the events that the chiller sequences
through at startup. A green light indicates that a particular
sequence requirement has been satisfied. It is recommended
that this information be viewed during the startup sequence.
One can see the requirements light up as they are met and
also determine why a non-start may have occurred. Similarly
during the shut down process, the sequence transitions back to
“Off” and the highlight color will switch to black.
The left side information displays the status of the compressor
inputs and outputs in greater detail than on the Home Detail
screen (
Figure 39
). Compressor information will populate in the
Power data box if the Full Metering card has been installed and
wired; otherwise zeros will be shown or the Power box will not
display on the HMI. Compressor related setpoint adjustments
can be made within the Settings screen on the Modes and
Motor tabs.
Capacity Control System
The opening or closing of the inlet vanes controls the quantity
of refrigerant entering the impeller thereby controlling the
compressor capacity. For 079-126 compressor models,
the vane movement occurs in response to oil flow from the
vane load/unload SA or SB 4-way solenoid valves, which in
turn, respond to instructions from the unit microprocessor
as it senses leaving chilled water temperature. This oil flow
activates a sliding piston that rotates the vanes.
Vane Operation
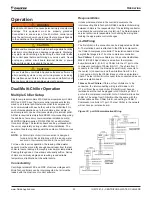
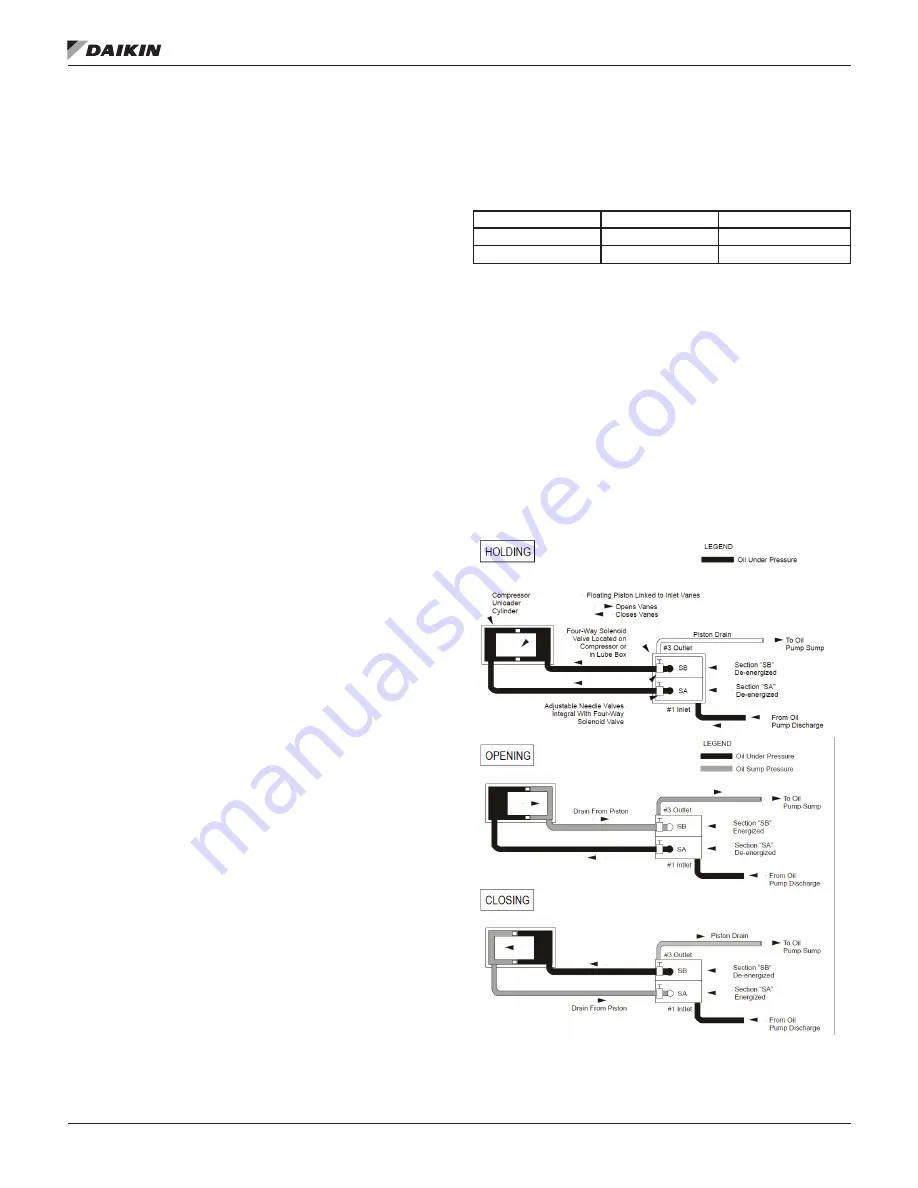
The hydraulic system for the inlet guide vane capacity
control operation consists of a 4-way normally open solenoid
valve located in the oil management control panel or on the
compressor close to the suction connection. Oil under pressure
from the oil filter is directed by the 4-way valve to either or both
sides of the piston, depending on whether the control signal is
to load, unload, or hold as illustrated in
Figure 42
.
To open the vanes (loading compressor), solenoid SA is de-
energized and SB is energized, allowing oil flow from port SA
to one side of the piston; other side drains through port SB.
To close the vanes (unload compressor), valve SB is de-
energized and valve SA is energized to move the piston and
vanes toward the unload position.
When both solenoid valves SA and SB are de-energized, full
oil pressure is directed to both sides of the piston through ports
SA and SB, and the vanes are held in that position. Refer to
Figure 43 on page 42
for solenoid action. Note that both
solenoids cannot be energized simultaneously.
Vane Speed Metering Valves
The speed at which the capacity control vanes are opened or
closed can be adjusted to suit system operating requirements.
Adjustable needle valves in the oil drain lines are used to
control the rate of bleed-off and consequently the “vane
speed”. These needle valves are part of the 4-way solenoid
valve assembly located in the compressor lube box. For unit
and system balancing through pLAN communication, it is
important to have the Opening (Load) and Closing (Unload)
speeds be as close as possible and must be within 30 seconds
of each other. The valves are factory set so that the vanes will
move from fully closed to fully opened in the times shown in
Table 11.
Table 11: Vane Speed Factory Setting
Compressor Model
Opening Time
Closing Time
CE079 - CE100
3 - 5 min.
3 - 5 min.
CE126
5 - 8 min.
5 - 8 min.
The start-up technician may readjust the vane speed at
initial start-up to meet job conditions. The speed must be
slow enough to prevent over-controlling and hunting. These
adjustments are sensitive. Turn the adjusting screws a few
degrees at a time.
The left adjusting screw is the SB needle valve for adjusting
the vane OPENING speed for loading the compressor. Turn
this screw clockwise to decrease the vane opening speed and
counterclockwise to increase the opening speed.
The right adjusting screw is the SA needle valve for adjusting
the CLOSING speed to unload the compressor. The same
adjustment method applies - clockwise to decrease closing,
counterclockwise to increase vane closing.
Figure 42: Vane Control Solenoid Operation .
Содержание WDC
Страница 4: ......
Страница 21: ...Installation www DaikinApplied com 21 IOM 1281 2 CENTRIFUGAL WATER CHILLERS Figure 16 Field Wiring Schematic...
Страница 22: ...IOM 1281 2 CENTRIFUGAL WATER CHILLERS 22 www DaikinApplied com Installation Figure 17 Compressor Control Box...
Страница 23: ...Installation www DaikinApplied com 23 IOM 1281 2 CENTRIFUGAL WATER CHILLERS Figure 18 Unit Control Box...
Страница 38: ...IOM 1281 2 CENTRIFUGAL WATER CHILLERS 38 www DaikinApplied com Operation Figure 39 Unit Detail View Screen...
Страница 72: ......

