No.
Name
Function
Press it for a long time to turn off the device.
We do not recommend you turn off the Device in this
way.
Press power button for a long time or pull out the
power cable might result in device auto restart.
2
System HDD Indicator
light
The blue light becomes on after system booted up
properly.
In the system HDD, there are device important
configuration file, factory default configuration file,
and device initial boot up data.
3
Alarm indicator light
The alarm indicator light becomes on once an alarm
occurred. It becomes on via the software detection.
The indicator light becomes on when there is a local
alarm.
4
Network indicator light
The blue network indicator light is on after you
connected the device to the network.
5
USB port
—
6
Front panel lock
—
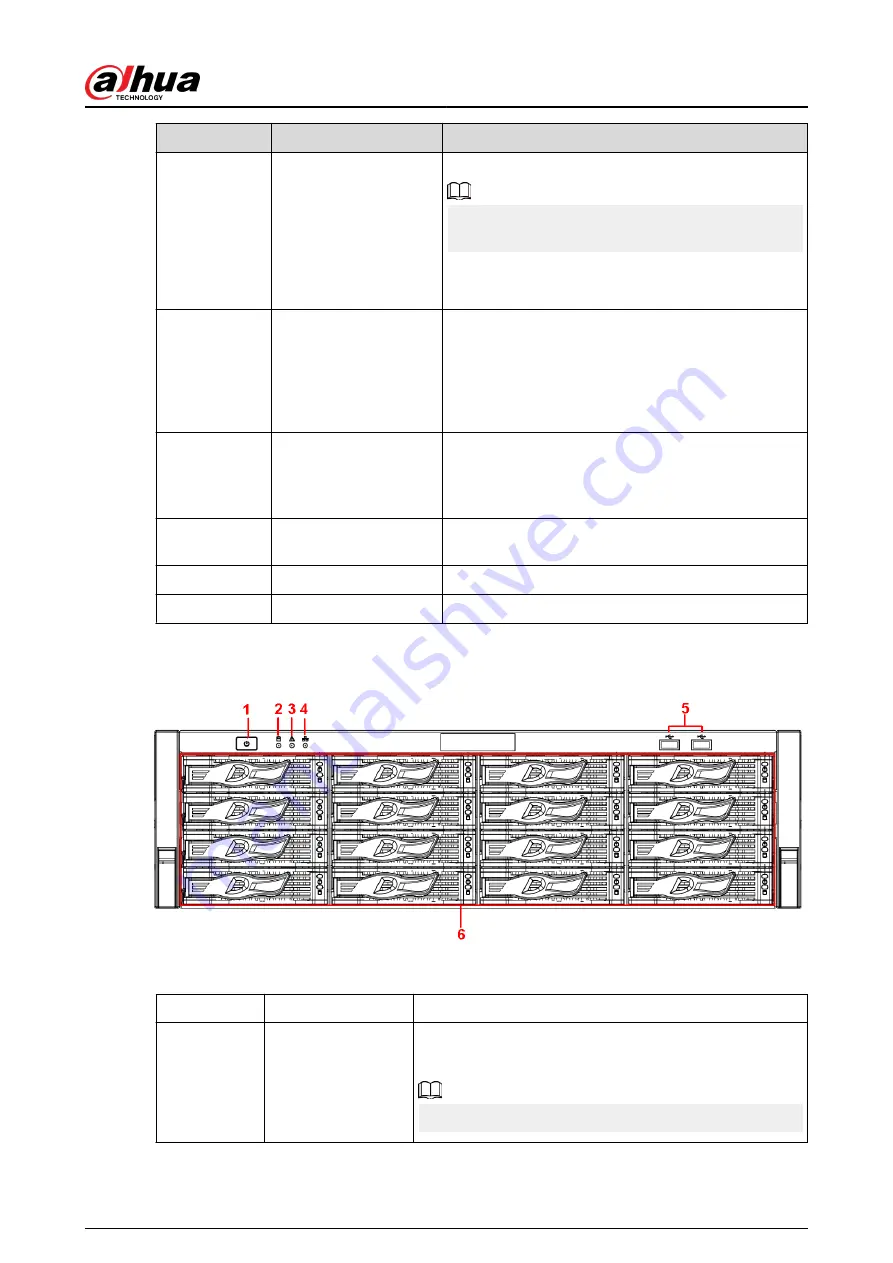
For general NVR616-4KS2/NVR50-EI series, the front panel is shown as below.
Figure 2-26 Front panel
Table 2-14 Icons
No.
Name
Function
1
Power button
Press it once to turn on the device.
Press it for a long time to turn off the device.
We do not recommend you turn off the Device in this way.
User's Manual
17
Содержание NVR2104-I2
Страница 1: ...ZHEJIANG DAHUA VISION TECHNOLOGY CO LTD V2 3 3 Network Video Recorder User s Manual...
Страница 84: ...Figure 2 98 Alarm input port 1 User s Manual 71...
Страница 122: ...Figure 3 60 Typical connection 3 5 15 NVR616 4KS2 Series Figure 3 61 Typical connection User s Manual 109...
Страница 132: ...Figure 5 8 Unlock pattern login User s Manual 119...
Страница 147: ...Figure 5 23 AcuPick human detection User s Manual 134...
Страница 148: ...Figure 5 24 AcuPick motor vehicle detection Step 5 Configure the search conditions as needed User s Manual 135...
Страница 151: ...Figure 5 27 Shortcut menu 1 User s Manual 138...
Страница 179: ...Figure 5 59 Modify IP Step 7 Click Next Figure 5 60 Device initialization Step 8 Click Finished User s Manual 166...
Страница 212: ...Figure 5 88 AcuPick motor vehicle detection Step 5 Configure the search conditions as needed User s Manual 199...
Страница 216: ...Figure 5 92 Thumbnails Step 7 Point to the target you want and then click to check the details User s Manual 203...
Страница 217: ...Figure 5 93 Custom search 2 Step 8 Configure the search conditions as needed User s Manual 204...
Страница 326: ...Figure 5 197 TCP IP Step 2 Click to configure the NIC card and then click OK User s Manual 313...
Страница 376: ...Figure 5 247 Pattern login User s Manual 363...
Страница 412: ...Figure 5 285 File management Step 2 Click Add User s Manual 399...
Страница 433: ...Figure 5 308 Shutdown 2 User s Manual 420...


