


Figure 5-113 Browse
Step 5
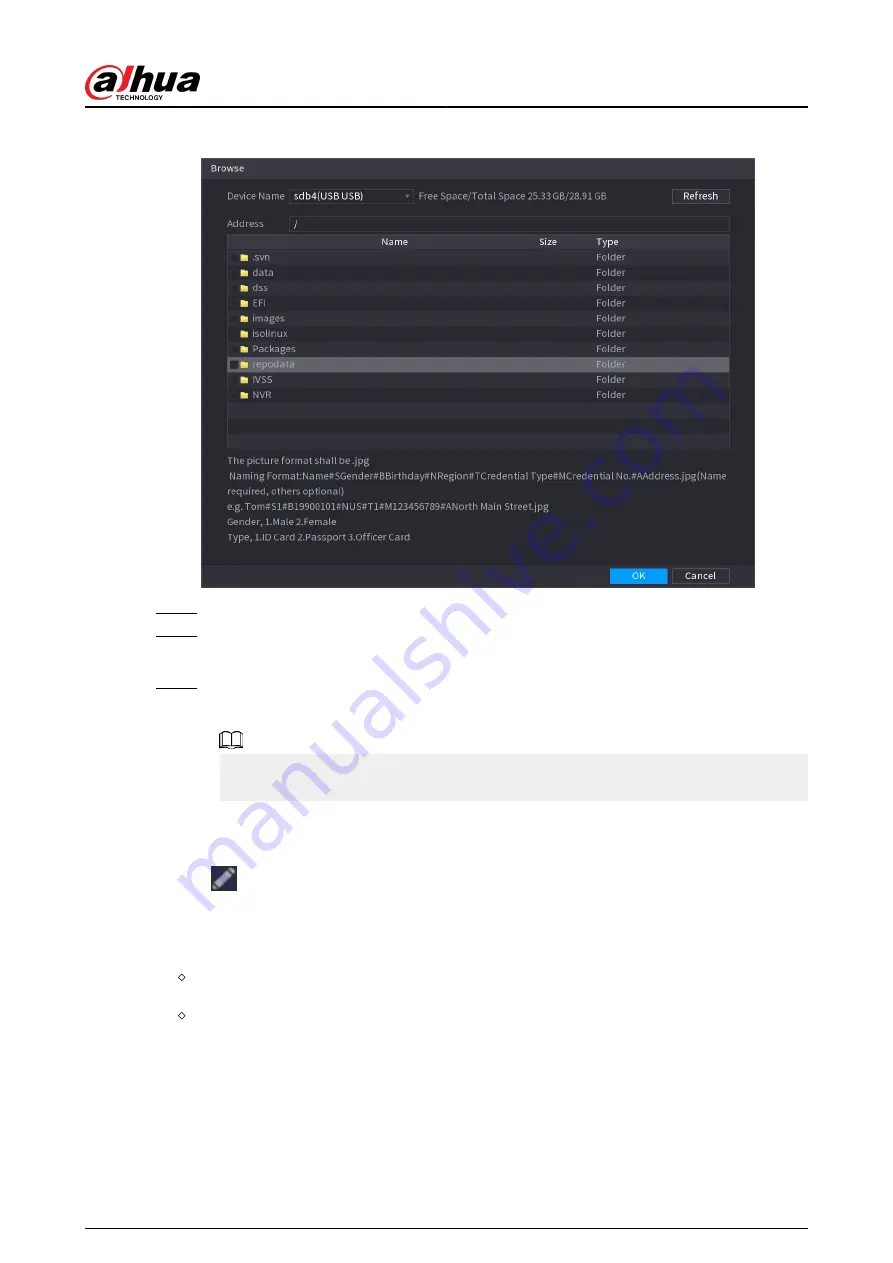
Select a face image and then enter the registration information.
Step 6
Click OK.
The system prompts the registration is successful.
Step 7
On the Details page, click Search.
The system prompts modeling is successful.
If the system prompts modeling is in process, wait a while and then click Search again. If
modeling failed, the registered face image cannot be used for face recognition.
Related Operations
●
Edit registration information.
Click
to modify the registration information.
●
Model face images.
The face images are modeled automatically after added to face database. You can also model
face images manually.
On the Database Config page, select a database, and then click Modeling to model all the
face images in the database.
On the Details page, select one or more face images, and then click Modeling to model the
selected images.
●
Export face images.
Select one or more face images, and then click Export.
●
Delete face images.
Select one or more face images, and then click Delete.
User's Manual
223
Содержание NVR2104-I2
Страница 1: ...ZHEJIANG DAHUA VISION TECHNOLOGY CO LTD V2 3 3 Network Video Recorder User s Manual...
Страница 84: ...Figure 2 98 Alarm input port 1 User s Manual 71...
Страница 122: ...Figure 3 60 Typical connection 3 5 15 NVR616 4KS2 Series Figure 3 61 Typical connection User s Manual 109...
Страница 132: ...Figure 5 8 Unlock pattern login User s Manual 119...
Страница 147: ...Figure 5 23 AcuPick human detection User s Manual 134...
Страница 148: ...Figure 5 24 AcuPick motor vehicle detection Step 5 Configure the search conditions as needed User s Manual 135...
Страница 151: ...Figure 5 27 Shortcut menu 1 User s Manual 138...
Страница 179: ...Figure 5 59 Modify IP Step 7 Click Next Figure 5 60 Device initialization Step 8 Click Finished User s Manual 166...
Страница 212: ...Figure 5 88 AcuPick motor vehicle detection Step 5 Configure the search conditions as needed User s Manual 199...
Страница 216: ...Figure 5 92 Thumbnails Step 7 Point to the target you want and then click to check the details User s Manual 203...
Страница 217: ...Figure 5 93 Custom search 2 Step 8 Configure the search conditions as needed User s Manual 204...
Страница 326: ...Figure 5 197 TCP IP Step 2 Click to configure the NIC card and then click OK User s Manual 313...
Страница 376: ...Figure 5 247 Pattern login User s Manual 363...
Страница 412: ...Figure 5 285 File management Step 2 Click Add User s Manual 399...
Страница 433: ...Figure 5 308 Shutdown 2 User s Manual 420...


