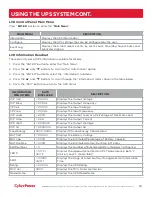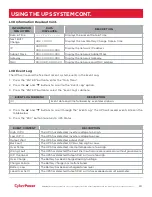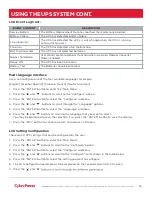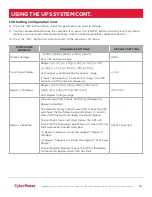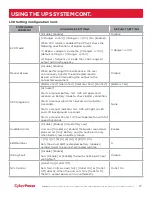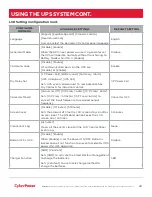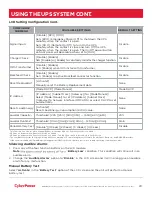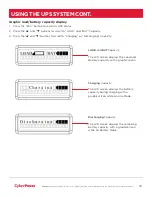
įĂĀĂĀƫ5!.ƫ+3!.ƫ5/0!)/ƫĨĩČƫ *ċƫ((ƫ.%#$0/ƫ.!/!.2! ċƫ((ƫ+0$!.ƫ0. !).'/ƫ.!ƫ0$!ƫ,.+,!.05ƫ+"ƫ0$!%.ƫ.!/,!0%2!ƫ+3*!./ċƫ
16
EXTENDED BATTERY MODULE INSTALLATION
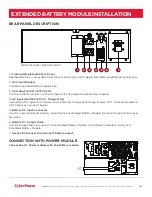
REAR PANEL DESCRIPTION
1.
On-board Replaceable Fuse Cover
Replaceable fuse is accessible from the rear panel. Service to be performed by qualified personnel only.
2.
AC Circuit Breaker
Provides overload and fault protection.
3.
AC Output Outlet (IEC320 C13)
Use this outlet to connect to the AC Input Inlet of a downstream Battery module.
4.
AC Input Inlet (IEC320 C14, Charge Only)
Connection for separate AC power source for Fast Charge Technology feature. NOT to be connected to
UPS output as source of power.
5.
Battery DC Input Connector
Use this input connector to daisy chain the next Extended Battery Module. Remove the connector cover
for access.
6.
Battery DC Output Cable
Use this output cable to connect the Extended Battery Module to the Power module or to the next
Extended Battery Module.
7.
Use the DC breaker to disconnect battery output.
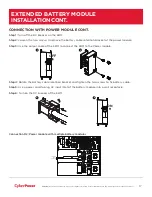
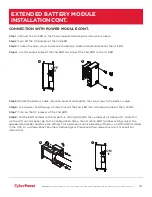
CONNECTION WITH POWER MODULE
Connection #1: Power module with one battery module
)86(
$
9a
&KDUJH2QO\
$&,1387
$&287387
9
%$77(5<,1387
%$77(5<287387
9
3
6
7
2
5
1
4
BP240VL3U01 / BP240VL3U02
3/8*,172$
:$//
5(&(37$&/(
5(/$<
287387
287
,1
86%
56
%$
&
.
)((
'
35
2
7(
&
7,
2
1
&211(
&7
25
%$7
7(
5
<
,1
38
7
9
(
32
,17(5)$&(
)86(
9a
$
$&,1387
&KDUJH2QO\
$&287387
9
%$77(5<287387
%$77(5<,1387
9


