4
Double check drapery height, drapery width, and track length before beginning your installation. Drapery track must be level
and all brackets must be vertically aligned for track to function properly.
NOTE:
If your track is spliced, follow the splicing instructions for proper assembly.
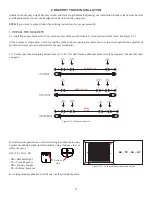
1. INSTALL THE BRACKETS
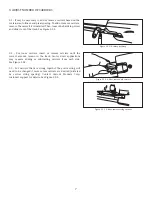
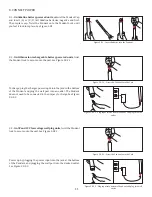
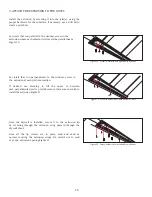
1.1 - Install the outer brackets first. Locate the center of the outer brackets 6” from each end of the track. See Figure 2.1.1
(If the drapery is center draw, use the centerline of the window opening as a reference. For side draw applications, adjust track
position if necessary to accommodate for drapery stackback.)
Figure 2.1.1 - Bracket Placement
2. DRapery Track Installation
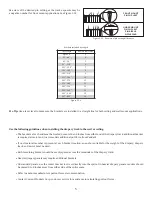
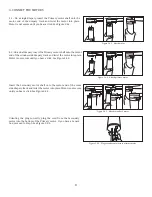
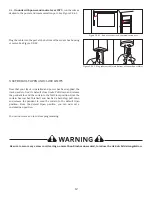
1.2 - Evenly space the remaining brackets every 16”-36” (for dual tracks, additional brackets will be required). See bracket chart
on page 3.
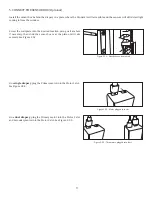
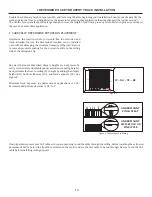
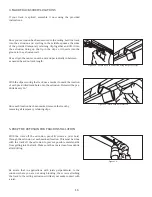
For wall mount applications, use the following formula to determine
bracket mounting height. Install brackets using “bottom side” as
reference point.
BH = TE + DH + BC
- BH = Bracket Height
- TE = Track Exposure
- DH = Drapery Height
- BC = Bottom Clearance
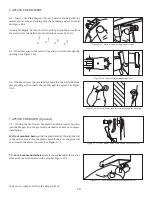
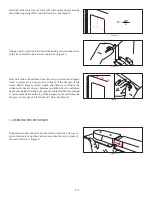
For ceiling mount applications with fascia, use the provided spacers.
BH
TE
DH
Figure 2.1.2 - Calculate bracket installation height
BH = TE + DH + BC
Bottom Side
Bottom
Side
6”
Every 16” - 36”
Every
16” - 36”
6”
6”
Every 16” - 36”
6”
6”
6”
6”
6”
6”
6”
BC


