background image

 12 

Counter: 
Specify Counter 

Specify Counter: 
[0   ] OK? 

Counter: 
No Counter 

6. Setting Counters and Assigning Names  

Two frequently used tasks are setting counters and assigning names to partitions. Directions for 
these tasks are given here.  

6.1 Setting Counters 


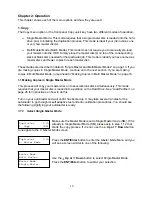
The autoloader frequently gives you the option to set a counter so that the machine can keep 
track of the number of copies made. Follow these steps when you see the Counter Selection 
Menu:  

The Counter Selection Menu lets you set how many copies you 
want to make for your project. The Counter Selection feature tells 
the autoloader to count the number of successful copies you have 
made and stop the job when the desired number of successfully 
copied discs has been reached. 

 
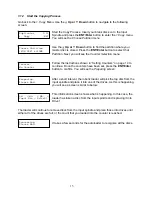
You can select “No Counter” if you prefer to copy continuously with no interruption. (It will still 
count the number of copies, but it will not notify you when to stop.) To select “No Counter”, simply 
press the 

ENT/Enter

 button when you see the screen above.  

Or, you can select “Specify Counter” between 1 to 9999 by pressing the 

Up or 

Down button


to go to the Specify Counter menu: 


Press the 

ENT/Enter

 button to select this option. You will see the 

next 

Specify Counter

 menu. 


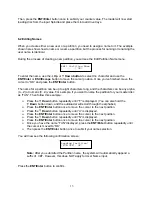
To specify the number of copies for your project, you need to 
enter/input a four-digit number.  
 

If you need to specify a number that is less than four digits, fill the leading spaces with zeros (any 
leading zeros will be skipped). Examples of four-digit numbers are “0234” (two hundred and thirty 
four), or “0010” (ten).  

To enter the number, you need to use the 

Up or 

Down button

 to select the number for each 

digit and use the 

ENT/Enter 

button or the 

ESC/Escape

 button to move the cursor position right or 

left. Once you've finished, move the cursor to “OK” and press the 

ENT/Enter

 button. For example, 

if you want to specify a counter value of 21 (twenty one). The 4-digit value would be “0021.” To 
input the desired quantity, do the following:  
 
Make sure the cursor is located at the first position (First blinking position):  


¾

 Press 

the 

Down

 button repeatedly until “0” is displayed.  

¾

 Press 

ENT/Enter

 button once to move the cursor to the next position.  

¾

 Press 

the 

Down

 button repeatedly until “0” is displayed.  

¾

 Press 

ENT/Enter

 button once to move the cursor to the next position.  

¾

 Press 

the 

Down

 button repeatedly until “2” is displayed.  

¾

 Press 

ENT/Enter

 button once to move the cursor to the next position.  

¾

 Press 

the


Down

 button repeatedly until “1” is displayed.  

¾

  Now, “0021” is displayed, press 

ENT/Enter

 button once and the cursor moves to “OK”. 

Specify Counter: 
[0   ] OK? 

Содержание Robotic Autoloader

Страница 1: ...25 Disc Capacity User s Manual V 3 0 6...

Страница 2: ...TRICTLY PROHIBITED WE DISCOURAGE THE USE OF ANY SUCH ACTION THAT GIVES RISE TO CRIMINAL INTENT AND PROSECUTION THE SELLER OF THIS PRODUCT IS NOT RESPONSIBLE FOR ANY POTENTIAL ILLEGAL ACTIONS OF THE US...

Страница 3: ...Copies in Single Master Mode 14 1 2 Making Copies in Multi Master Mode 17 2 Test 20 3 Compare 20 4 Test Copy 21 5 Copy Compare 21 6 Select Burn Speed 22 7 Select Source 23 8 Master Mode 23 9 Erase 24...

Страница 4: ...nfo 33 12 2 System Info 34 12 3 Device Info 34 12 4 Load Default 34 12 5 Update Firmware 34 13 Loader Utilities 35 13 1 Update Robot Firmware 35 14 Manage Accounts 35 14 1 View User 36 14 2 Create Use...

Страница 5: ...D disc to another double layer Blu Ray DVD recordable media but you cannot duplicate a single layer Blu Ray DVD disc to double layer Blu Ray DVD recordable media or vice versa Temperature Warning If t...

Страница 6: ...reatment If you have experienced this kind of problem please do the following to remove the adhesive static between the discs Separate the blank discs before you place them into the autoloader s spind...

Страница 7: ...ea for holding CDs DVDs and or Blu Ray Discs Although the manual refers to them as spindles many of the messages shown on the LCD display will refer to them as bins in order to create a more concise m...

Страница 8: ...epending on the media thickness Place the media you wish to copy into the Input Bin The robotic arm will pick discs from Input Bin then place the successfully copied discs onto the Output Bin If any d...

Страница 9: ...enu or list Down Scroll down through the menu or list Enter Execute the function Also referred to as OK in the Menus Escape Go back to the previous function Copy Quick key to make a copy Pressing this...

Страница 10: ...R DVD R copying you will encounter failure messages Warning If you are using CD DVD BD Rewritable discs as your blank media during the simulation the content on those discs will be permanently erased...

Страница 11: ...ations These options include loading renaming or deleting your images 11 Setup page 28 Use the Setup menu options to control how the autoloader operates You can scroll between the various options usin...

Страница 12: ...ibility Mode This feature allows you to turn the DVD R High Compatibility Mode feature ON or OFF The purpose of this feature is to increase the compatibility of DVD R media with a broader range of DVD...

Страница 13: ...are in the other trays Then you can press the ENT Enter button to update Important You should not update your autoloader s robot firmware unless your system is becoming unstable or you are advised to...

Страница 14: ...master disc has been detected the reserve partition s content of previous master disc will be replaced with the content of the new master disc You can tell immediately which mode you are in by lookin...

Страница 15: ...rom the drives and dropped on to the Output Spindle At the same time the system will pick up the next discs from the input bin and place them in the corresponding writer drive s Then the copying proce...

Страница 16: ...see the next Specify Counter menu To specify the number of copies for your project you need to enter input a four digit number If you need to specify a number that is less than four digits fill the l...

Страница 17: ...xample if you want to name the partition for your master disc as FUN Then follow this example Press the Down button repeatedly until F is displayed You can also hold the Down button down and the autol...

Страница 18: ...Mode continue on to the next section If you are making copies in Multi Master Mode jump ahead to Making Copies in Multi Master Mode on page 18 1 1 Making Copies in Single Master Mode This process wil...

Страница 19: ...see the Counter Selection menu Follow the instructions shown in Setting Counters on page 14 to continue Once the counters have been set press the ENT Enter button to confirm You will see the Preparing...

Страница 20: ...duplication and up to one minute for DVD Blu Ray Disc duplication That is caused by the initializing and finalizing stages Once the duplication run is completed the loader will remove the finished di...

Страница 21: ...the HDD Simply place the master disc s on top of the stack of blank discs needed for that particular job This mode is ideal if you have numerous master discs and fewer copies for each master disc The...

Страница 22: ...th different formats among CD DVD BD can be intermixed The autoloader will automatically detect a job s master and blank disc format and copy them when they match You should still be at the 1 Copy Men...

Страница 23: ...ess the ESC Escape button to go to the Access Drive Log screen If you choose to see the job log file you will see a screen similar to below Master 01 indicates the below results are for the 1st master...

Страница 24: ...identical to original master disc s Note The bit by bit comparison will only apply on all Blu Ray Discs DVDs and Data CDs A readability check will be applied for other formats like Audio CDs CD G and...

Страница 25: ...put Spindle place the discs to be compared in the Input Spindle and Press the ENT Enter button to continue If you have no more discs to compare press the ESC Escape button to terminate the operation 4...

Страница 26: ...t quality duplicates If you are at the 1 Copy Menu do the following Use the Up or Down button to find the 6 Select Burn Speed menu Press the ENT Enter button at 6 Select Burn Speed menu and you will s...

Страница 27: ...uccessfully you will see the following screen for 2 seconds You will automatically be returned to the Main Menu 7 Select Source The Select Source menu or the Source quick key is used to set the Master...

Страница 28: ...completely ereased and unable to be recovered for security purposes you must utilize the FULL ERASE function Use the Up or Down buttons to select between the two options and press the ENT Enter button...

Страница 29: ...more discs to erase press the ESC Escape button to terminate the operation 10 Hard Drive Setup The Hard Drive Setup menu consists of following sub menus 1 Select Partition 2 Load Partition 3 Rename Pa...

Страница 30: ...ample 10 2 Load Partition The Load Partition menu is used to load a master disc s content into the desired partition on the Hard Drive Press the ENT Enter button to enter the 2 Load Partition menu You...

Страница 31: ...the first input spindle The robotic arm will pick it up and place it into one of the drives and the contents of the master disc will be loaded into the desired partition Pres the ENT Enter button to...

Страница 32: ...is partition 002 DVD 4012MB FUN VEF 10 6 Select Loading Drive Select Loading Drive gives you the control of choosing which drive the master should be loaded from when you perform the Load Partition fe...

Страница 33: ...d in its own subsection 11 1 Language This setting allows you to choose the language that you prefer to use when navigating the autoloader The autoloader supports multiple languages Use the Up or Down...

Страница 34: ...which mode to use to duplicate a CD Disc at Once or Track at Once Unless you understand completely what these modes are we strongly suggest you set it to Disc at Once Use the Up or Down button to sel...

Страница 35: ...n you turn on the autoloader The options are 1 Copy 2 Test 3 Compare 4 Test Copy 5 Copy Compare 6 AutoCopy Use the Up or Down button to select the Startup Menu option and press the ENT Enter button to...

Страница 36: ...ON or OFF The purpose of this feature is to increase the compatibility of DVD R media with a broader range of DVD Video players This process will increase the amount of time required to duplicate your...

Страница 37: ...or OFF and press the ENT Enter button to select that option 12 System Utilities System Utilities is used to provide information pertaining to the autoloader as well as modification to maintain proper...

Страница 38: ...ill reset all of the options back to the manufacturer s default settings You should only perform this function if your autoloader is acting abnormally Use the Up or Down button to select the Load Defa...

Страница 39: ...re the autoloader recognizes all users as the Administrator The pre defined password for this function is 0000 By adding additional users each individual user has his or her own settings To take advan...

Страница 40: ...rative account It will always be there Press the ENT Enter button to enter this menu Use the Up or Down button to scroll through the list of users Press the ESC Escape button to go back to the Manage...

Страница 41: ...scroll through the list of users Press the ENT Enter button to select user Edit the user s name using the instructions shown in Setting Counters and Assigning Names on page 14 Press the ENT Enter but...

Страница 42: ...spindle s with the required number of blank discs Place the Master disc on top of the stack in the first input spindle Press the 15 AUTOCOPY button Fill the input spindle s with blank discs Place the...

Страница 43: ...ve 4012MB indicates the capacity of the master disc 12 481MB indicates the current progress of the duplication 0 indicates you have made 0 copies so far Note It is normal to see the progress indicator...

Страница 44: ...ve log file you will see a screen similar to below Drive 1 indicates the below results are for the 1st drive OK 1 indicates there is 1 successful copy made by this drive NG 0 indicates there are 0 bad...

Страница 45: ...it for several seconds If it still doesn t work turn the machine off and then restart the machine after a minute Copy completed but the copies are not readable executable Use the compare feature to c...

Страница 46: ...of the autoloader without Tech Support Service s consent will void the autoloader s warranty instantly Contact Tech Support Why does my autoloader stay at System Bootup The reason the autoloader may...

Страница 47: ...s that the picking arm did not reach the drop position within 4 seconds when placing a disc to the output bin The drop position represents the safe distance between the picking arm and the spindle whe...

Страница 48: ...d sequence is corrupted Please abort the current job and start over with a new job R50 Drawer not fully opened If error code 50 is shown it represents that the disc drawer is not fully opened If you b...

Страница 49: ...ly where bin 0 indicates the position right in front of the drive housing R255 High static shock error Too much static electricity built up from the disc s This error occurs when the static electricit...

Страница 50: ...rmat Hard Drive 11 Setup 11 1 Language 11 2 Read Error Skip On Off Off with Retry 11 3 CD Writing Modes 11 4 Max Audio VCD and CDG Speed 1x 2x 4x 8x 10x 12x 16x 24x 32x 40x 52x 11 5 Buzzer On Off 11 6...

Отзывы: