


Crestron
UPX-2
Universal Presentation Processor
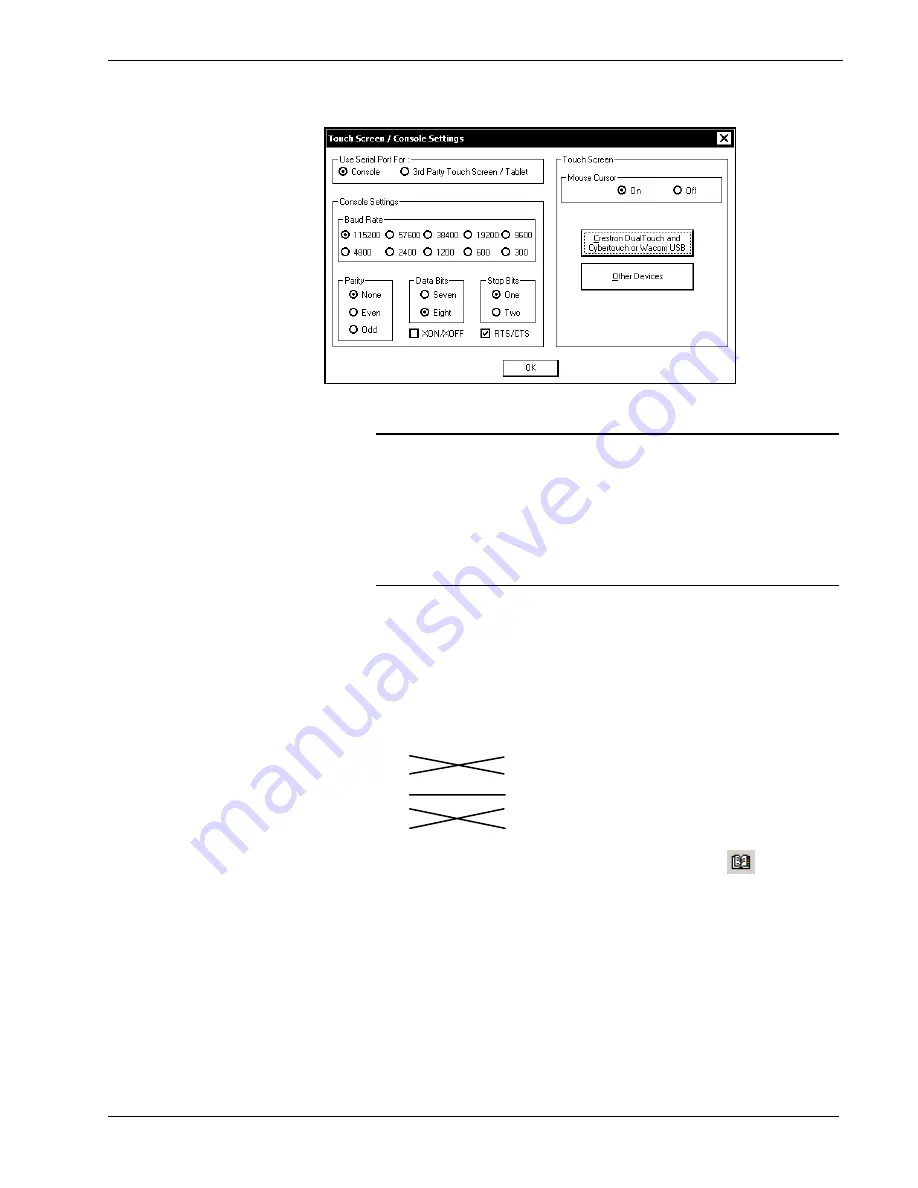
“Touch Screen / Console Settings” Window
6.
Click
OK
, and then click
Save & Reboot
on the SETUP MENU.
CAUTION:
At power up or reboot, the touchpanel will cycle through
colors and the Crestron logo screen for approximately 2.5 minutes prior to
displaying the progress bar. This is a normal part of the boot up process.
Do
not
turn off power to the UPX-2 while it is rebooting. Damage may occur.
NOTE:
If you are going to use the serial port (AUX COM) for a
touchpanel, you must return to this window, choose
3
rd
Party
Touch
Screen / Tablet
, and
Save & Reboot
.
7.
Connect the AUX COM port on the UPX-2 to one of the COM ports
(usually COM 1) on the PC. Use a null modem RS-232 cable with a DB9
female connector on both ends. Most commercially available null-modem
cables are acceptable; they should have at least five pins for transmit,
receive, ground, and hardware handshaking (pins 2, 3, 5, 7, and 8).
Pins
2
3
5
7
8
Pins
2
3
5
7
8
Null Modem Cable
8.
Open Crestron Toolbox and click the
Address Book
icon
to open the
Address Book. Alternatively, you can open Crestron Toolbox and select
Tools | Manage Address Book
to open the Address Book. The Address
Book allows you to maintain a list of accessible control systems and
network devices. You can establish a session with any or all of the devices
in the address book (provided the PC has a valid connection to the Cresnet
or Ethernet network).
9.
Select the device from the Address Book or click
Add Entry
and type a
name for the new device (UPX2 in our example).
62
¥
Universal Presentation Processor: UPX-2
Operations Guide – DOC. 6276B


