background image

42

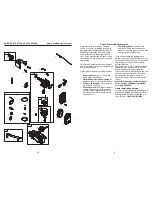
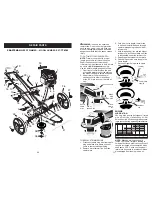
KEY PART

NO. NO. 

DESCRIPTION

1 594100 

Cylinder 

Assembly

299819s  Seal-Oil (Magneto Side)

4 594101 

Sump-Engine

5 594091 

Head-Cylinder

7 592358 

Gasket-Cylinder 

Head

11 590522 

Tube-Breather 

12 799587 

Gasket-Crankcase 

13 

590512  Screw (Cylinder Head)

16 594104 

Crankshaft

20 

399781s  Seal-Oil (PTO Side)

22 

692551  Screw (Crankcase Cover/


Sump) (1/4-20 x 1.19)

22A 

590673  Screw (Crankcase Cover/


Sump) (1/4-20 x .78)

23 594054 

Flywheel

24 222698s 

Key-Flywheel 

(Aluminum)

25 

594099  Piston Assembly (Standard)

26 

594098  Ring Set (Standard)

27 691588 

Lock-Piston 

Pin

28 298909 

Pin-Piston

29 594089 

Rod-Connecting 

32 

691664  Screw (Connecting Rod)

33 594095 

Valve-Exhaust 

34 594094 

Valve-Intake 

35 590532 

Spring-Valve 

(Intake)

36 590532 

Spring-Valve 

(Exhaust)

37 594103 

Guard-Flywheel

40 594092 

Retainer-Valve

43 697799 

Slinger-Governor/Oil

45 590514 

Tappet-Valve

46 594090 

Camshaft

48 

   N/A 

Short Block (Not Available


at this Printing)

58 591108 

Rope-Starter 

60 281434s 

Grip-Starter 

Rope 

78 

793480  Screw (Flywheel Guard)

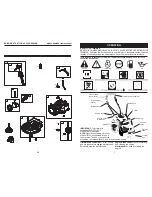
KEY PART

NO. NO. 

DESCRIPTION

104 590558 Pin-Float 

Hinge

105 594581 Valve-Float 

Needle

117 594059 Jet-Main 

(Standard)

118 

593271  Jet-Main (High Altitude)


(5000 > 9000 Feet)

121 590589 Kit-Carburetor 

Overhaul

122 590549 Spacer-Carburetor

125 594057 Carburetor

133 591120 Float-Carburetor

137 594633 Gasket-Float 

Bowl


(Pack of 5)

155 594093 Plate-Cylinder 

Head

163 799580 Gasket-Air 

Cleaner

187 791766 Line-Fuel


(Cut to Required Length)

188 

793480  Screw (Control Bracket)

192 590535 Adjuster-Rocker 

Arm

202 590517 Link-Mechanical 

Governor

209 590541 Spring-Governor 

(Purple)

216 590547 Link-Choke

217 590740 Spring-Choke 

Return

222 590560 Bracket-Control

227 590520 Lever-Governor 

Control

238 594097 Cap-Valve

300 594108 Muffler

305 

590586  Screw (Blower Housing)

318 

793480  Screw (Mounting Bracket)


(M5 x 14.1mm)

332 690662 Nut 

(Flywheel)

333 595009 Armature-Magneto

334 

691061  Screw (Magneto Armature)

337 594056 Plug-Spark

356 595018 Wire-Stop 

358 594114 Gasket 

Set-Engine

404 

690272  Washer (Governor Crank)

445 

593260  Filter-Air Cleaner Cartridge

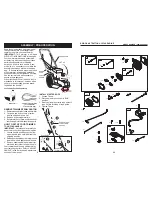
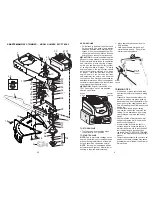
BRIGGS & STRATTON 4-CYCLE ENGINE

MODEL NUMBER 103M02-0008-F1

3

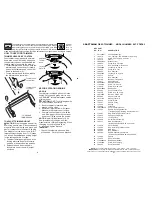
I.  GENERAL OPERATION 

•  Read, understand, and follow all 

instructions on the machine and in the 

manual before starting. Be thor ough ly 

familiar with the controls and the proper 

use of the machine before starting.

•  Do not put hands or feet near or under 

rotating parts.

•  Keep all parts of your body away from 

muffler and spinning line. A hot muffler 

can cause serious burns.

•  Only allow responsible individuals, who 

are familiar with the instructions, to 

operate the machine.

•  Stay away from breakable objects, such 

as house windows, auto glass, green-

 hous es, etc.

•  Clear the area of objects such as rocks, 

toys, wire, bones, sticks, etc., which 

could be picked up and thrown by the 

spinning lines.

•  Be sure the area is clear of other people 

before trimming, particularly small chil-

dren and pets.  Stop machine if anyone 

enters the area.

•  Wear appropriate clothing such as a 

long-sleeved shirt or jacket. Also wear 

long trousers or slacks. Do not wear 

shorts.

•  Do not wear loose clothing which could 

get caught in this equipment.

•  Do not operate the machine when bare-

foot or wearing open sandals.  Always 

wear work gloves and sturdy footwear. 

Leather work shoes or short boots work 

well for most people. These will protect 

the operator’s ankles and shins from 

small sticks, splinters, and other debris, 

and improve traction.

 WARNING: 

Engine exhaust, some 

of its constituents, and certain vehicle 

com po nents contain or emit chem i cals 

known to the State of Cal i for nia to cause 

can cer and birth defects or oth er re pro-

duc tive harm.

  CAUTION: 

 Muffler and other engine 

parts become extremely hot during 

operation and remain hot after engine 

has stopped. To avoid severe burns on 

contact, stay away from these areas.

•  Do not pull machine backwards unless ab-

solutely necessary.  Always look down and 

behind before and while moving backwards.

•  Do not operate the machine without 

proper guards, plates or other safety 

protective devices in place.

•  See manufacturer’s instructions for 

proper operation and installation of 

accessories. Only use accessories ap-

proved by the manufacturer.

•  Never use blades, wire, or flailing devices. 

This unit is designed for line trimmer use 

only. Use of other ac ces so ries or attach-

ments will increase the risk of injury.

•  Stop the rotating trimmer head when 

crossing gravel drives, walks, or roads. 

Wait for the cutting lines to stop rotat-

ing.

•  Stop the engine (motor) whenever 

you leave the equipment and allow it 

to cool, before cleaning, repairing or 

inspecting the unit. Be sure the trim-

mer head and all moving parts have 

stopped.

•  Operate only in daylight or good artifi-

cial light.

•  Do not operate the machine while un-

der the influence of alcohol or drugs.

•  Never operate machine in wet grass.  

Always be sure of your footing: keep a 

firm hold on the handle and walk; never 

run.

•  If the equipment should start to vibrate 

abnormally, stop the engine (motor) 

and check immediately for the cause.  

Vibration is generally a warning of 

trouble.

•  Always wear safety goggles or safety 

glasses with side shields when op er at-

 ing machine.

II.  SLOPE OPERATION

Slopes are a major factor related to slip and 

fall accidents which can result in severe 

injury.  All slopes require extra caution.  If 

you feel uneasy on a slope, do not trim it.

DO:

•  Trim across the face of slopes: never up 

and down.  Exercise extreme caution 

when changing direction on slopes.

•  Remove obstacles such as rocks, tree 

limbs, etc.

•  Watch for holes, ruts, or bumps. Tall 

grass can hide obstacles.

Содержание 917.776741

Страница 1: ...d and follow all Safety Rules and Instructions before operating this equipment Owner s Manual WHEELED WEEDTRIMMER 675 Series Briggs Stratton Engine 22 Inch Cut Sears Brands Management Corp Hoffman Estates IL 60179 U S A Visit our Craftsman website www craftsman com Español p 18 ...

Страница 2: ...objects thrown into the eyes which can result in severe eye damage Always wear safety glasses or eye shields while operating your trimmer or performing any adjustments or repairs We recommend standard safety glasses or a wide vision safety mask worn over spectacles WARNING In order to prevent acci dental starting when setting up transport ing adjusting or making repairs always disconnect spark plu...

Страница 3: ... the area of objects such as rocks toys wire bones sticks etc which could be picked up and thrown by the spinning lines Be sure the area is clear of other people before trimming particularly small chil dren and pets Stop machine if anyone enters the area Wear appropriate clothing such as a long sleeved shirt or jacket Also wear long trousers or slacks Do not wear shorts Do not wear loose clothing ...

Страница 4: ...nt if you strike an object Repair if necessary before restarting Do not change the engine governor set ting or overspeed the engine Clean and replace safety and instruction decals as necessary Serial Number Date of Purchase Gasoline Capacity Type 1 6 Quarts Unleaded Regular Oil Type API SJ SN SAE 30 above 32 F SAE 5W 30 below 32 F Oil Capacity 15 5 Ounces Spark Plug Gap 020 Autolite 3924 Trimmer L...

Страница 5: ...nt of 10 from regular price of service and service related parts not covered by the agreement also 10 off regular price of preventive mainte nance check Fast help by phone phone sup port from a Sears representative on products requiring in home repair plus convenient repair scheduling Once you purchase the Agreement a simple phone call is all that it takes for you to schedule service You can call ...

Страница 6: ...ithtrimmer 2 Cut down two end corners of carton and lay end panel down flat 3 Remove all packing materials 4 Roll trimmer out of carton and check car tonthoroughlyforadditionallooseparts HOW TO SET UP YOUR TRIMMER TO UNFOLD HANDLE IMPORTANT Unfold handle carefully so as not to pinch or damage control cables 1 Loosen handle knob enough to allow upper handle to be unfolded from the shipping position...

Страница 7: ...PERATING YOUR TRIMMER Compare the illustrations with your trimmer to familiarize yourself with the location of various controls and adjustments Save this manual for future reference Starter handle Gasoline cap Air filter Trimmer head Handle knob Trimmer line Engine oil cap w dipstick Chassis cover Trimmer head control bar Engine brake control Trimmer head control lever Engine brake control used fo...

Страница 8: ...r Theoperationofanytrimmercanresultinforeignobjectsthrown into the eyes which can result in severe eye damage Always wear safety glasses or eye shields while operating your lawn mower or performing any adjustments or repairs We recom mendstandardsafetyglassesorawidevisionsafetymaskoverspectacles Use ear protec tors to a v o i d damage to hearing 37 CRAFTSMAN WEED TRIMMER MODEL NUMBER 917 776741 KE...

Страница 9: ...d gasoline with a minimum of 87 octane Do not mix oil with gasoline Pur chase fuel in quantities that can be used within 30 days to assure fuel freshness CAUTION Alcohol blended fuels called gasohol or using ethanol or methanol can attract moisture which leads to separation and formation of acids during storage Acidic gas can damage the fuel system of an engine while in storage To avoid engine pro...

Страница 10: ...55 inch diameter trimmer line Cut new trimmer line length to 18 3 4 inches After new line is installed on trimmer head check all lines so they do not vary more then one 1 inch in length This is important to make sure the trimmer head is balanced and will not vibrate abnormally 35 KEY PART NO NO DESCRIPTION 1 Engine Briggs Stratton Model No 103M02 0008 F1 See Breakdown 2 150406 Bolt Engine Mounting...

Страница 11: ... and insert folded end through carrier plate opening to back side of retainer clip 4 With folded end of line at back side of retainer clip pull line outward until line is fully seated under the retainer clip 5 Repeat on other side of carrier plate 6 Check all lines to be sure they are the same length 7 Reconnect spark plug wire to spark plug New trimmer line Chassis cover WRAP LINE AROUND End of s...

Страница 12: ...ual 6 Replace engine oil cap 7 Reconnect spark plug wire to plug AIR FILTER Your engine will not run properly and may be damaged by using a dirty air filter Replace the air filter cartridge every 100 hours of operation or every season whichever occurs first Service air cleaner more often under dusty conditions TO CLEAN AIR FILTER 1 Remove cover 2 Carefully remove cartridge 3 Clean by gently tappin...

Страница 13: ...ea de medida incorrecta recortadora de diámetro 155 inch PROBLEMA CAUSA CORRECCIÓN SOLUCIÓN DE PROBLEMAS Vea la sección apropiada en el manual amenos que esté dirigido a un centro de servico Sears 13 TRIMMER TO ADJUST TRIMMING HEIGHT See TO ADJUST TRIMMING HEIGHT in the Operation section of this manual TO ADJUST HANDLE The upper handle may be adjusted to dif ferent height positions Loosen handle k...

Страница 14: ... pintura picada use una lija antes de pintar MANGO Usted puede plegar el mango de su recorta dora para el almacenaje Afloje la perilla del mango lo suficiente para permitir al mango superior ser plegado hacia adelante IMPORTANTE Cuando doble el mango para el alacenamiento o el trasporte asegurese que lo doble segun se muestra o puede danar los cables de control MOTOR SISTEMA DE COMBUSTIBLE IMPORTA...

Страница 15: ...esarios 15 STORAGE Immediately prepare your trimmer for stor age at the end of the season or if the unit will not be used for 30 days or more TRIMMER When trimmer is to be stored for a period of time clean it thoroughly remove all dirt grease leaves etc Storeinaclean dryarea 1 Cleanentiretrimmer See CLEANING in theMaintenancesectionofthismanual 2 Lubricate as shown in the Mainte nance section of t...

Страница 16: ...ta hacia arriba y a distancia de la recortadora SERVICIO Y AJUSTES ADVERTENCIA Para evitar lesiónes serias ntes de dar cualquier sercicio o de hacer ajustes 1 Pare el motor 2 Asegúrese que las líneas rotatorias y que todas las partes movibles se hayan de tenido completamente 3 Desconecte el alambre de la bujía y pón galo en donde no pueda entrar en contacto con ésta SEGADORA PARA AJUSTAR LA ALTURA...

Страница 17: ...es como el keroseno no se deben usar para limpiar el cartucho Pueden producir el deterioro de éste No aceite el cartucho No use aire a presión para limpiarlo o secarlo 4 Instale el cartucho luego vuelva a poner la cubierta Envase Oreja Cartucho Cubierta del filtro de aire Ranura BUJÍA Cambie el bujía al comienzo de cada tempo rada de siega o después de cada 100 horas de operación lo que suceda pri...

Страница 18: ...ualquier recortadora puede hacer que salten objetos extraños dentro de sus ojos lo que puede producir daños graves en éstos Siempre use anteojos de seguridad o protección para los ojos mientras opere su recortadora o cuando haga ajustes o reparaciones Recomendamos gafas de seguridad o una máscara de visión amplia de seguridad usada sobre las gafas productos químicos conocidos en el Estado de Calif...

Страница 19: ...a puede esconder obstáculos NO No recorte cerca de pendientes zanjas o terraplenes El operador puede perder la tracción en los pies o el equilibrio No recorte cuestas demasiado inclinadas No recorte en hierba mojada La reducción en la tracción de la pisada puede causar resbalones III NIÑOS Se pueden producir accidentes trágicos si el operador no presta atención a la presencia de los niños A menudo...

Страница 20: ...ual quier acumulación de hierba Mantenga la superficie del motor alrededor del arranca dor despejado y limpio de recortes Esto facilitará el flujo de aire de motor y alargará la vida del motor Para mejores resultados y una línea du radera utilice los extremos de la línea para hacer el corte Esto se puede hacer con facilidad al mover lentamente través de las malas hierbas Utilizar el lado izquierdo...

Страница 21: ...ste situado en una de las seis 6 posicio nes de la altura PARA ACCIONAR EL CABEZAL DE CORTE Barra de mando del cabizal de la recortadora Palanca de control del cabezal de corte CÓMO UTILIZAR SU RECORTADORA La operación de cualquier recortadora puede hacer que salten objetos extraños dentro de sus ojos lo que puede producir daños graves en éstos Siempre use anteojos de seguridad o protección para l...

Страница 22: ...a la barra del control del cabezal de la recorta dora al mango superior El mango de su recortadora puede ajustarse según le acomode para recortar Refiérase a AJUSTE DEL MANGO en la Sección de Servicio y Ajustes de este manual INSTALACIÓN DEL CORDÓN ARRANCADOR 1 Afloje una manilla T 2 Mueva la palanca de control del freno de motor a la posición de MARCHA RUN 3 Lentamente tire el cordón arrancador d...

Отзывы: