


20
6 Assembly instructions
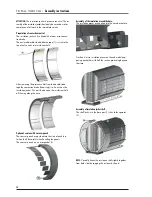
6�1 Check on delivery
All components on the delivery note are complete
All components are intact, in particular:
Storage modules (without dents, etc.)
Loading and unloading pipes (thread, sealing surfaces)
All seals on the modules are protected by caps
NOTE:
The seals may not be removed!
Included loading and unloading pipes and connecting rods
(dimensions in mm):
8 module
s
7 module
s
6 module
s
5 module
s
4 module
s
3 module
s
2 module
s
8 module
s
7 module
s
6 module
s
5 module
s
4 module
s
3 module
s
2 module
s
5 x 1890 + 5 x 3230
5 x 1890 + 5 x 2600
5 x 1890 + 5 x 1970
5 x 3230
5 x 2600
5 x 1970
5 x 1340
8 x 1890 + 8 x 2428
8 x 1890 + 8 x 1798
8 x 3058
8 x 2428
8 x 1798
8 x 1168
8 x 53
8
6�2 Tools
Tools required for installation:
• Spanner size 10 + 36
• Pipe wrench for diameter 70
• Impact drill and masonry drill bit M8
• Phillips screwdriver
• Spirit level or cross line laser, scale and pencil
• Step Ladder
6�3 Floor preparation
The store must be mounted on the bottom rails. Set the
position of the bottom rails with the store projection (see
illustration below and Chapter 3 planning aid). Take into
account the dimensions for the future plumbing and mainte-
nance access.
L = length of the track rails in mm
2 modules
1380
3 modules
2010
4 modules
2640
5 modules
3270
6 modules
1890 + 2010 = 3900
7 modules
1890 + 2640 = 4530
8 modules
1890 + 3270 = 5160
The floor under the store must be leveled with a levelling
compound (see figure next page), if the rails do not lie flat.
The levelling compound must have an approved load per
surface of minimum 35 000 kg /m
2
, or EN 13813 compres-
sive strength class C8 or above. Note the curing time.
NOTE:
Quick-setting levelling compound is available as an
accessory. The processing time is 15 minutes, the curing
time 60 minutes.
With the levelling compound (2) create a flat surface with a
*) Projection past the store in mm
**) Distance to the wall after Planning Guide (mm)
***) Inside dimensions, specified by template
T D M A - VA R I C A L :
Assembly instructions