Apex Tool Group
P2260JH | 2019-05
31
Installation – Existing network
8
EN
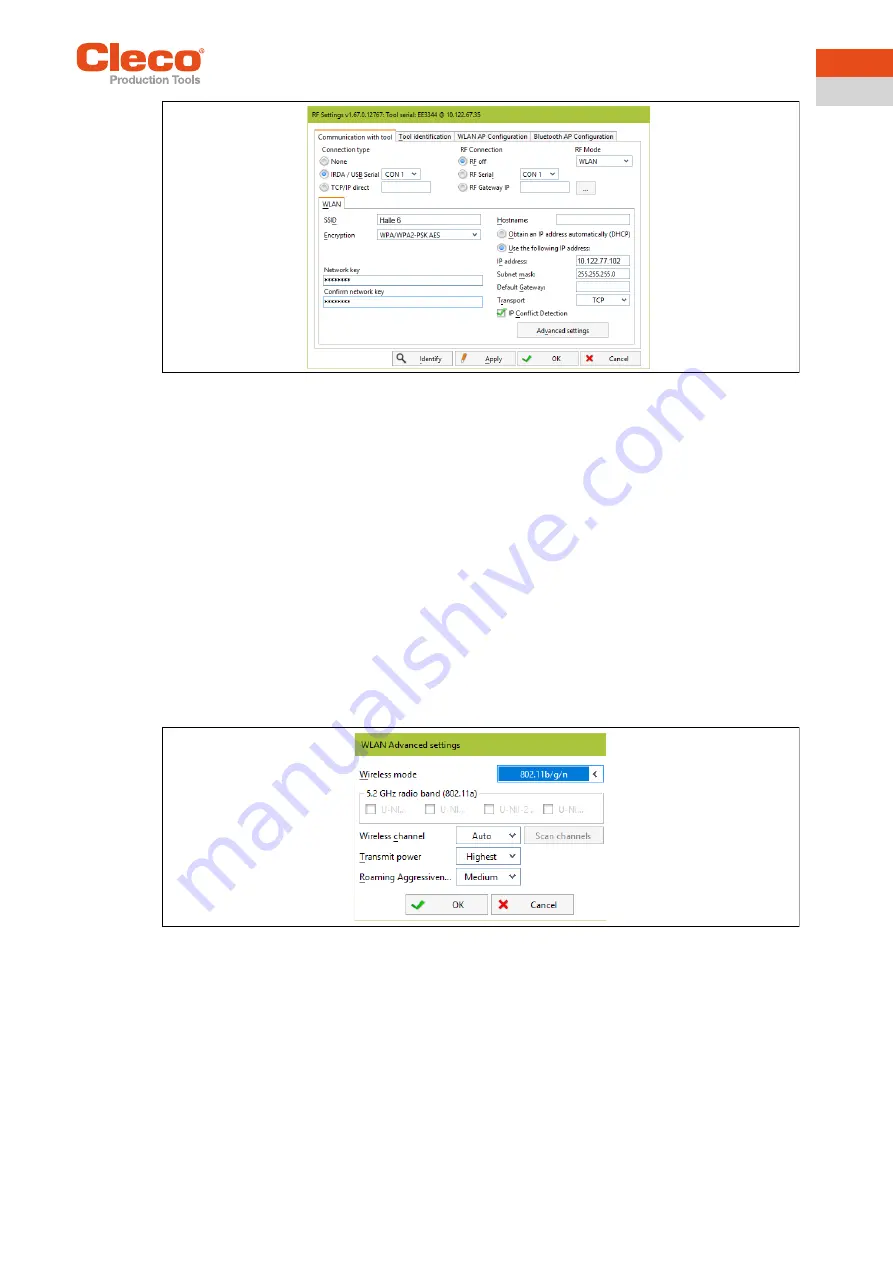
Fig. 8-4: RF settings (local network)
4.
IRDA connection
: Select port to match the port on the tool holder.
5. XS4 = CON 1 (XS5 = CON 2).
6. Select <Identify> to read out the specific data of the WLAN module.
7. Enter the value for
SSID
.
8. SSID must be identical to the access point.
9. Select value for
Encryption
(see access point
Authentication type
)
.
10.
Confirm network key:
Enter the network key and confirm by entering it again underneath (see access
point
Pass phrase
)
.
11. If required, work with DHCP (IP address is automatically assigned). The DHCP Address must be static
(linked to tool MAC address):
12.
Obtain an IP address automatically (DHCP)
: >Set tick.
13. View assigned IP address in submenu for tool WLAN radio transmission.
14. If you are not working with DHCP:
15.
Use the following IP address:
Value for
IP address, subnet mask
.
16. If necessary, enter
Default gateway
.
17. Select <Advanced settings>.
18. Select
Wireless mode
and confirm with <OK>.
Fig. 8-5: WLAN advanced settings
19. Press <Apply>.
→ Settings are written onto the tool.
20. Confirm the following message with <Yes>:
Toolserial: xxxxxxx
Builddate: xx.xx.xx
Configure Tool?
21. Confirm the following message with <OK>:
Configuration done!


