5
BASIC OPERATION
Most of this manual is devoted to showing you how to create basic shapes.
Other than these specific instructions, setting up the bender to form your
particular shape will involve a certain amount of trial-and-error.
You will notice some differences in operation depending on whether you are
forming the piece around a die, or whether you are making a sharp-angle
bend in the piece. However, in general you will:
1. Determine the appropriate material and size for the part(s) to be made.
2. Determine the appropriate dies to install on the centre pin and/or the pin
installed in the handle, and determine the appropriate hole for attaching
the handle to the ring assembly’s loop.
3. Install the stop block or the sharp-angle-bend attachment, as appropriate.
Install the block support. If the stop block is used, orient it properly. Refer to
pages 4 and 5 for more information on the stop block and the sharp-angle-
bend attachment.
4. Insert the blank stock into the bender, and position it properly for the first
bend.
5. Make the first bend. Re-check the angle and location before continuing.
6. Make any additional bends in the same way. In some cases, you may have
to remove the piece from the bender and turn it end-for-end or upside-
down.
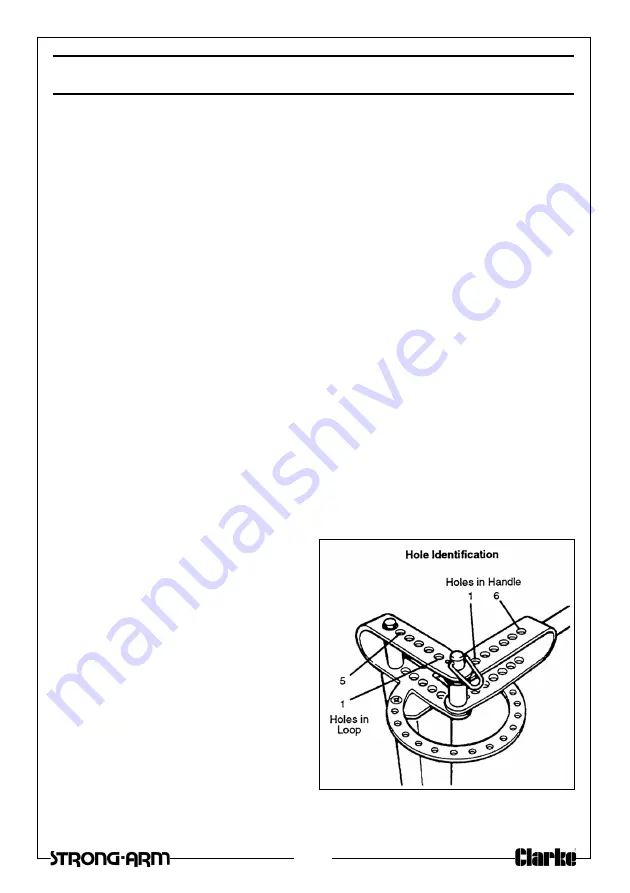
HOLE IDENTIFICATION
In the examples shown in this manual,
the holes in the loop and those in the
handle are identified by a number.
Refer to the illustration at right.
MEASURING BEND ANGLES
When accuracy is required, you will
need a suitable device for measuring
the bend angles.
FIXED AND ADJUSTABLE STOPS
If you are making multiple parts with
the same bend angle, using the
same setup (dies and hole locations),
the operation will be speeded up by
installing either the fixed or adjustable stop in the appropriate hole in the ring
assembly.
Содержание 7630073
Страница 42: ...42 LETTER V STOCK REQUIRED 3 16 STOCK 2 MAX WIDTH 1 X 13 1 2 Blank...
Страница 48: ......


