background image

Hydrogen generator 

Hydro200

13

6.

Use

6.1.

Keyboard and display

KEYBOARD

The keyboard on the front panel of the generator enables the user to interact
with the generator, i.e. give specific commands or display and set parameters.
The table shows the function of the various keys:

DISPLAY

The display comprises 2 lines each of 20 characters
Usually the top line displays the functions or parameters and the lower line di-
splays the relative status and values
If the message exceeds 20 characters, the text scrolls on display.

6.2.

Generator start-up

To switch on the generator, press the black key “POWER” at the front of the ge-
nerator.

Key

Function

Function

Selects a generator function 

Cursor

Increases the selected value

Cursor

Decreases the selected value

Operation

Starts or stops the generator

Содержание Hydro200

Страница 1: ...User s manual Hydrogen generator Hydro200 ...

Страница 2: ...1 Introduction 3 2 Safety 4 3 Description of the generator 6 4 Installation 9 5 Disassembly and transport 12 6 Use 13 7 Maintenance 20 8 Troubleshooting 23 9 Guarantee 25 10 Declaration of conformity 26 11 Note 27 ...

Страница 3: ... it is presumed that the manual user is experienced in the use of pneumatic components and in par ticular is aware of all safety aspects linked to the use of hydrogen The margin of the text contains the following symbols indicating m compulsory safety standards to be observed c electrical hazard e recommendations and important information It is strongly recommended to carefully read all safety war...

Страница 4: ...is gas consult the relative safety datasheet m Place the generators FAR FROM SOURCES OF HEAT m The generator must operate with its safety guard fitted this guaran tees the correct circulation of air and prevents the formation of gas pockets For the same reason NEVER PLACE OBJECTS ON THE TOP VENTILATION GRILLE m Place the generators in an environment PROTECTED AGAINST RAIN AND WIND c NEVER OPEN the...

Страница 5: ... which shu ts down the generator when pressure value exceed 4 5 bar HYDROGEN OXYGEN MIXTURE The formation of potentially hazardous hydrogen oxygen mixtures inside the generator is prevented by Special electrodes patented for the production of hydrogen which prevent oxy gen from mixing with the hydrogen A forced ventilation system prevents the formation of hydrogen pockets due to possible gas leaks...

Страница 6: ...ection to copper pipe 1 8 comprising n 1 adaptor 6MB 1 8 n 1 nut Swagelok 1 8 n 1 back ferrule Swagelok 1 8 n 1 front ferrule Swagelok 1 8 For connection to steel pipe 2x1mm comprising n 1 coupling 6MB for steel pipe 2x1mm n 5 ferrule for steel pipe 2x1mm For connection to vent pipe comprising 2m polyamide pipe 6x4mm n 1 ferrule for polyamide pipe 6x4mm n 1 nut for polyamide pipe 6x4mm For routine...

Страница 7: ...rical 3 2 3 Gas Dimensions Width 40 cm Depth 50 Height 31 Weight 19 kg Noise 46 dB A Operating temperature 5 40 C Protection rating IP20 Power supply voltage 115 230 V 10 1ph 50 60Hz Max absorption 100 V Maximum hydrogen flow rate 200 Nml min Hydrogen pressure settable from 1 to 4 bar ...

Страница 8: ...EY ON push button A CONNECTOR jack type for control of external pump optional B CONNECTOR for electric power cable includes housing for main FUSE C TANK for demineralised water D H2 OUT coupling for hydrogen outlet E O2 VENT coupling for air vent F WATER coupling for demineralised water inlet G HANDLE for generator lifting H LABEL stating the model serial number SN and electrical specifications I ...

Страница 9: ...n the future Ensure that the supply is complete see section 3 1 4 2 2 Step 2 position the generator Locate an installation area that meets the specifications listed in section 4 1 Position the generator on a laboratory bench or on a Claind generator from the series AirToc AirToc SL or NitroAir e Handle with care never tilt the generator and avoid impact with obstacles e Ensure a clearance of at le...

Страница 10: ...generator da taplate ensure that the POWER key is set to OFF Make the electrical connection using the cable supplied with the generator type IRC350 Schuko length 2m c For reasons of safety the following instructions must be strictly obser ved The electrical installation must comply with current standards in particular re garding the protection line c Recommendations for correct installation do not...

Страница 11: ...tor e avoid obstructing the vent during use the end of the polyamide pipe 6x1 mm opposite the generator must never by closed off or immersed in the liquid e conserve the cap as it is used in the event of future transport of the generator see chapter 5 4 2 7 Step 7 set the mode parameters In this phase the mode parameters should be checked and modified if requi red which enable the selection of the...

Страница 12: ...eumatic connec tions Seal off outlet H2 OUT using the original cap Seal off outlet O2 VENT using the original cap Empty the demineralised water tank e missing caps on the outlets H2 OUT and O2 VENT can cause serious damage to the generator and packaging during transport 5 2 Transport If conserved use the original packaging otherwise use a pallet of adequate di mensions to hold the generator affixi...

Страница 13: ...y comprises 2 lines each of 20 characters Usually the top line displays the functions or parameters and the lower line di splays the relative status and values If the message exceeds 20 characters the text scrolls on display 6 2 Generator start up To switch on the generator press the black key POWER at the front of the ge nerator Key Function Function Selects a generator function Cursor Increases ...

Страница 14: ...DY is displayed hydrogen production can be started up as follows Press the operation key START STOP The production cycle is started up and the following message is displayed PRODUCTION X XX bar YYY Nml min where X XX hydrogen pressure expressed in bar Y YY instant quantity of hydrogen produced expressed in normal millilitres per minute 6 4 Stop the generator At any time during production the gener...

Страница 15: ...he START STOP key is disabled At the end of depressurisation the following message is displayed GENERATOR READY There are then two alternatives 1 Switch off the generator by pressing the POWER key see par 6 5 2 resume the gas production by pressing the key START STOP see par 6 3 ...

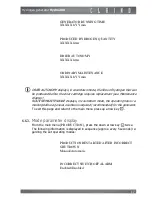
Страница 16: ...OFF To shut off the alarm press the function key 6 6 Parameter display See also flow chart in APPENDIX 6 6 1 Hydrogen and oxygen pressure display During production the main menu displays the message PRODUCTION For more information on generator status press the up arrow key The fol lowing page is displayed H2 O2 X XX bar Y YY bar where X XX hydrogen compartment pressure bar Y YY oxygen compartment ...

Страница 17: ... chapter ROUTINE MAINTENANCE displays in countdown mode the operating hours re maining before a general overhaul is required recommended for the generator To exit this page and return to the main menu press up arrow key 6 6 3 Mode parameter display From the main menu PRODUCTION press the down arrow key twice The following information is displayed in sequence approx every 5 seconds re garding the s...

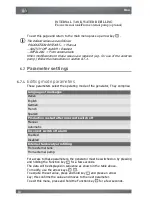
Страница 18: ...ode of the generator They comprise For access to these parameters the generator must be switched on by pressing and holding the Function key for a few seconds The data will be displayed in sequence as shown in the table above To modify use the arrow keys To acquire the set value press and hold key and press an arrow key this confirms the value and moves to the next parameter To exit this menu pres...

Страница 19: ...om 1 bar to 6 bar proceed as follows From the main menu PRODUCTION press function key to display the following HYDROGEN PRESSURE SET POINT X XX bar To modify the value use arrow keys To acquire the set value press and hold key and press the up arrow key To exit this menu press and hold the Function key for a few seconds 6 7 3 Editing maintenance parameters See Maintenance section ...

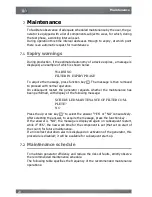
Страница 20: ...t the generator requests whether the maintenance has been performed with display of the following message SCHEDULED MAINTENANCE OF FILTER COM PLETE NO Press the up arrow key to select the answer YES or NO consecutively After selecting the answer to acquire the message press the function key If the answer is NO the message is displayed again on subsequent restart while if YES the new work time for ...

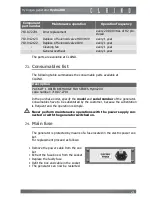
Страница 21: ...e generator is protected by means of a fuse located in the electric power soc ket For replacement proceed as follows Component part number Maintenance operation Operation frequency 710 07 2701 Drier replacement every 20 000 litres of H2 pro duced 710 04 2123 Replace of Solenoid valve HDV HVV every 1 year 710 04 2122 Replace of Solenoid valve OVV every 1 year Cleaning fan every 1 year General overh...

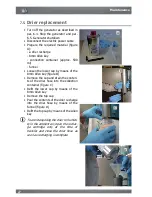
Страница 22: ... the 8mm Allen key figure B Remove the cap and drain the conten ts of the drier hose into the collection container figure C Refit the lower cap by means of the 8mm Allen key Remove the top cap Pour the contents of the drier recharge into the drier hose by means of the funnel figure D Refit the top cap by means of the Allen key e To avoid exposing the drier to humidi ty in the ambient air open the ...

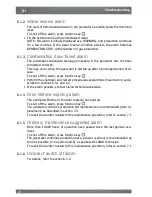
Страница 23: ...Water reserve active Water reserve empty Condensation drain failed Drier lifetime expiring Ordinary maintenance is suggested Incorrect Switch off The following section lists the causes and actions to be taken in the event of the alarms If an alarm is activated not listed below contact CLAIND technical assi stance 8 1 1 Hydrogen consumption too high alarm The generator is unable to maintain the set...

Страница 24: ...ocedures several times maximum 4 as de scribed in sections 6 5 1 and 6 2 If the alarm persists contact Claind technical assistance 8 1 4 Drier lifetime expiring alarm The estimated lifetime of the drier material has expired To shut off the alarm press function key The generator continues production but maintenance is recommended drier re placement as described in section 7 3 To reset the counter r...

Страница 25: ...costs for technicians to visit the client s premises The guarantee covers exclusively COSTS DERIVING FROM MANUFACTURING DEFECTS and does not include 1 Damage caused by negligence or improper use of the equipment 2 Damage caused by inadequate electric power supply 3 Damage caused by natural catastrophes e g fire 4 Damage caused by transport 5 Damage caused by compressed air with inadequate properti...

Страница 26: ...s is fully in conformity with the following rules 2014 30 EU Richtlinie über elektromagnetische Verträglichkeit EMV Electromagnetic compatibility directive 2014 35 EU Niederspannungsrichtlinie NS Low voltage directive 2014 34 EU Europäische Richtlinie über Geräte und Schutzsysteme zur Verwendung in explosiongefährdeten Bereichen ATEX Gruppe II Kategorie 3 European directive concerning equipment to...

Страница 27: ...Hydrogen generator Hydro200 27 11 Note ...

Страница 28: ...Claind srl Via Regina 24 22016 Tremezzina Loc Lenno CO Italy Tel 39 0344 56603 Fax 39 0344 56627 e mail service claind it Hydro200 eng Rev3 fm ...

Отзывы: