4- 1
4. Part Names and Functions
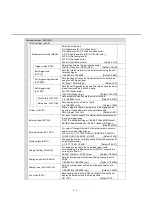
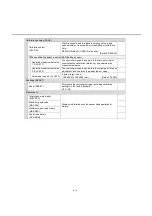
4-1 Display and Control Keys
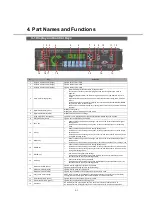
No.
Key
Description
1
Output 1 indicator lamp (orange)
Lights when Output 1 is ON.
2
Output 2 indicator lamp (orange)
Lights when Output 2 is ON.
3
Output 3 indicator lamp (orange)
Lights when Output 3 is ON.
4
Circle meter (orange/green)
Meter indicating increase/decrease of judgment value.
The two lowest blocks show a LOW judgment, and the two highest show a HIGH
judgment.
When the judgment is GO, the lamps turn green, and when it is LOW/HIGH, they turn
orange.
When the HIGH setting value is equal to or lower than the LOW setting value, all lamps
turn off.
On the basic screen, this meter will display the count when the LEFT/RIGHT/UP/DOWN
keys are held down for two seconds.
Lamps turn on to indicate the number of setting items for each layer, and blink to indicate
the order.
5
Digital display SUB (green)
Displays setting items.
Displays the items set in display switching mode.
6
Digital display MAIN (white)
Displays judgment values or settings.
7
Arrow key guide marks (white)
Lamps turn on to indicate which of the LEFT/RIGHT/UP/DOWN keys can be used.
8
ENT guide mark (white)
Lights when the ENTER key is enabled.
9
LEFT key
Used to switch setting items and settings, and to move the cursor between the digits of
setting values.
On the basic screen, holding this key down for two seconds switches over to teaching
mode.
10
UP key
Used to switch setting items and to change setting values.
On the basic screen, holding this key down for two seconds switches over to the display
switching mode.
On the basic screen, pressing this key for a short time switches over to the mode for fine
tuning HIGH setting values.
11
RIGHT key
Used to switch setting items and settings, and to move the cursor between the digits of
setting values.
On the basic screen, holding this down key for two seconds switches over to setting mode.
12
DOWN key
Used to switch setting items and to change setting values.
On the basic screen, holding this key down for two seconds switches over to bank mode.
On the basic screen, pressing this key for a short time switches over to the mode for fine
tuning LOW setting values.
13
ENTER key
Commits the setting items and settings.
On the basic screen, holding this key and the EXIT key down simultaneously for two
seconds executes the key lock setting/release.
14
EXIT key
Cancels the setting items and settings.
On the basic screen, holding this key and the ENTER key down simultaneously for two
seconds executes the key lock setting/release.
15
Status mark TRIG (white)
Lights while the trigger input (external input) is ON.
Lights during the sampling period in self hold setting.
Status mark HOLD (white)
Lights while the judgment value is held.
Status mark CALC (white)
Lights when connected to slave units and set to calculation mode.
16
Copy check mark (orange)
COPY lights if a slave unit is enabled for copying while setting the master unit. If selected for
copying, the check mark lights, and the relevant data is copied on execution.
17
Input indicator lamp (white)
Lights when one of the external inputs 1/2/3 is ON.
18
Preset indicator lamp (green)
Lights when the preset function is being used.
19
Preset key
On the basic screen, pressing this key for a short time turns the preset function ON.
On the basic screen, holding this key down for two seconds turns the preset function OFF.
1 2 3
4
5
6
7
8 9
10
11 12
13
14
15
16
17
18
19

