5-5
Cisco XR 12416 and Cisco XR 12816 Router Chassis Installation Guide
OL-17440-01
Chapter 5 Maintaining the Router
Removing and Installing Front Doors
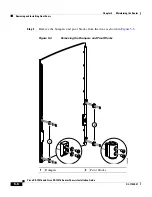
Step 2
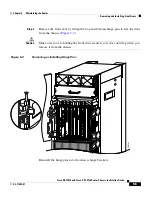
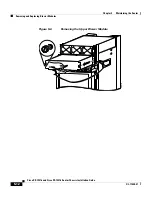
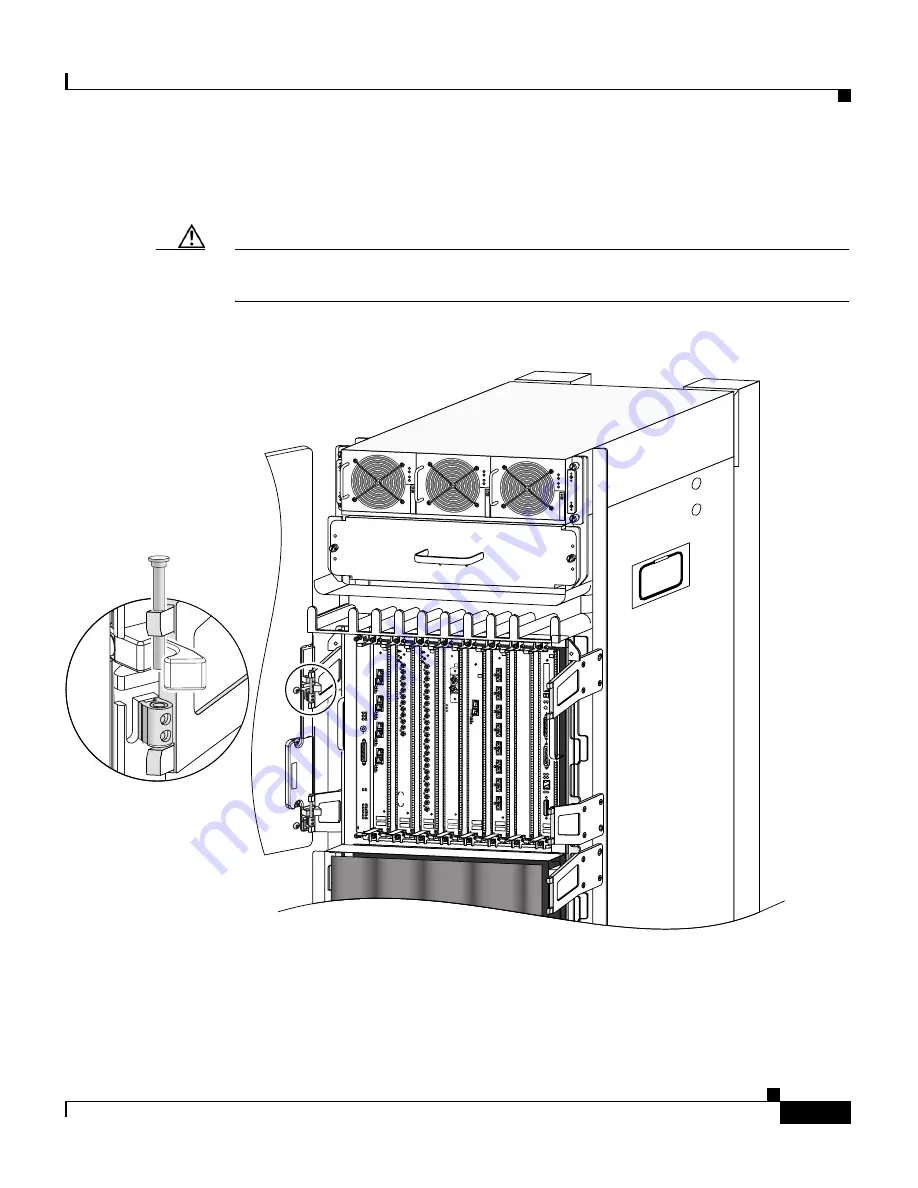
Remove the front door by lifting the (top and bottom) hinge pins to free the door
from the chassis (
Figure 5-2
).
Caution
Make sure you are holding the front door securely so it does not drop when you
release it from the chassis.
Figure 5-2
Removing or Installing Hinge Pins
Reinstall the hinge pins into the chassis hinge brackets
PWR OK
FAULT
TEMP
I LIM
PWR OK
FAULT
TEMP
I LIM
PWR OK
FAULT
TEMP
I LIM
ALARM
EN
AB
LE
D
FA
IL
AC
O
/LT
ALARM
CS
C
0
FA
IL
1
0
1
2
EN
AB
LE
D
CR
ITIC
AL
M
AJ
O
R
M
IN
O
R
SF
C
AC
TIV
E
0
CARRIER
RX PKT
ACTIVE
1
CARRIER
RX PKT
ACTIVE
2
CARRIER
RX PKT
ACTIVE
3
CARRIER
RX PKT
Q OC-3/STM-POS
6DS3–SMB P
/
H
/
F
DO
WN
LOOP
RA
LA
CDHNT
CD
TX
0
RX
TX
1
RX
TX
2
RX
TX
3
RX
TX
4
RX
TX
5
RX
12DS3–SMB P
/
H
/
F
DO
WN
LOOP
RA
LA
CDHNT
C
D
TX
0
RX
TX
1
RX
TX
2
RX
TX
3
RX
TX
4
RX
TX
5
RX
TX
6
RX
TX
7
RX
TX
8
RX
TX
9
RX
TX
10
RX
TX
11
RX
AC
TIVE
CARRIER
RX PKT
OC-48/STM-16-SCPOS
AC
TIVE
0
CARRIER
RX CELL
OC-12/STM-4 A
T
M
F
AST ETERNET
SL
OT
-0
R
OUTE PR
OCESSOR
SL
OT
-1
CO
LL
LIN
K
TX
RX
RJ-45
M
II
RE
SE
T
AU
X
CO
NS
OL
E
EJ
EC
T
149542


