


15
Melter Start Up
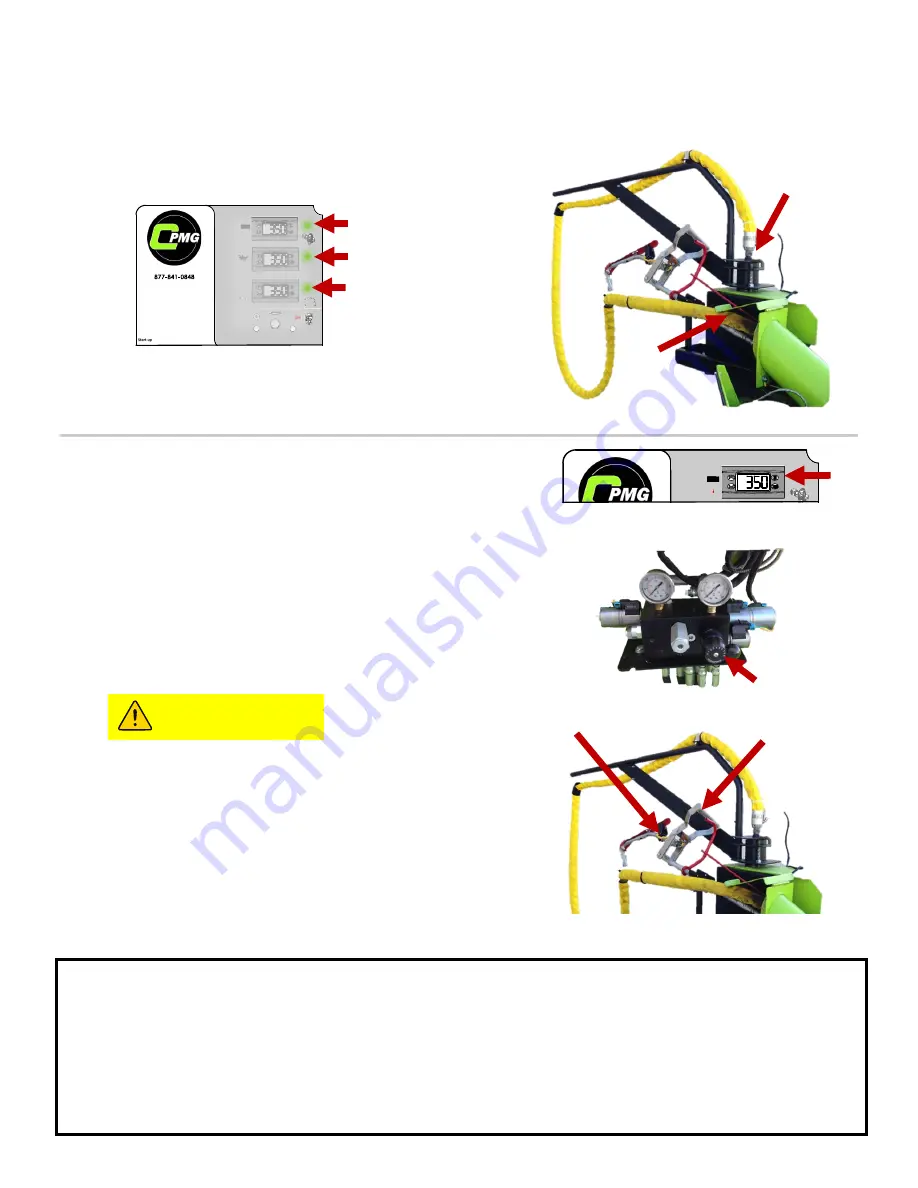
3. PREPARE WAND
Wait for
all 3
indicator lights
GREEN
lights to turn on.
A) Unlock Boom
B) Place wand in recirculation port
4. SETTING WAND FLOW SPEED
Wait for material to reach desired
temperature
A) Set Sealant Flow Control to
“ 0 ”
B) Pin Wand trigger using the pin located
above recirculation port. Open valve by pushing
wand handle forward
C) Slowly adjust the Flow Control knob to begin
flow of material.
The flow of material can be observed
through the recirculation port. Use caution
when in proximity to flowing hot material.
This includes proper face and skin
protection.
D) Once the material is flowing at the desired
speed pull the handle back to stop the flow.
RUNNING SEALING WAND
With Start Up procedure complete, you are ready to begin sealing
A) Remove pin from wand trigger
B) Remove wand from recirculation port
C) Squeeze wand trigger and push handle forward to began flow and begin sealing.
B)
B)
B)
A)
1
2
3
CAUTION
Содержание C1
Страница 13: ...13 Sub Control Panel Controls and Their Functions 1 2 3 4 5 6 7 8 9 10 11 12 IMLINE ...
Страница 29: ...29 Trailer Wiring Diagram Note Brake controller is required on vehicle to active the brakes on the trailer ...
Страница 31: ...31 Sealant Control Panel Wiring Diagram ...
Страница 37: ...37 Tank Burner Internal Wiring Diagram ...
Страница 39: ...39 Hydraulic Schematic For Compressor Hydraulics see Supplement manual ...
Страница 45: ...45 Sealant Plumbing Components ...
Страница 50: ...50 Mastic Mixer Assembly ...
Страница 55: ...55 Miscellaneous Parts ...


