


INST.No.INE-475-P1CE Software Version 1.00
-31-
8.3.1 Setting with this detector unit
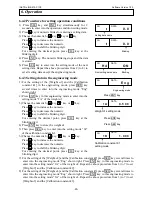
(1) Press SEL key and ENT key simultaneously
for 2 seconds to enter into the operating
condition setting mode.
(2) Press SEL key several times to enter into the
sample temperature correction enabled/
disabled setting mode (St).
(3) Select the sample temperature correction
enabled or disabled.
ENT (OFF) Correction OFF (disabled)
ENT (ON) Correction ON (enabled)
*
When you go on setting the sample
temperature scaling, skip the next (4) and
proceed to (2) of [8.4 Setting a sample
temperature scaling (8.4.1 Setting with this
detector unit)].
(4)Press SEL key for 2 seconds. The mode
returns the measurement mode.
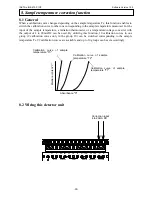
8.3 Enabling/disabling the sample temperature correction function
Execute this setting with either this detector unit or the operator interface/display unit. When the
correction is disabled, the operation is normal which means the calibration curve is not switched
corresponding to the sample temperature measured. When it is enabled, the calibration curve is
switched with the sample temperature.
8.4 Setting a sample temperature scaling
When a radiation thermometer or a thermoelectric converter is used, matching the temperature
range for its 4 to 20mADC output to the temperature range for 4 to 20mADC input of this detector
unit is required.
Carry out the scaling with either this detector unit or the operator interface/display unit, following
the procedure shown below.
8. Sample temperature correction function
8.3.2 Setting with the operator
interface/display unit
(1) Set the calibration curve number to 0.
CH 0 ENT
(2) Enter into the sample temperature correction
enabled/ disabled setting mode (St).
MODE 1 9 ENT
(3) Select the sample temperature correction
enabled or disabled.
0 ENT (OFF) Correction OFF (disabled)
1 ENT (ON) Correction ON (enabled)
*
When you go on setting the sample
temperature scaling, skip the next (4) and
proceed to (2) of [8.4 Setting a sample
temperature scaling (8.4.2 Setting with the
operator interface/display unit)].
(4) Return the calibration curve number to the
original one.
CH
DATA
S t
O F F
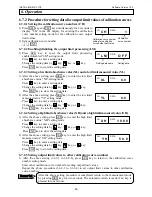
8.4.1 Setting with the detector unit
(1) Press SEL key and ENT key simultaneously
for 2 seconds to enter into the operating
condition setting mode.
(2) Press SEL key several times to enter into the
sample temperature scaling low limit (tL)
setting mode.
(3) Set the sample temperature scaling low
limit (tL). (Setting range: -999.9 to 999.9)
(4) Press SEL key once to enter into the sample
temperature scaling high limit (tH) setting
mode.
(5) Set the sample temperature scaling high
limit (tH). (Setting range: -999.9 to 999.9)
CH
DATA
t L
0. 0
8.4.2 Setting with the operator
interface/display unit
(1) Set the calibration curve number to 0.
CH 0 ENT
(2) Enter into the sample temperature scaling
setting mode
MODE 2 1 ENT
(3) Set the sample temperature scaling low limit
(tL). (Setting range: -999.9 to 999.9)
(4) Press SEL key once to enter into the sample
temperature scaling high limit (tH) setting
mode.
(5) Set the sample temperature scaling high limit
(tH). (Setting range: -999.9 to 999.9)


