


Chapter 2: Software
81
Chapter 2: Software
81
Viewing History
Datalog History can be viewed through the ConsoleView software or via the RIM-600 web page. It
can be viewed through the ConsoleView software in two ways: There is the quick view which can
be displayed by right-clicking on an input or profile and selecting
History
, or you can perform a
query on the entire history database using the HistoryView program (right-click on
History
in the
menu tree and select
HistoryView,
or from the main menu select
File
, then
HistoryView
).
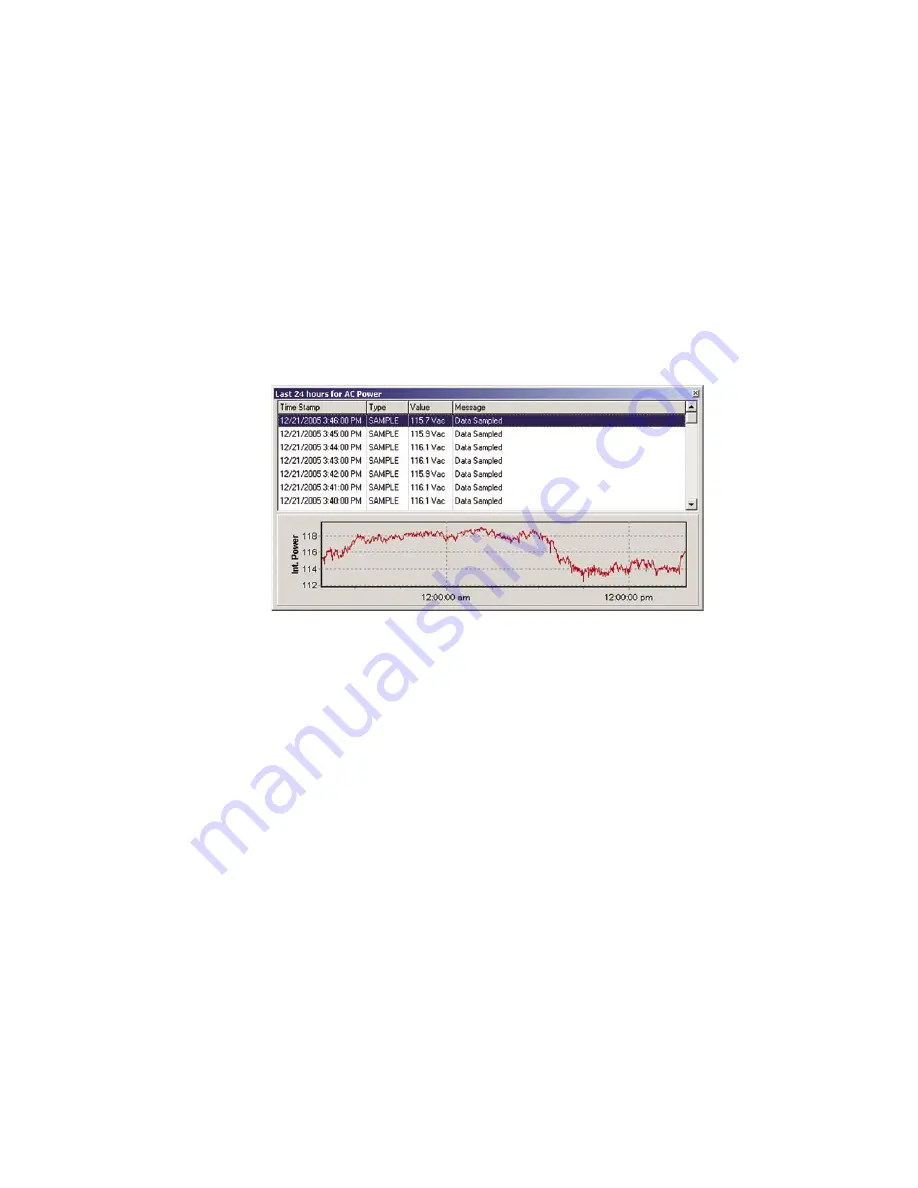
History QuickView
You can display a quick view of an input or profile by simply right-clicking on the item and
selecting
History
. This will provide an event listing and graph of the input over the last 24 hours
(default). You can change the amount of history displayed to several hours or several days by
changing the setting on the
Options
screen under the
File
menu. A sample is shown below:
Figure 55: AC Power History
Querying the History Database with HistoryView
The HistoryView program allows you to query the entire History database for all RIM-600 units.
There are filters to select Samples, Alarms, System messages, or User Logins. You can view data
from a RIM-600 Host and its associated Nodes combined, or individually. You can also graph sam-
pled data.
To begin, run the HistoryView program by right-clicking on
History
in the menu tree and select
HistoryView
, or from the main menu select
File
, then
HistoryView
. The first screen will prompt
you to select a RIM-600 Host. Click in the box next the Host you want to Query. The program
will then load the associated nodes and input names. Next, select the Host or Nodes that you want
to query information on, then select any filters that you want to apply. If you select
All
you will see
all events and data samples for the selected units. If you select
Samples
or
Alarms
you must then
choose one or more Environmental Inputs or IP Alarms.
Note
: the number that precedes each Environmental and IP description corresponds to the unit
number to which they’re connected (0 being the Host and 1-31 being the associated Nodes).


