


RIM-600 Manual
68
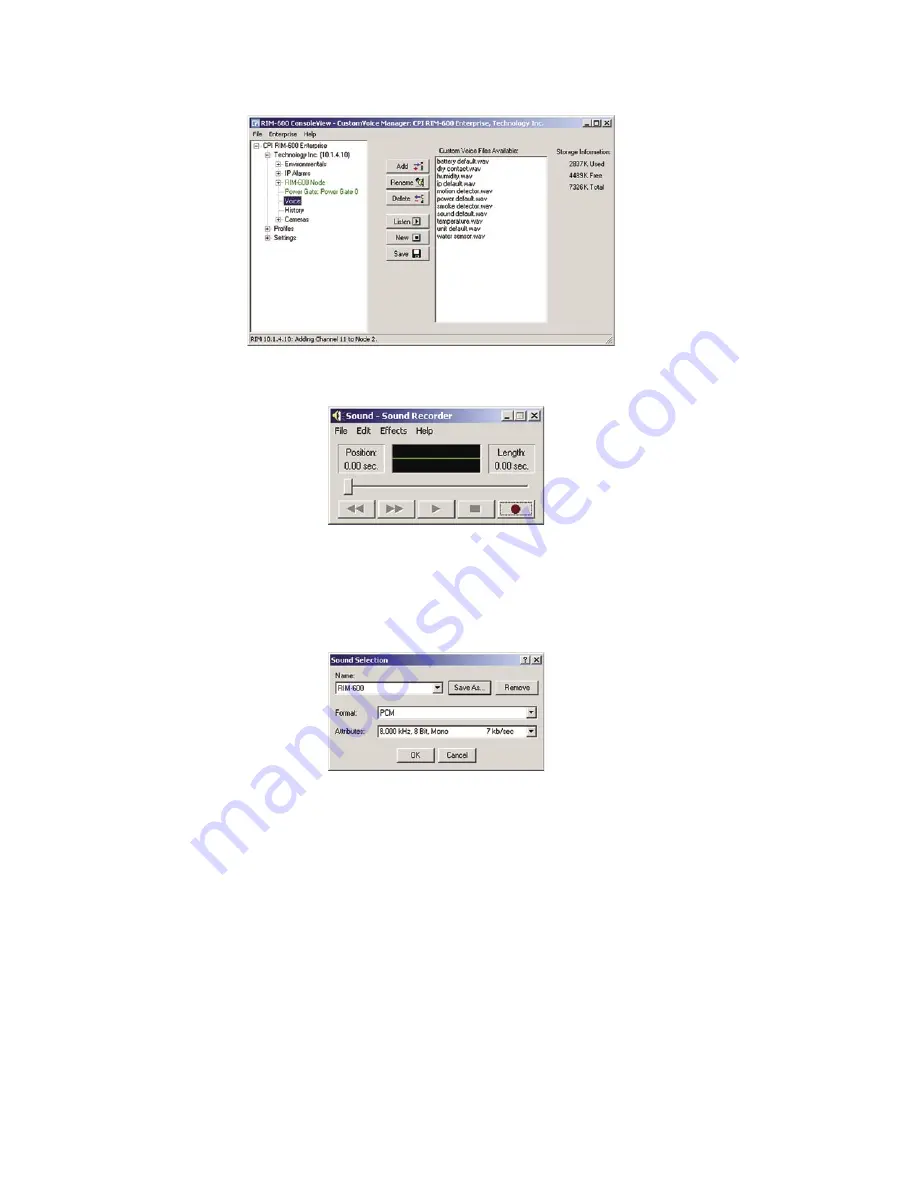
Figure 36: Custom Voice Manager
Click on the
New
button. This will display the MS Windows Sound Recorder program shown below.
Figure 37: Sound Recorder screen
For the voice messages to play back correctly you must set the recording format to PCM, 8KHz, 8
bit, mono. To set these parameters click
File,
then
Properties
. Next, click the
Convert Now
button.
In the Format field select “PCM.” In the Attributes field select “8,000 Hz, 8 Bit, Mono 8 KB/s.”
See the following screen.
Figure 38: Sound Specifications screen
Next, save this recording format by typing “RIM-600” in the Name field and click
Save As
. Click
OK
on each screen until you get back to the Sound Recorder main screen.
To record a message, click the button with the Red circle. To play a message, click the right arrow
(Play) button. Trim off any silence before and after the message to ensure that the voice report
flows smoothly. Messages can be trimmed by sliding the message position bar and selecting
Edit
from the main menu, and then either
Delete Before Message Position
or
Delete After Message
Position
. It’s important to minimize the length of the file to keep the message file size small
and also to ensure that the message plays back smoothly when inserted into the message phrases.
Once you’re satisfied with your message, save it by clicking
File,
then
Save
. Enter a name for the
voice file and click
OK
. Continue this process until you’ve recorded all of the messages required.
Next, upload your voice messages into the RIM-600 by clicking the
Add
button on the RIM-600
CustomVoice Manager.
Select the message you would like to upload then click
OK
. The new voice message will be loaded
into the RIM-600 and will appear in the list.
68


