Chapter 3
3-6 PNP/PCI Configurations
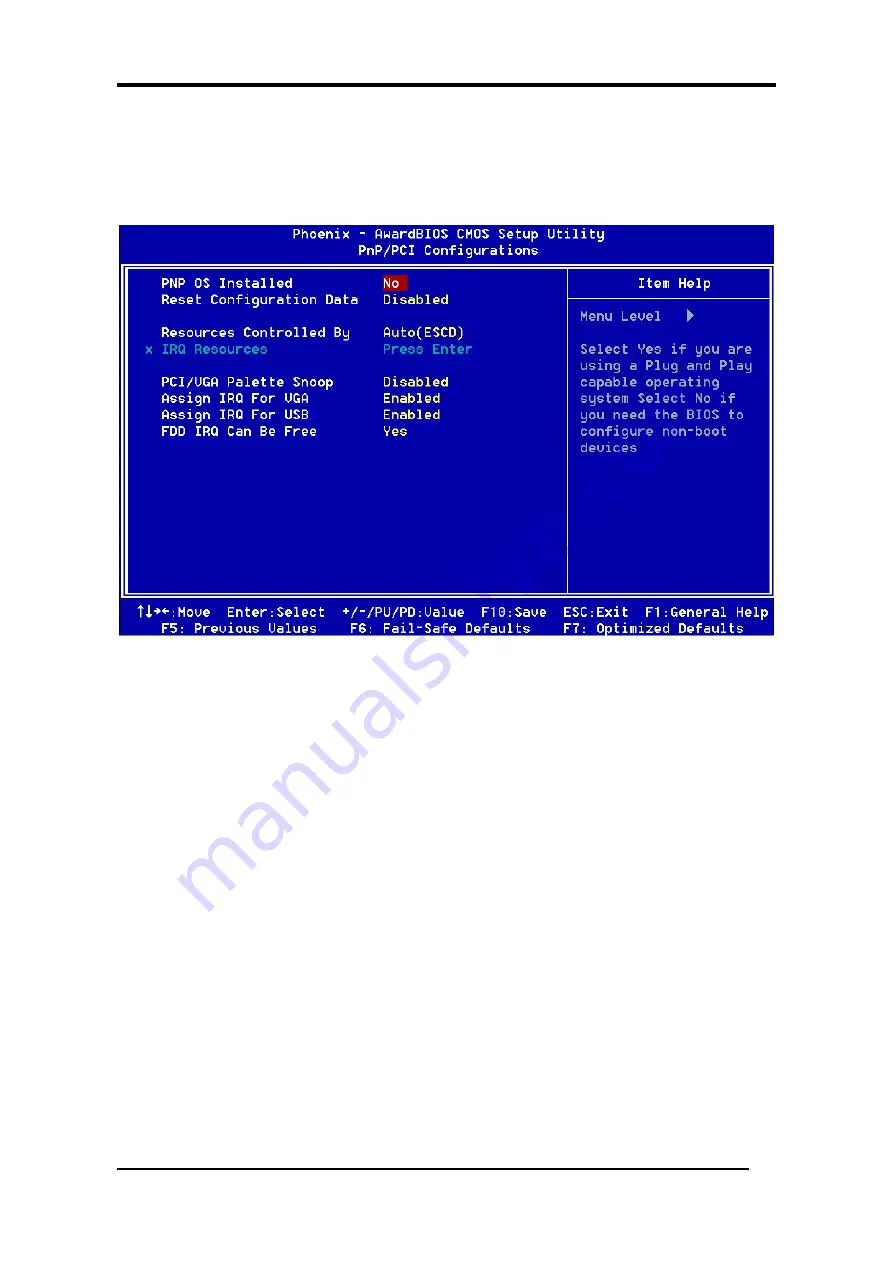
This section provides IRQ and DMA setting information. By choosing the PNP/PCI
Configuration option from the CMOS Setup Utility menu (Figure 3-1), the screen below
is displayed. This screen contains the manufacturer's default values for the motherboard.
Figure 3-7
PNP OS Installed
If you want to install a PNP compatible OS (such as Windows 95), set it to Yes.
Reset Configuration Data:
If you want to reset CMOS IRQ divide hardware device, please select [
Enabled
].
Resources Controlled By
When set to Manual the system BIOS will not refer to the ESCD for IRQ & DMA
information. Instead, it will refer to the items in the setup menu for assigning IRQ &
DMA. When set to Auto the system BIOS will refer to the ESCD for all legacy
information. ESCD (Extended System Configuration Data) provides a detailed format of
the configuration data structures stored in flash memory. Each data structure defines the
resources used by a device or a card in the system. This includes legacy and PCI/ISA PnP
devices.
PCI/VGA Palette Snoop
When set to [Enabled], multiple VGA devices operating on different buses can handle
data from the CPU on each set of palette registers on every video device. Bit 5 of the
command register in the PCI device configuration space is the VGA Palette Snoop bit (0
32
Содержание 7VIF3
Страница 1: ...7VIF3 7VIF4 AMD Socket A VIA KM266 KM400 VT8235 u ATX Motherboard User s Guide Version 1 0...
Страница 7: ...Chapter 1 1 3 7VIF3 7VIF4 Motherboard Layout 3...
Страница 41: ...Chapter 4 3 Please select Yes to accept the license agreement 4 Please select Next to continue 37...
Страница 43: ...Chapter 4 7 Please select Next to continue installing AGP Driver 8 Please select OK to restart your computer 39...
Страница 44: ...Chapter 4 4 2 Audio Driver Setup 1 Click Audio Driver 2 Click Next to start software installation 40...
Страница 47: ...Chapter 4 7 Please select OK to complete the setup process 4 3 LAN Driver Setup 1 Click LAN Driver 43...
Страница 48: ...Chapter 4 2 Please select Next to continue 3 Please click Finish to complete the setup process 44...
Страница 49: ...Chapter 4 4 4 USB 2 0 Driver 1 Click USB 2 0 Driver 2 Please select Next to continue 45...
Страница 50: ...Chapter 4 3 Please select Next to continue 4 Please select Yes to accept the license agreement 46...


