


Chapter 3
3-1 Standard CMOS Setup
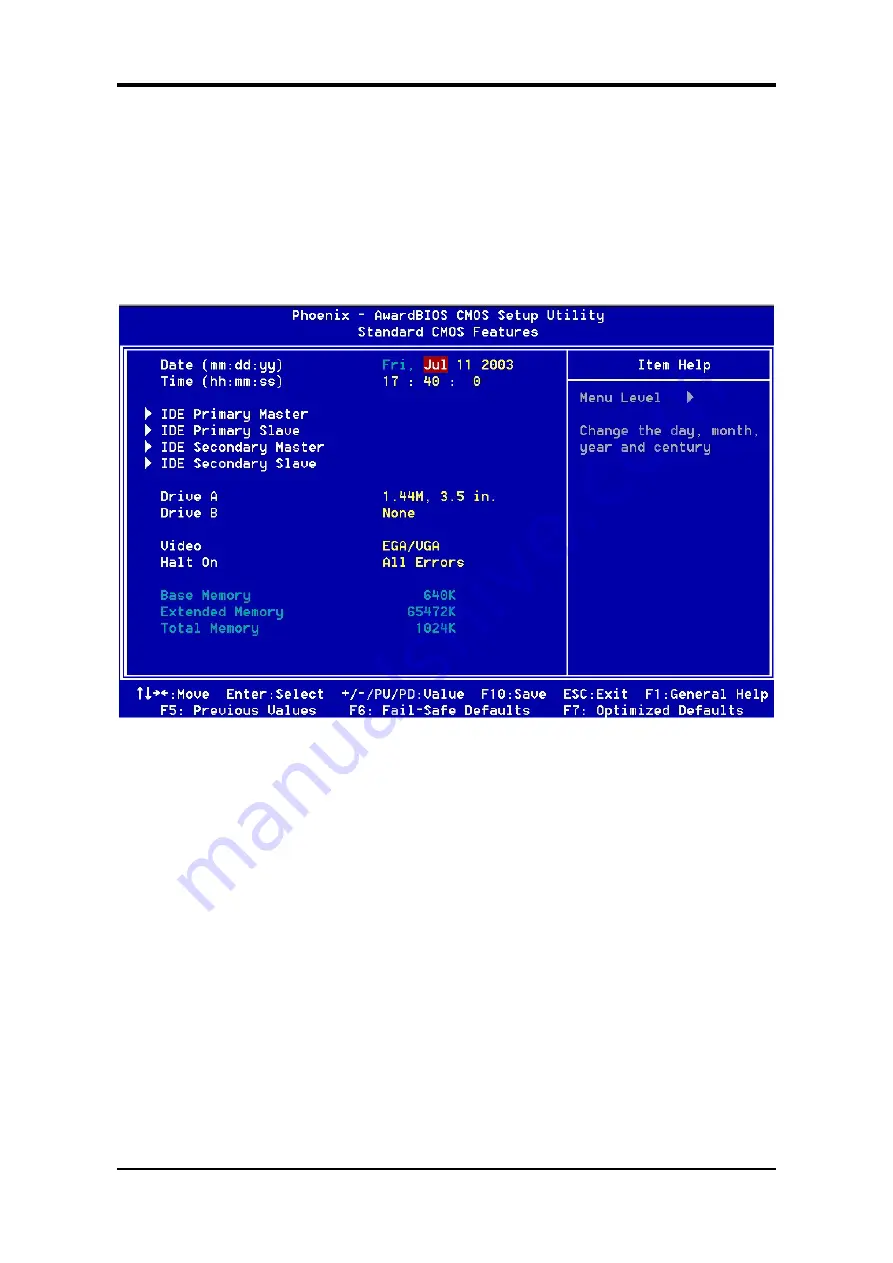
The Standard CMOS Setup allows users to configure system components such as hard
disk drive, floppy disk drive and video display as well as date, time and boot-up error
signaling. This configuration menu should be changed when installing a motherboard for
the first time, changing hardware in your system such as the HDD, FDD, video display,
or when the CMOS data was corrupted. Choose the Standard CMOS Setup option from
the CMOS Setup Utility menu (Figure 3-1) to display the following screen.
Figure 3-2
Date/Time
Set the date and time of the system. Do not skip this function as all of your timed events
such as power management, saving files, etc are based on this timer.
IDE (Primary/Secondary; Master/Slave)
This category identifies up to four IDE hard disk drives that have been installed in the
computer. This section does not show information on other IDE devices such as
CD-ROM drives or other hard drive type such as SCSI drives.
Drive A/B
Select different Floppy device Model. Available options are [None], [360K, 5-1/4 in],
[1.2M, 5-1/4 in], [720k, 3-1/2 in], [1.44M, 3-1/2 in], and [2.88M, 3-1/2 in].
Video
Select the type of video adapter present in your system. You can ignore this setting if you
are using a VGA monitor; VGA BIOS will automatically configure this setting.
19
Содержание 7VIF3
Страница 1: ...7VIF3 7VIF4 AMD Socket A VIA KM266 KM400 VT8235 u ATX Motherboard User s Guide Version 1 0...
Страница 7: ...Chapter 1 1 3 7VIF3 7VIF4 Motherboard Layout 3...
Страница 41: ...Chapter 4 3 Please select Yes to accept the license agreement 4 Please select Next to continue 37...
Страница 43: ...Chapter 4 7 Please select Next to continue installing AGP Driver 8 Please select OK to restart your computer 39...
Страница 44: ...Chapter 4 4 2 Audio Driver Setup 1 Click Audio Driver 2 Click Next to start software installation 40...
Страница 47: ...Chapter 4 7 Please select OK to complete the setup process 4 3 LAN Driver Setup 1 Click LAN Driver 43...
Страница 48: ...Chapter 4 2 Please select Next to continue 3 Please click Finish to complete the setup process 44...
Страница 49: ...Chapter 4 4 4 USB 2 0 Driver 1 Click USB 2 0 Driver 2 Please select Next to continue 45...
Страница 50: ...Chapter 4 3 Please select Next to continue 4 Please select Yes to accept the license agreement 46...


