


Chapter 2
current to the motherboard.
Power-On By Modem
While in Soft-Off state, if an external modem ring-up signal occurs, the system wakes up
and can be remotely accessed. You may enable this function in BIOS's Power
Management Setup menu. (See section 3. 5)
Blinking LED in Suspend Mode
While in Suspend mode, the LED light on the front panel of your computer will flash.
Suspend mode is entered by pressing the Override Power Button, pushing the Green
button on your ATX case, or enabling the Power Management and Suspend Mode options
in BIOS's Power Management menu. (See section 3.5)
Poly-fuse Over Current Protection
The poly-fuse protects the system from dangerous voltages that the system might be
exposed to via the keyboard or USB connector. In case of such exposure, the poly-fuse
will immediately be disconnected from the circuit, just like a normal fuse. After being
disconnected for a certain period of time, the poly-fuse will return to its normal state.
Then the keyboard or USB connector can function properly again. Unlike conventional
fuses, the poly-fuse does not have to be replaced, relieving the user from such
inconveniences.
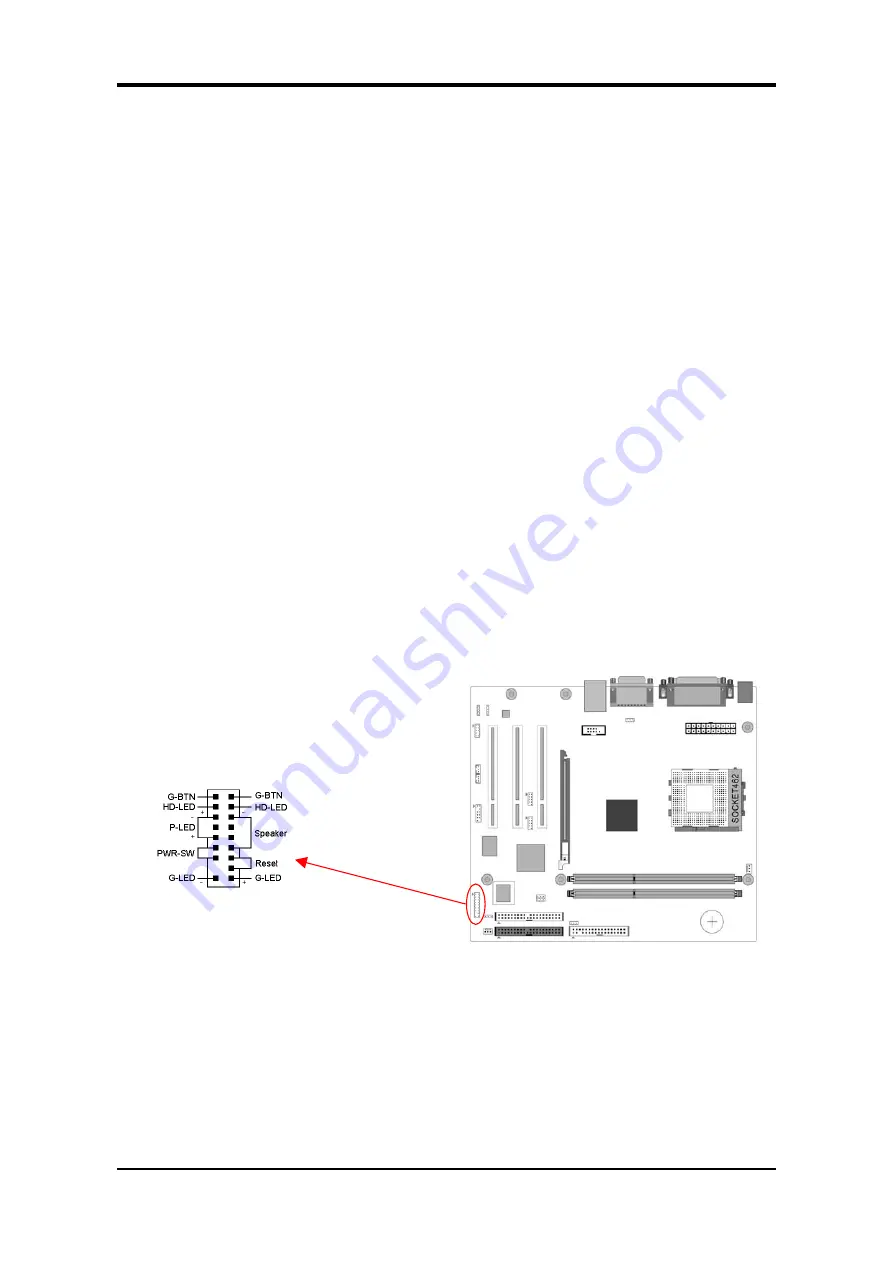
CN1A (Front Panel Connector)
1.
PWR-SW
(Over-ride Power Button Connector)
The power button on the ATX chassis can be used as a normal power switch as well as a
device to activate Advanced Power Management Suspend mode. This mode is used for
saving electricity when the computer is idle for long a period of time. The Soft-OFF by
PWR-BTTN function in BIOS's Power Management Setup menu must be set to [Delay 4
Sec.] to activate this function.
When the Soft-OFF by PWR-BTTN function is enabled, pushing the power button
rapidly will switch the system to Suspend mode. Any occurrence of external activities
9
Содержание 7VIF3
Страница 1: ...7VIF3 7VIF4 AMD Socket A VIA KM266 KM400 VT8235 u ATX Motherboard User s Guide Version 1 0...
Страница 7: ...Chapter 1 1 3 7VIF3 7VIF4 Motherboard Layout 3...
Страница 41: ...Chapter 4 3 Please select Yes to accept the license agreement 4 Please select Next to continue 37...
Страница 43: ...Chapter 4 7 Please select Next to continue installing AGP Driver 8 Please select OK to restart your computer 39...
Страница 44: ...Chapter 4 4 2 Audio Driver Setup 1 Click Audio Driver 2 Click Next to start software installation 40...
Страница 47: ...Chapter 4 7 Please select OK to complete the setup process 4 3 LAN Driver Setup 1 Click LAN Driver 43...
Страница 48: ...Chapter 4 2 Please select Next to continue 3 Please click Finish to complete the setup process 44...
Страница 49: ...Chapter 4 4 4 USB 2 0 Driver 1 Click USB 2 0 Driver 2 Please select Next to continue 45...
Страница 50: ...Chapter 4 3 Please select Next to continue 4 Please select Yes to accept the license agreement 46...


