


10
11
INITIAL SETUP
QUICK SETUP
(cont.)
VERIFYING STATION AND LINE CONFIGURATION
1.
Press
LINE 1
. The LINE INDICATOR will light green and the speakerphone LED will light red.
2.
The station ID will appear in the display to indicate the station is in use.
3.
Dial the telephone number for line 2. The LINE INDICATOR for line 2 should flash red. If the
line indicator, for the line you called, does not flash, check to make sure lines are correctly
installed.
4.
Repeat step 2 and call the telephone numbers for line 3 and 4.
5.
If the indicators of the lines you called flashed, you have successfully installed this station!
VERIFYING SYSTEM CONFIGURATION
To verify that all stations are communicating,
1.
Press and hold
PAGE ALL
.
2.
“
PAGING
” and the station icons for all properly connected stations will appear in the Station
Status Display. It may take a moment for all the icons to appear.
3.
Check to see if all stations connected to line 1, appear in the display. If they did, the system is
successfully configured. If all the stations do not appear in the display, note the station(s) that
did not appear in the display. Go to the noted station and make sure the lines are connected
and in the correct line jacks.
INSTALLATION CHECKLIST
❑
AC adapter is connected at stations
❑
Line cords have been connected
❑
Line 1 is common on all stations
❑
All stations have been assigned an extension number
❑
The time and date have been set at all stations
DATE (MM/DD)
BACK SAVE NEXT
Press the soft key under “
CHANGE
” to
toggle between “
AM
” and “
PM
”.
5.
6.
Use the keypad to enter the month (01-12)
and day (01-31). To edit your entry, press
the soft key under “
BACK
” to re-enter the
date.
7.
8.
9.
“
INITIAL SETUP COMPLETE
” will
appear in the display.
STATION 11 SET
BACK
NEXT
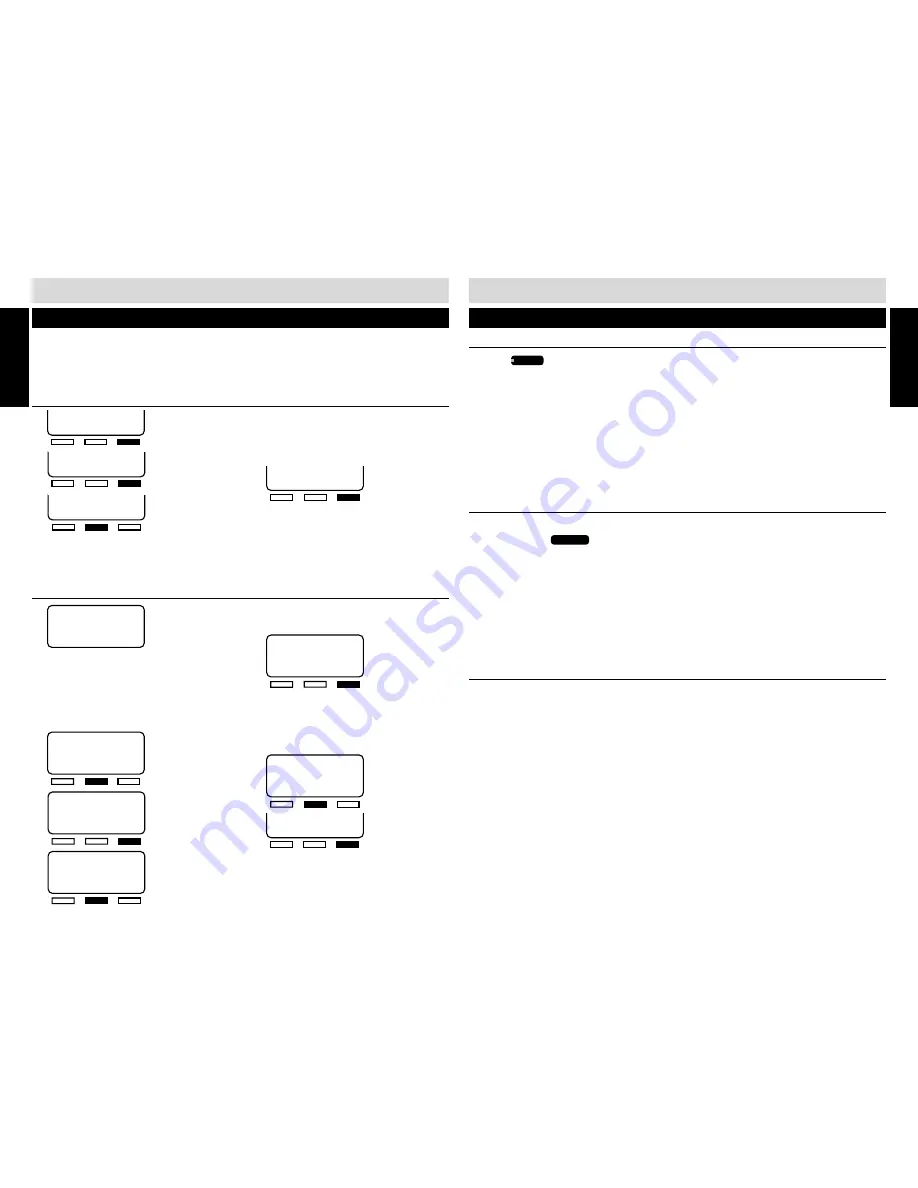
1.
2.
3.
Press the soft key under “
CHANGE
” until
the chosen extension number (11-22)
appears in the display.
INITIAL SETUP
QUICK SETUP
SET STATION ID
NEXT
SET STATION 11
CHANGE SAVE
INITIAL SETUP
START
On initial power-up (the line cord(s) and AC adapter are connected) each station will prompt the
user to set the station ID, time and date. All other system defaults (see SYSTEM DEFAULTS on
page 4) are in place and the station is immediately ready for use. Refer to your completed system
configuration diagram, on page 8, for rapid installation.
SETTING THE TIME AND DATE
1.
Use the keypad to enter the hour (two
digits) and minutes (two digits). Your
entries will appear in the display as they
are typed. If the time entry is incorrect,
press the soft key under “
BACK
” to
re-enter the time.
2.
3.
4.
TIME (HH:MM)
BACK SAVE NEXT
1/01 8:24
AM
AM/PM
BACK CHANGE NEXT
1/01 8:24
AM
TIME (HH:MM)
BACK SAVE NEXT
1/01 8:24
AM
AM/PM
BACK CHANGE NEXT
1/01 8:24
AM
ASSIGNING A STATION EXTENSION NUMBER
DATE (MM/DD)
BACK SAVE NEXT
4/ 18 8:24
PM
TIME (HH:MM)
BACK SAVE NEXT
1/01 12:00
AM
NOTE:
■
If another station’s ID number is chosen, an error
beep will be heard and “
NOT AVAIL
” will appear in
the display. Press the soft key under “
CHANGE
” to
select another extension number.
4.
“
STATION 11 SET
” will appear in the
display.
5.
Press the soft key under “
NEXT
” to
program the time.
INITIAL SETUP
INITIAL SETUP
Содержание SA-400
Страница 29: ...56 SA 400 FEATURES...


