

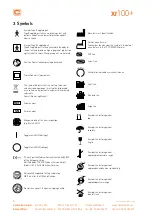


16
User Manual: xr100+_eng
Cardioline S.p.A.
Via Linz,151
38121 Trento (TN)
www.cardioline.com
Sales office:
Via F.lli Bronzetti, 8 20129 Milano (MI) Italy tel.+39 02 94750470
fax +39 02 94750471
xr100+
6 Operation
The ergometer is available with different control terminals
which differ to some extent in terms of their functionality.
The following sections describe the control and configura-
tion of the ergometer.
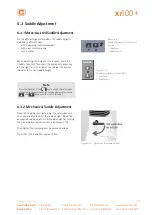
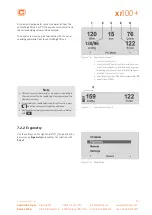
6.1 Speed Readout
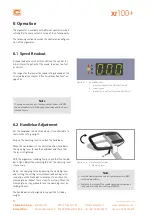
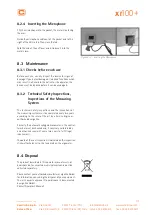
A speed readout as well as three LEDs on the control ter-
minal inform the patient of the speed: too slow, too fast
or correct.
The ranges for the respective speed ratings depend on the
selected load (see chapter 9 “Technical Specifications” on
page 32).
1
2
3
Figure 6 – 1: Speed Readout
1 speed low (patient should pedal faster)
2 correct speed
3 speed high (= patient should pedal slower)
Note
If, during an exercise test, the speed drops below 30 RPM,
the load readout starts blinking on the display and the load is
reduced to zero.
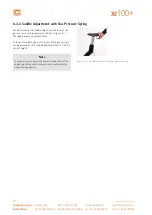
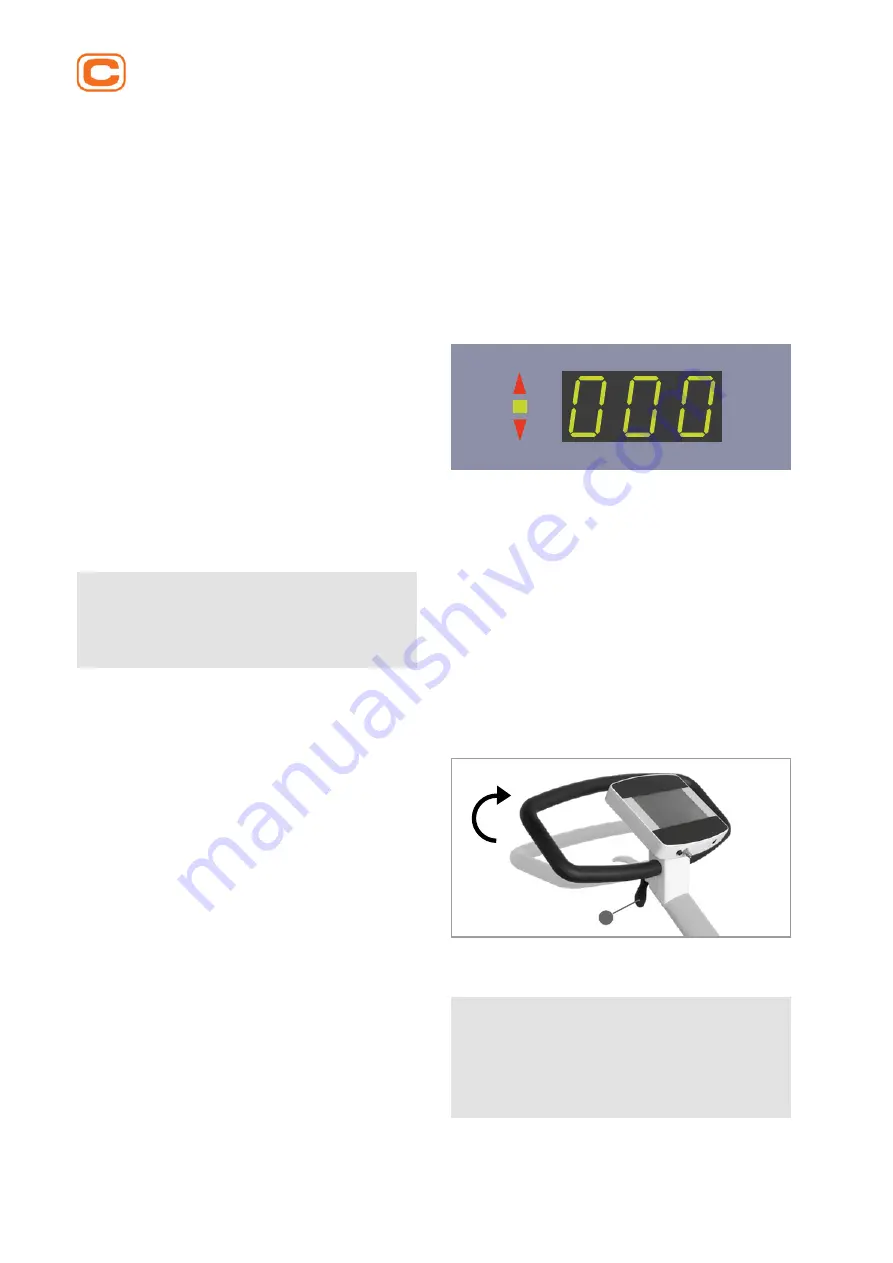
6.2 Handlebar Adjustment
Set the handlebar to a position where it is comfortable to
reach while sitting upright.
Fold up the clamping lever to unlock the handlebar.
When the handlebar is in the correct position, fold down
the clamping lever to lock the handlebar and check that
the lever is tightened.
With the ergometer standing firmly, check that the handle-
bar is tight. Adjust the clamping force of the clamping lever
if necessary.
Adjust the clamping force by opening the clamping lever
and turning the setting screw clockwise about a quarter
revolution with a flat-blade screwdriver. Then check the
clamping force. Repeat these steps if necessary. When the
clamping force is appropriate, lock the clamping lever by
folding it down.
The handlebar is not designed to support the full body
weight.
1
Figure 6 – 2: Handlebar adjustment
1 Clamping lever
Note
• Lock the clamping levers only as tight as necessary, NOT
with maximum force.
• Lubricate the thread of the saddle clamping lever periodi
cally with a suitable lubricant (e.g., OKS470).