


*1
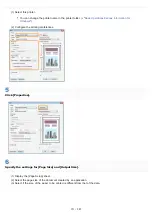
The setting is located in the [Paper Source] sheet in the printer driver.
*2
Recycled paper can be also used.
*3
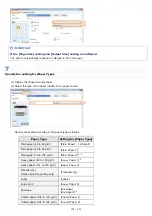
If you want to print paper of 64 to 69 g/m², you can specify either of [Plain Paper] or [Plain Paper L].
*8
*4
If you want to print paper of 76 to 82 g/m², you can specify either of [Plain Paper] or [Plain Paper H].
*8
*5
You can load custom size paper that is 76.2 to 215.9 mm wide and 127.0 to 355.6 mm long.
*6
If you want to print paper of 92 to 100 g/m², you can specify either of [Plain Paper H] or [Heavy Paper 1].
*8
*7
If you want to improve the toner fixation when printed with [Envelope] selected, select [Envelope H].
*8
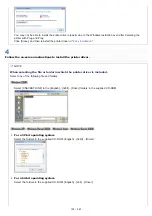
If either setting causes the following problems and so on, specify the other setting to print.
Output paper curls.
Residual images appear on non-printed areas.
The toner does not fix onto paper well, and the printing comes out faint.
IMPORTANT
About print speed
The print speed may drop depending on the paper settings for the size, type, orientation, and number of copies.
When printing paper whose width is less than 192 mm, the print speed drops.
Precautions for paper
NOTE
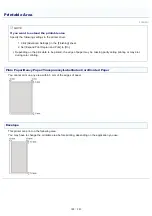
Printable area
Envelope sizes
The envelope sizes are as follows.
Envelope Monarch
98.4 mm x 190.5 mm
Envelope No. 10 (COM10)
104.7 mm x 241.3 mm
Envelope DL
110.0 mm x 220.0 mm
Envelope C5
162.0 mm x 229.0 mm
Envelope B5
176.0 mm x 250.0 mm
㻝㻠㻝㻌㻛㻌㻟㻠㻟
Содержание LBP7018C
Страница 1: ......
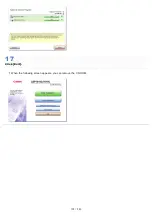
Страница 19: ...7 Click Exit When the following screen appears you can remove the CD ROM...
Страница 35: ...If the laser beam should escape and enter your eyes exposure may cause damage to your eyes...
Страница 74: ...The packing materials may be changed in form or placement or may be added or removed without notice...
Страница 78: ...11 Press down the lock release lever on both sides 12 Close the front cover 13 Close the top cover...
Страница 85: ...NOTE Calibration time It takes approximately 57 seconds...
Страница 92: ......
Страница 106: ...Close the covers after you finish checking Next install the printer Installing the Printer...
Страница 111: ...019A 027 Installing the Printer Driver Uninstalling the Printer Driver Driver Installation...
Страница 120: ...When the installation is complete an icon and folder for this printer will be created After Installation...
Страница 135: ...17 Click Exit When the following screen appears you can remove the CD ROM...
Страница 137: ...If the User Account Control dialog box appears Click Yes or Continue...
Страница 156: ......
Страница 177: ...3 Click OK For details on the basic printing procedure see Basic Printing Procedure...
Страница 181: ...For details on the basic printing procedure see Basic Printing Procedure...
Страница 183: ...3 Click OK For details on the basic printing procedure see Basic Printing Procedure...
Страница 186: ...3 Click OK Then the Page Setup sheet reappears...
Страница 190: ...Black and White Color 3 Click OK For details on the basic printing procedure see Basic Printing Procedure...
Страница 197: ...4 Click OK For details on the basic printing procedure see Basic Printing Procedure...
Страница 201: ...3 Click OK For details on the basic printing procedure see Basic Printing Procedure...
Страница 203: ...4 Click OK For details on the basic printing procedure see Basic Printing Procedure...
Страница 207: ...4 Click OK For details on the basic printing procedure see Basic Printing Procedure...
Страница 211: ...Low...
Страница 221: ...4 Confirm the settings then click OK The printer folder reappears...
Страница 273: ...4 Click OK...
Страница 282: ...For details on the procedure for loading paper see Loading Paper...
Страница 316: ...If you specify Special Settings C4 printing speed drops...
Страница 341: ......


