background image

Chapter 12

12-7

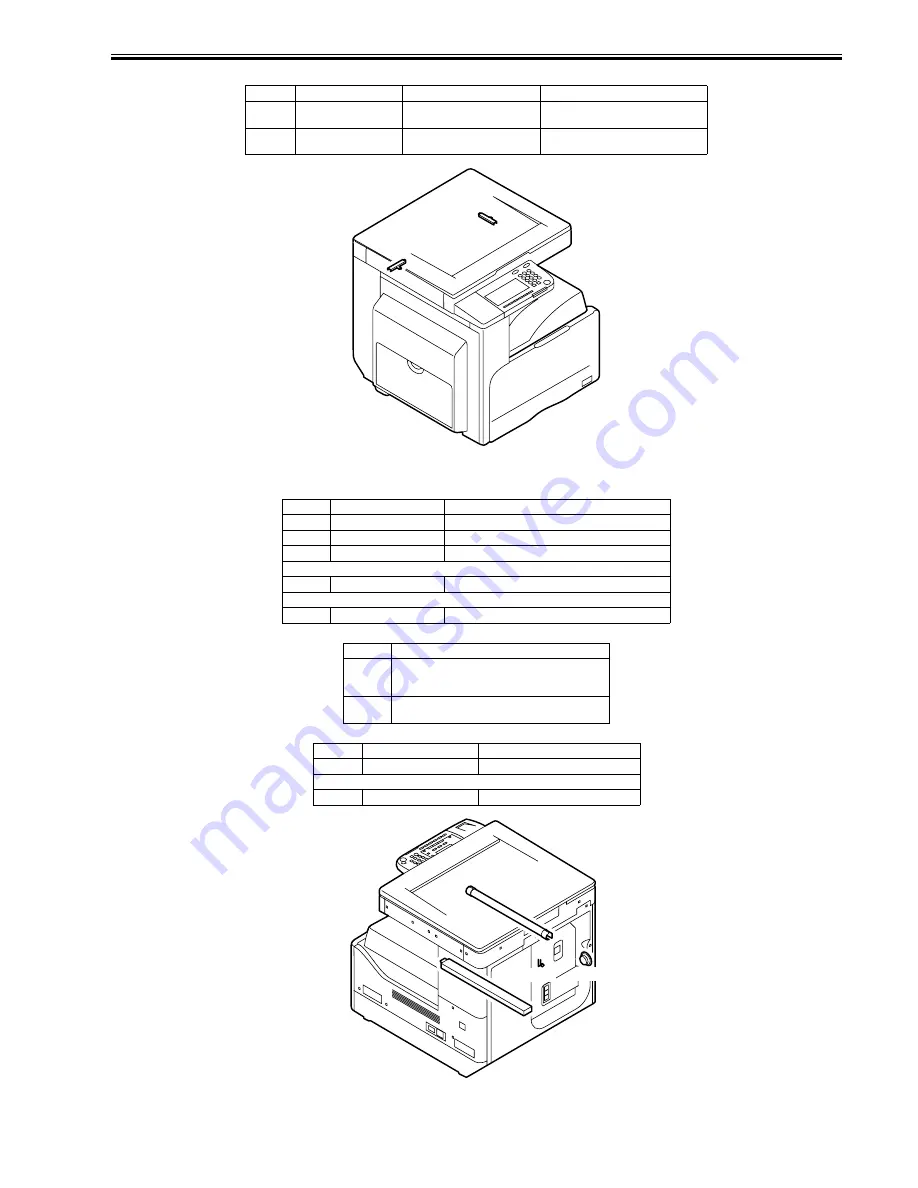
T-12-16

F-12-8

<Printer unit>

T-12-17

T-12-18

T-12-19

F-12-9

Symbol

Name

Part No.

Function

H3

Reader heater (left)

NPN

Prevents dew condensation on the ADF 
reading glass.

H4

Reader heater (right)

NPN

Prevents dew condensation on the 
copyboard glass.

Symbol

Name

Function

H1

Fixing main heater

Used as the main heater for fixing.

H2

Fixing sub heater

Used as the sub heater for fixing.

H6

Cassette heater

Prevents paper in the cassette from absorbing moisture.

VA1

Varistor

Used as a varistor.

SP1

Speaker

Used as a speaker (for fax unit).

Symbol

Part No.

H1,H2

Fixing film unit
FM2-3346(120V)
FM2-3353(230V)

H6

FK2-1146(100V)
FK2-1088(230V)

Symbol

Part No.

Modem PCB

VA1

FH5-3543

SP1

FK2-1265

J1203

H4

H3

H1, H2

H6

VA1

SP1

Содержание iR2016 Series

Страница 1: ...Jan 30 2006 Service Manual iR2020 2016 Series Download Free Service Manual And Resetter Printer at http printer1 blogspot com ...

Страница 2: ...Download Free Service Manual And Resetter Printer at http printer1 blogspot com ...

Страница 3: ...es in the contents of this manual over a long or short period Canon will issue a new edition of this manual The following paragraph does not apply to any countries where such provisions are inconsistent with local law Trademarks The product names and company names used in this manual are the registered trademarks of the individual companies Copyright This manual is copyrighted with all rights rese...

Страница 4: ...dicates an item prohibiting disassembly to avoid electric shocks or problems Indicates an item requiring disconnection of the power plug from the electric outlet Indicates an item intended to provide notes assisting the understanding of the topic in question Indicates an item of reference assisting the understanding of the topic in question Provides a description of a service mode Provides a descr...

Страница 5: ...w ever differs from circuit to circuit In addition the asterisk as in DRMD indicates that the DRMD signal goes on when 0 In practically all cases the internal mechanisms of a microprocessor cannot be checked in the field Therefore the operations of the microprocessors used in the machines are not discussed they are explained in terms of from sensors to the input of the DC controller PCB and from t...

Страница 6: ...Download Free Service Manual And Resetter Printer at http printer1 blogspot com ...

Страница 7: ...i 1 19 1 2 2 3 When Turning Off the Main Power Switch iR2020 iR2020J iR2016 iR2016J 1 20 1 2 2 4 When Turning Off the Main Power Switch iR2020i iR2016i 1 21 1 2 2 5 Control Panel iR2020 iR2020J iR2016 iR2016J 1 22 1 2 2 6 Control Panel iR2020i iR2016i 1 23 1 2 3 User Mode Items 1 23 1 2 3 1 Common Settings iR2020 iR2020J iR2016 iR2016J 1 23 1 2 3 2 Common Settings iR2020i iR2016i 1 24 1 2 3 3 Copy...

Страница 8: ...ttle 2 7 2 2 5 Installing the Toner Bottle 2 7 2 2 6 Setting the Cassettes 2 9 2 2 7 Attaching the Ferrite Core 2 10 2 2 8 Attaching the Ferrite Core 2 10 2 2 9 Checking the Image Quality 2 10 2 2 10 Setting the Country Region 2 11 2 2 11 Setting the Country Region 2 11 2 2 12 Setting the Date and Time 2 11 2 2 13 Setting the Date and Time 2 12 2 2 14 Attaching Other Parts 2 12 2 3 Checking the Co...

Страница 9: ...sion 3 7 3 4 4 Flow of Image Data for the Fax Reception Function 3 7 3 4 5 Flow of Image Data for the PDL Function 3 8 3 5 Parts Replacement Procedure 3 9 3 5 1 Main Controller PCB 3 9 3 5 1 1 Removing the Rear Cover 3 9 3 5 1 2 Removing the Left Cover Rear 3 9 3 5 1 3 Removing the RAM Cover 3 9 3 5 1 4 Removing the SDRAM 3 9 3 5 1 5 Removing the LAN Cover 3 9 3 5 1 6 Removing the IP Cover 3 9 3 5...

Страница 10: ... Shading Adjustment 4 15 4 3 6 7 Shading Correction 4 16 4 4 Parts Replacement Procedure 4 17 4 4 1 Copyboard glass 4 17 4 4 1 1 Removing the Copyboard glass 4 17 4 4 1 2 Procedure after Replacing the Copyboard Glass iR2020i iR2016i 4 17 4 4 1 3 Removing the ADF Reading Glass 4 17 4 4 2 Reader Controller PCB 4 17 4 4 2 1 Removing the Rear Cover 4 17 4 4 2 2 Removing the Right Cover Lower 4 18 4 4 ...

Страница 11: ...on 5 1 5 1 1 Overview 5 1 5 1 2 Specifications and Control Mechanism 5 1 5 1 3 Specifications and Control Mechanism 5 1 5 1 4 Main Components 5 1 5 1 5 Control System Configuration 5 2 5 2 Various Controls 5 3 5 2 1 Controlling the Laser Activation Timing 5 3 5 2 1 1 Laser Emission ON OFF Control 5 3 5 2 1 2 Laser Emission ON OFF Control 5 3 5 2 1 3 Horizontal Synchronization Control 5 4 5 2 1 4 H...

Страница 12: ... 2 6 Precautions about Installation of Developing Assembly 6 10 6 10 2 7 Procedure after Replacing the Developing Assembly 6 10 6 10 3 Transfer Charging Roller 6 10 6 10 3 1 Removing the Transfer Charging Roller 6 10 Chapter 7 Pickup Feeding System 7 1 Construction 7 1 7 1 1 Specifications Configuration Operation Methods 7 1 7 1 2 Locations of Main Units 7 1 7 1 3 Roller Layout Drawing 7 2 7 1 4 P...

Страница 13: ...oving the Cassette Pickup Solenoid 7 12 7 5 7 Manual Pickup Roller 7 12 7 5 7 1 Removing the Drum Unit 7 12 7 5 7 2 Removing the Transfer Registration Unit 7 13 7 5 7 3 Removing the Feed Guide 7 13 7 5 7 4 Removing the Multifeeder Pickup Roller 7 13 7 5 8 Manual Feed Tray paper sensor 7 13 7 5 8 1 Removing the Drum Unit 7 13 7 5 8 2 Removing the Transfer Registration Unit 7 13 7 5 8 3 Removing the...

Страница 14: ...Unit 8 9 8 4 2 2 Removing the rear cover 8 9 8 4 2 3 Removing the Left Cover Rear 8 9 8 4 2 4 Removing the Left Door 8 9 8 4 2 5 Removing the Fixing Unit 8 10 8 4 2 6 Removing the Fixing Film Unit 8 10 8 4 2 7 Removing the Pressure Roller 8 12 8 4 3 Fixing Film 8 13 8 4 3 1 Removing the Drum Unit 8 13 8 4 3 2 Removing the rear cover 8 13 8 4 3 3 Removing the Left Cover Rear 8 13 8 4 3 4 Removing t...

Страница 15: ... 2 9 Removing the IP Cover 9 9 9 4 2 10 Removing the IP Cover 9 10 9 4 2 11 Removing the Image Processor PCB Mount 9 10 9 4 2 12 Removing the Fixing Drive Unit 9 11 9 4 3 Power Supply Unit 9 12 9 4 3 1 Removing the Rear Cover 9 12 9 4 3 2 Removing the Right Cover Lower 9 12 9 4 3 3 Removing the Delivery Tray 9 12 9 4 3 4 Removing the Main Power Supply PCB 9 12 9 4 4 Control Panel 9 12 9 4 4 1 Remo...

Страница 16: ...10 1 10 2 3 Printer Unit 10 1 10 3 Scheduled Servicing Basic Procedure 10 2 10 3 1 Scheduled Servicing 10 2 Chapter 11 Standards and Adjustments 11 1 Scanning System 11 1 11 1 1 Procedure after Replacing the CIS iR2020 iR2020J iR2016 iR2016J 11 1 11 1 2 Procedure after Replacing the CIS iR2020i iR2016i 11 1 11 1 3 Procedure after Replacing the Copyboard Glass iR2020i iR2016i 11 1 11 2 Image Format...

Страница 17: ... to Inner 2 way Tray 13 4 13 4 Finisher Error Codes 13 4 13 4 1 Error Code Details 13 4 13 5 FAX Error Codes 13 8 13 5 1 Outline 13 8 13 5 1 1 Error Code Outline 13 8 13 5 2 User Error Code 13 8 13 5 2 1 User Error Code 13 8 13 5 3 Service Error Code 13 8 13 5 3 1 Service Error Code 13 8 Chapter 14 Service Mode 14 1 Outline 14 1 14 1 1 Outline of Service Mode iR2020 iR2020J iR2016 iR2016J 14 1 14 ...

Страница 18: ... 14 12 14 3 11 2 Detailed Discussions of Bit 0 14 12 14 3 11 3 Detailed Discussions of Bit 1 14 12 14 3 11 4 Detailed Discussions of Bit 2 14 13 14 3 11 5 Detailed Discussions of Bit 3 14 13 14 3 12 SSSW SW34 14 13 14 3 12 1 List of Functions 14 13 14 3 12 2 Detailed Discussions of Bit 0 14 13 14 3 12 3 Detailed Discussions of Bit 1 14 13 14 4 Setting of Menu Switch Menu 14 13 14 4 1 Menu Switch C...

Страница 19: ... when the ADF is used 14 21 14 6 18 193 ADF special standard sized paper LGL misidentification ready 14 21 14 6 19 194 ADF special standard sized paper LTR misidentification ready 14 21 14 6 20 195 ADF special standard sized paper LTR_R misidentification ready 14 21 14 6 21 196 Shading Target Value Red 14 22 14 6 22 197 Shading Target Value Green 14 22 14 6 23 198 Shading Target Value Blue 14 22 1...

Страница 20: ...R2016i 14 37 14 15 4 D RAM Test 1 D RAM TEST 14 39 14 15 5 Scan Test 2 SCAN TEST 14 39 14 15 6 Print Test 3 PRINT TEST 14 40 14 15 7 MODEM Test 4 MODEM TEST 14 40 14 15 8 Function Test 6 FUNCTION TEST iR2020 iR2020J 14 42 14 15 9 Function Test 6 FUNCTION TEST iR2016 iR2016J 14 46 14 15 10 Function Test 6 FUNCTION TEST iR2020i 14 50 14 15 11 Function Test 6 FUNCTION TEST iR2016i 14 53 14 15 12 Roll...

Страница 21: ...loading the PCL Software 15 18 15 3 4 2 Downloading the PCL Software 15 19 Chapter 16 Service Tools 16 1 Service Tools 16 1 16 1 1 Special Tools 16 1 16 1 2 Oils and Solvents 16 1 Download Free Service Manual And Resetter Printer at http printer1 blogspot com ...

Страница 22: ...Contents Download Free Service Manual And Resetter Printer at http printer1 blogspot com ...

Страница 23: ...Chapter 1 Introduction Download Free Service Manual And Resetter Printer at http printer1 blogspot com ...

Страница 24: ...Download Free Service Manual And Resetter Printer at http printer1 blogspot com ...

Страница 25: ...2 3 When Turning Off the Main Power Switch iR2020 iR2020J iR2016 iR2016J 1 20 1 2 2 4 When Turning Off the Main Power Switch iR2020i iR2016i 1 21 1 2 2 5 Control Panel iR2020 iR2020J iR2016 iR2016J 1 22 1 2 2 6 Control Panel iR2020i iR2016i 1 23 1 2 3 User Mode Items 1 23 1 2 3 1 Common Settings iR2020 iR2020J iR2016 iR2016J 1 23 1 2 3 2 Common Settings iR2020i iR2016i 1 24 1 2 3 3 Copy Settings i...

Страница 26: ...bout Fire 1 36 1 2 5 7 Cautions as to the replacement and disposal of lithium battery 1 36 1 2 6 Product Specifications 1 37 1 2 6 1 Product Specifications 1 37 1 2 7 Function List 1 38 1 2 7 1 Printing Speed iR2020 iR2020J 1 38 1 2 7 2 Printing Speed iR2020i 1 39 1 2 7 3 Printing Speed iR2016 iR2016J 1 40 1 2 7 4 Printing Speed iR2016i 1 41 1 2 7 5 Types of Paper 1 43 Download Free Service Manual...

Страница 27: ...es 2 This accessory is required when the Finisher U1 Inner 2 way tray E1 Cassette feeding module K1 or Duplex unit A1 is installed This accessary comes standard with the iR2020 for North America Latin America and Asia 1 DADF P1 2 Platen Cover Type J 1 3 Finisher U1 4 Additional Finisher Tray C1 5 Inner 2 way Tray E1 6 Cassette Feeding Module K1 7 Duplex Unit A1 8 Power Supply Kit Q1 2 9 Document T...

Страница 28: ...assette units as a 3 stage cassette unit 3 This accessory is required when the Finisher U1 Inner 2 way tray E1 Cassette feeding module K1 or Duplex unit A1 is installed This accessory comes standard with the iR2016 for North America Latin America and Asia 1 DADF P1 2 Platen Cover Type J 1 3 Finisher U1 4 Additional Finisher Tray C1 5 Inner 2 way Tray E1 6 Cassette Feeding Module J1 2 7 Cassette Fe...

Страница 29: ...12 5978 iR2020i The configuration is as shown in the following figure F 1 3 1 Standard equipment 1 DADF P1 1 2 Finisher U1 3 Additional Finisher Tray C1 4 Inner 2 way Tray E1 5 Cassette Feeding Module K1 6 Duplex Unit A1 7 Power Supply Kit Q1 1 8 Document Tray J1 9 Card Reader E1 8 2 3 4 5 6 7 9 1 ...

Страница 30: ...equipment 2 A Cassette feeding module J1 can be placed on the Cassette feeding module K1 to use these cassette units as a 3 stage cassette unit 1 DADF P1 1 2 Finisher U1 3 Additional Finisher Tray C1 4 Inner 2 way Tray E1 5 Cassette Feeding Module J1 2 6 Cassette Feeding Module K1 2 7 Duplex Unit A1 8 Power Supply Kit Q1 1 9 Document Tray J1 10 Card Reader E1 2 9 3 4 6 6 5 7 8 10 5 1 ...

Страница 31: ...iR2020J iR2016 iR2016J 0011 0901 iR2016J iR2016 iR2020 The configuration is as shown in the following figure F 1 5 1 To operate the heaters a heater PCB is required These parts are supplied as service parts not the standard items 1 Reader Heater 1 2 Cassette Heater 1 3 Heater PCB ...

Страница 32: ...figuration iR2020i 0012 5985 iR2020i The configuration is as shown in the following figure F 1 6 1 To operate the heaters a heater PCB is required These parts are supplied as service parts not the standard items 1 Reader Heater 1 2 Cassette Heater 1 3 Heater PCB ...

Страница 33: ...figuration iR2016i 0012 5986 iR2016i The configuration is as shown in the following figure F 1 7 1 To operate the heaters a heater PCB is required These parts are supplied as service parts not the standard items 1 Reader Heater 1 2 Cassette Heater 1 3 Heater PCB ...

Страница 34: ...hapter 1 1 8 1 1 8 Printing Transmitting Accessories System Configuration iR2020J iR2016J 0011 0912 iR2016J The iR202J iR2016J does not allow the print function and the transmission function to be added ...

Страница 35: ...s shown in the following figure F 1 8 1 To make the FAX feature effective a FAX panel and a super G3 FAX board are required 2 The PCL printer kit contains a 256MB expansion RAM 1 FAX Panel A1 1 2 UFRII LT Printer Kit J2 3 Serial Interface Board A1 4 PCL Printer Kit J1 2 5 Super G3 FAX Board T1 1 6 iR 256MB Expansion RAM D1 5 3 4 2 1 6 ...

Страница 36: ...0i The configuration is as shown in the following figure F 1 9 1 Standard equipment 1 UFRII LT Printer Kit J2 1 2 Serial Interface Board A1 3 PCL Printer Kit J1 1 4 Super G3 FAX Board T1 5 iR 256MB Expansion RAM D1 This item is not supplied as goods 1 6 Color SEND Kit This item is not supplied as goods 1 4 2 1 5 6 3 ...

Страница 37: ...ons expected of the accessories for details see the chapters that follow UFR II print function Resolution 600dpi UFRII LT Printer Kit J2 UFR II print function Resolution 1200dpi UFRII LT Printer Kit J2 iR 256MB Expansion RAM D1 PCL print function PCL Printer Kit J1 FAX function Super G3 FAX Board T1 FAX Panel A1 Coin vender function Serial Interface Board A1 ...

Страница 38: ...xpected of the accessories for details see the chapters that follow T 1 1 1 Standard equipment UFR II print function Resolution 1200dpi 1 UFRII LT Printer Kit J2 iR 256MB Expansion RAM D1 PCL print function 1 PCL Printer Kit J1 FAX function Super G3 FAX Board T1 Coin vender function Serial Interface Board A1 Color SEND function 1 This function is not supplied as goods ...

Страница 39: ... American countries Other models are available optionally 1 Copyboard cover 1 10 Left door 2 Reader front cover 11 Left cover rear 3 Control panel 12 Reader left cover 4 Delivery tray 13 Reader right cover 5 Front cover 14 Reader erar cover 6 Cassette 1 15 Rear cover 7 Cassette 2 16 Cassette rear cover 8 Left cover front 17 Right cover upper 9 Manual feed tray 18 Right cover lower 1 2 7 8 17 9 10 ...

Страница 40: ...ront cover 11 Left cover rear 3 Control panel 12 Reader left cover 4 Delivery tray 13 Reader right cover 5 Front cover 14 Reader rear cover 6 Cassette 1 15 Rear cover 7 Cassette 2 16 Right cover upper 8 Left cover front 17 Right cover lower 9 Manual feed tray 1 2 6 8 7 16 9 10 11 12 13 14 15 17 3 4 5 ...

Страница 41: ...in American countries Other models are available optionally 1 Copyboard cover 1 9 Left door 2 Reader front cover 10 Left cover rear 3 Control panel 11 Reader left cover 4 Delivery tray 12 Reader right cover 5 Front cover 13 Reader erar cover 6 Cassette 1 14 Rear cover 7 Left cover front 15 Right cover upper 8 Manual feed tray 16 Right cover lower 1 2 7 15 8 9 10 11 12 13 14 16 3 4 5 6 ...

Страница 42: ...er 5 Front cover 13 Reader rear cover 6 Cassette 1 14 Rear cover 7 Left cover front 15 Right cover upper 8 Manual feed tray 16 Right cover lower 1 CIS unit 10 Separation roller 2 Reader unit 11 Vertical path roller 3 Laser scanner unit 12 Manual feed pickup roller 4 DC power supply PCB 13 Registration roller 5 HVT PCB 14 Transfer roller 6 Cassette 15 Drum unit 7 Toner bottle 16 Pressure roller 1 2...

Страница 43: ...Chapter 1 1 17 8 Pickup roller 17 Fixing film unit 9 Feed roller 18 Delivery roller ...

Страница 44: ... iR2016 iR2020 iR2016i iR2020i The machine possesses 2 power switches main power switch and control power switch Normally i e unless the machine is in a sleep state the machine will be supplied with power when you turn on its main power switch F 1 15 1 Control panel power switch 2 Main power lamp 3 Main power switch 1 2 3 ...

Страница 45: ... The machine possesses 2 power switches main power switch and control power switch Normally i e unless the machine is in a sleep state the machine will be supplied with power when you turn on its main power switch F 1 16 1 Control panel power switch 2 Main power lamp 3 Main power switch 1 2 3 ...

Страница 46: ...to operate the main power switch while the Processing Data lamp on the control panel is not lit Turning off the main switch during printing or fax data transmission reception can erase the data being processed F 1 17 During downloading Do not turn off the power switch or ON OFF switch on the control panel Turning off the main power switch during downloading can make this machine inoperative F 1 18...

Страница 47: ...n power switch while the Processing Data lamp on the control panel is not lit Turning off the main switch during printing or fax data transmission reception can erase the data being processed F 1 19 During downloading Do not turn off the power switch or ON OFF switch on the control panel Turning off the main power switch during downloading can make this machine inoperative F 1 20 ...

Страница 48: ...ssing Date indicator 6 LCD 22 Different size original key 7 Image quality key 23 Additional functions key 8 Reset key 24 2 on 1 key 9 System monitor key 25 Plus key 10 Control panel power switch 26 Frame erase key 11 Counter check key 27 OK key 12 Numeric keys 28 Two page separation key 13 Stop key 29 Minus key 14 Start key 30 Two sided key 15 Clear key 31 Copy ratio key 16 Main power indicator 1 ...

Страница 49: ...WER 1 ON OFF DRAWER 2 ON OFF DRAWER 3 ON OFF DRAWER 4 ON OFF STACK BYPASS OFF ON PRINTER DRAWER 1 ON OFF DRAWER 2 ON OFF DRAWER 3 ON OFF DRAWER 4 ON OFF FAX DRAWER 1 ON OFF DRAWER 2 ON OFF DRAWER 3 ON OFF DRAWER 4 ON OFF STACK BYPASS OFF ON OTHER DRAWER 1 ON OFF DRAWER 2 ON OFF DRAWER 3 ON OFF DRAWER 4 ON OFF STACK BYPASS OFF ON 7 REG PAPER TYPE DRAWER 1 PLAIN PAPER COLOR RECYCLED HEAVY PAPER 1 BO...

Страница 50: ...Off Register Paper Type Paper Drawer 1 Paper Drawer 2 2 Paper Drawer 3 2 Paper Drawer 4 2 Plain 1 Recycled Color Bond Heavy Paper 1 Energy Consumption in Sleep Mode Low 1 High Tray Designation 2 If the Optional Inner 2 Way Tray E1 Is Attached Tray A Copy 1 Printer 1 Receive 1 Other 1 Tray B Copy 1 Printer 1 Receive 1 Other 1 If the Optional Finisher U1 and Additional Finisher Tray C1 Are Attached ...

Страница 51: ...FINE DIRECT TX OFF ON STAMP DOCUMENT OFF ON INIT FAX STD SET OFF ON 2 TX SETTINGS ECM TX ON OFF PAUSE TIME 1 to 15 4 SEC AUTO REDIAL ON REDIAL TIMES REDIAL INTERVAL TX ERROR REDIAL OFF TIME OUT ON OFF STAMP DOCUMENT DIRECT MEMORY TX DIRECT TX DIALING LINE CHCK ON OFF ROTATE TX ON OFF 3 RX SETTINGS ECM RX ON OFF 4 PRINTER SETTINGS SELECT DRAWER SWITCH A ON OFF SWITCH B ON OFF SWITCH C ON OFF SWITCH...

Страница 52: ...OR TIME OUT ON 5 to 300 SEC OFF 8 COLLATE OFF COLLATE OFFSET COLLATE OFFSET GROUP STAPLE 9 INIT PRINTER SET OFF ON 10 PCL SETTINGS ORIENTATION PORTRAIT LANDSCAPE FONT NUMBER 0 to 120 POINT SIZE 4 00 to 999 75 point 12 00 point PITCH 0 44 to 99 99 cpi 10 00 cpi FORM LINES 5 to 128 lines 64 lines SYMBOL SET PC8 PC850 PC852 PC8DN PC8TK PC1004 PIFONT PSMATH PSTEXT ROMAN8 VNINTL VNMATH VNUS WIN30 WINBA...

Страница 53: ...s Forward w o Cond Receive Type Fax 1 I Fax Forwarding Destination Select from the registered addresses File Format TIFF 1 PDF Divide into Pages Detail Edit Condition Name 50 characters maximum Forwarding Conditions Receive Type Fax 1 I Fax Forwarding Destination Select from the registered addresses File Format TIFF 1 PDF Divide into Pages Erase Yes No Print List Yes No Device Info Settings Device...

Страница 54: ...tialize TX Terminal ID On 1 Printing Position Inside Outside 1 Telephone Mark FAX 1 TEL Gamma Value for Color Send Jobs Gamma 1 0 Gamma 1 4 Gamma 1 8 1 Gamma 2 2 Sharpness 1 to 7 levels 4 1 Register Favorites Button M1 to M18 Color TX Scan Settings Speed Priority Image Priority 1 Default Screen for Send Favorite Buttons One touch Buttons Initial Function 1 Initialize TX Settings Yes No RX Settings...

Страница 55: ...Short Edge Margin MM 50 0 MM to 50 0 MM 0 0 MM Inches 01 90 Inches to 01 90 Inches 00 00 Inches Error Time Out On Time Out Period 5 to 300 Sec Off 15 Sec Collate Off Collate Offset Collate Offset Group Staple Staple Position Top Left Top Right Bottom Left Init Printer Set Off On Reset Printer Off On PCL Settings Orientation PortraitT Landscape Font Number 0 to 120 0 Point Size 4 00 to 999 75 point...

Страница 56: ...FF SNMP WRITABLE 2 ON OFF DEDICATED PORT ON OFF ETHERNET DRIVER DETECT AUTO MANUAL DUPLEX HALF DUPLEX FULL DUPLEX ETHERNET TYPE 10 BASE T 100 BASE TX MAC ADDRESS VIEW IP ADDRESS IP ADDRESS SUBNET MASK GATEWAY ADDRESS STARTUP TIME SET 0 to 300 SEC 6 COMMUNICATIONS TX START SPEED 2400 to 33600 bps RX START SPEED 2400 to 33600 bps MEMORY LOCK SETTI OFF ON PASSWORD REPORT PRINT MEMORY RX TIME R KEY SE...

Страница 57: ...s Copy B W Scan Color Scan or Print Setting method Register Department ID in Department ID Management under Additional Functions key System Setting Operation outline Department ID can be registered in Department ID management from the operation unit of the machine even though System Manager Settings is not done When registering data in Department ID Management using RUI you need to register yourse...

Страница 58: ...s small 3 and glass holder 4 in the same manner F 1 24 3 Cleaning the Fixing Pressure Roller If white streaks are seen on the printed paper the fixing pressure roller can be dirty If white streaks are seen on the printed paper clean the fixing pressure roller in the user mode Be sure to clean the fixing pressure roller after replacing the toner bottle When cleaning the fixing pressure roller manua...

Страница 59: ...EANING Next press the OK key Cleaning will start 1 2 4 3 Cleaning iR2020i iR2016i 0012 6179 iR2016i iR2020i The parts that should be cleaned by the customer to maintain the design performance and the cleaning method are described below The service engineer should instruct the customer to clean the machine at regular intervals once a month 1 Pressure Plate Clean the pressure plates 1 with a cloth d...

Страница 60: ...he quality of the printer image is poor the drum can be dirty If this symptom occurs clean the drum in the user mode 1 Press the Additional functions key to enter the user mode 2 Select Adjustment Cleaning on the touch panel 3 Select Drum Cleaning and then press Start Cleaning will start 1 2 5 Safety 1 2 5 1 Safety of the Laser Light 0010 8951 iR2016J iR2016 iR2020 iR2016i iR2020i Laser light can ...

Страница 61: ...inside the front cover of this machine F 1 32 1 2 5 4 Handling the Laser Unit iR2020i iR2016i 0012 6040 iR2016i iR2020i The laser scanner unit emits invisible laser light inside it If exposed to laser light the human eye can irreparably be damaged Never attempt to disassemble the laser scanner unit It is not designed for servicing in the field Warning labels are affixed to the top cover of the las...

Страница 62: ...y with the fibers of the cloth 3 Do not bring toner into contact with plastic material It tends to react easily 1 2 5 6 Point to Note about Fire 0010 7304 iR2016J iR2016 iR2020 iR2016i iR2020i It is dangerous to throw lithium batteries and parts and components containing flammable substances such as cartridges etc into fire Such parts and components must be disposed of in accordance with local law...

Страница 63: ...ting resolution iR2020 iR2016 1200 dpi x 1200 dpi iR2020J iR2016J 600dpi x 600 dpi First print time Book mode 7 9 sec or less ADF mode 13 5 sec or less Cassette capacity 250sheets 80 g m2 Multifeeder tray capacity 100 sheets 80 g m2 B4 LGL or less 64 g m2 80 sheets 80 g m2 B4 LGL or less 80 g m2 50 sheets B4 LGL or more 64 g m2 80 g m2 50 sheets heavy paper 105 to 128 g m2 OHP 10 sheets envelope 1...

Страница 64: ...16i approx 46 2 kg Paper size Single sided Casette feed Manual feed Plain paper A4 20 20 A5 23 23 A5R 13 B5 20 20 B5R 12 12 A4R 11 11 B4 9 9 A3 10 10 STMT 15 15 STMTR 13 EXE 21 LTR 20 20 LTRR 11 11 LGL 10 10 LDR 10 10 Heavy paper 1 2 Heavy paper 3 A4 12 10 12 10 A5 13 11 13 11 A5R 11 7 B5 12 10 12 10 B5R 9 6 9 6 A4R 10 8 10 8 B4 8 6 8 6 A3 8 7 8 7 STMT 11 7 11 7 STMTR 9 6 EXE 12 10 LTR 11 10 11 10...

Страница 65: ...leaning Spesial Mode P ON 1 2 7 2 Printing Speed iR2020i 0012 5996 iR2020i T 1 13 Envelope Monarch 4 COM10 4 ISO B5 4 ISO C5 4 DL 4 Paper size Single sided Casette feed Manual feed Plain paper A4 20 20 A5 24 24 A5R 13 B5 21 21 B5R 12 12 A4R 11 11 B4 9 9 A3 10 10 STMT 16 16 STMTR 13 EXE 21 LTR 20 20 LTRR 11 11 LGL 10 10 LDR 10 10 8K 9 9 16K 21 21 Heavy paper 81 to 105g m2 Heavy paper 106 to 128g m2...

Страница 66: ...ded copy speed applies only when a duplex unit A1 is installed 1 2 7 3 Printing Speed iR2016 iR2016J 0011 3247 iR2016J iR2016 Bond paper A4 8 8 A5 5 5 A5R 4 B5 6 6 B5R 4 4 A4R 4 4 B4 5 5 A3 6 6 STMT 4 4 STMTR 4 EXE 6 LTR 7 7 LTRR 4 4 LGL 4 4 LDR 6 6 8K 5 5 16K 6 6 OHP A4 20 LTR 20 Envelope Monarch 4 COM10 4 ISO B5 4 ISO C5 4 DL 4 Postcard Postcard 8 Double postal card 7 4 plane post card 7 Paper s...

Страница 67: ...al Mode P ON 1 2 7 4 Printing Speed iR2016i 0012 5999 iR2016i Paper size Single sided Cassette feed Manual feed Plain paper A4 16 16 A5 23 23 A5R 13 B5 20 20 B5R 12 12 A4R 11 11 B4 9 9 A3 10 10 STMT 15 15 STMTR 13 EXE 21 LTR 16 16 LTRR 11 11 LGL 10 10 LDR 10 10 Heavy paper 1 2 Heavy paper 3 A4 12 10 12 10 A5 13 11 13 11 A5R 11 7 B5 12 10 12 10 B5R 9 6 9 6 A4R 10 8 10 8 B4 8 6 8 6 A3 8 7 8 7 STMT 1...

Страница 68: ...8g m2 A4 12 10 12 10 A5 13 11 13 11 A5R 10 7 B5 12 10 12 10 B5R 9 6 9 6 A4R 10 8 10 8 B4 6 6 A3 8 7 8 7 STMT 11 7 11 7 STMTR 10 7 EXE 13 11 LTR 12 10 12 10 LTRR 9 8 9 8 LGL 8 5 8 5 LDR 8 7 8 7 8K 7 5 7 5 16K 12 10 12 10 Bond paper A4 8 8 A5 6 6 A5R 4 B5 6 6 B5R 4 4 A4R 4 4 B4 5 5 A3 6 6 STMT 4 4 STMTR 4 EXE 6 LTR 7 7 LTRR 4 4 LGL 4 4 LDR 6 6 8K 5 5 16K 6 6 OHP A4 16 LTR 16 Envelope Monarch 4 COM10...

Страница 69: ...5 Types of Paper 0011 1097 iR2016J iR2016 iR2020 iR2016i iR2020i T 1 18 Paper size Double sided Casette feed Manual feed Plain paper A4 16 16 A5 11 11 A5R 15 B5 19 19 B5R 8 8 A4R 8 8 B4 7 7 A3 7 7 STMT 14 14 STMTR 13 EXE 19 LTR 16 16 LTRR 8 8 LGL 7 7 LDR 7 7 8K 7 7 16K 19 19 Type Paper size Source Manual Feed Tray Cassette Plain paper eco paper recycled paper 64 90g m2 A3 B4 A4 A4R B5 B5R A5 LDR L...

Страница 70: ...Chapter 1 1 44 ...

Страница 71: ...Chapter 2 Installation ...

Страница 72: ......

Страница 73: ...3 2 Checking the Network Connection 2 14 2 4 Flow of Accessory Installation 2 15 2 4 1 Flow of Accessary Installation 2 15 2 4 2 Flow of Accessary Installation 2 16 2 4 3 Flow of Accessary Installation 2 17 2 5 Installing the Card Reader 2 18 2 5 1 Points to Note 2 18 2 5 2 Checking the Contents 2 18 2 5 3 Installation Procedure 2 19 2 5 4 Registering the Card IDs 2 24 2 5 5 Registering the Card I...

Страница 74: ......

Страница 75: ...ted by the machine will not affect the health of individuals around it Some however may find its odor unpleasant as while remaining in contact with it for long hours Be sure that the room is well ventilated 5 The floor of the machine must be level so that the feet of the machine will remain in contact and the machine will remain level 6 The machine must be at least 10 cm away from any wall permitt...

Страница 76: ...er front cover 11 Left cover rear 3 Control panel 12 Reader left cover 4 Delivery tray 13 Reader right cover 5 Front cover 14 Reader erar cover 6 Cassette 1 15 Rear cover 7 Cassette 2 2 16 Cassette rear cover 2 8 Left cover front 17 Right cover upper 9 Manual feed tray 18 Right cover lower A3 B5 LTR A4 LGL 8K B4 LTR A4 B5 STMT A5 11 17 16K A3 B5 LTR A4 LGL 8K B4 LTR A4 B5 STMT A5 11 17 16K 1 3 2 4...

Страница 77: ...pc Check the documentation and CD against the following table 1 3 Names of Parts 1 Drum unit 1 6 Document size label 1 2 Power cable 1 7 Finger pinch caution label 1 3 Ferrite core 1 8 Scan glass cleaning label 1 4 Cassette size label 2 1 1 9 Black streak cleaning instruction label 1 5 Caution sheet 2 1 1 Operators manual User s Guide Operators manual Network Quick Start Guide Drum Unit Replacing ...

Страница 78: ... cover rear 3 Control panel 12 Reader left cover 4 Delivery tray 13 Reader right cover 5 Front cover 14 Reader rear cover 6 Cassette 1 15 Rear cover 7 Cassette 2 2 16 Right cover upper 8 Left cover front 17 Right cover lower 9 Manual feed tray 1 2 6 8 7 16 9 10 11 12 13 14 15 17 3 4 5 ...

Страница 79: ...ials 0012 6449 iR2016i iR2020i 1 Unpack the machine and remove vinyl cushioning materials and tape 2 Hold the handles 1 of the machine together with one or more persons and take it out The maximum weight of this machine is approximately 52kg Two or more persons are required to lift the machine F 2 8 2 2 3 Installing the Drum Unit 0011 1071 iR2016J iR2016 iR2020 iR2016i iR2020i 1 Open the front cov...

Страница 80: ...4 Holding the protective cover 1 of the new drum unit place the drum unit against the iR body F 2 12 5 While holding the protective cover insert the new drum unit 1 into the iR body MEMO The protective cover will not be reused F 2 13 6 Turn the developer pressure release lever 1 counterclockwise and then close the left door 2 F 2 14 7 Enter the date in the drum counter label 1 F 2 15 8 Affix the d...

Страница 81: ...y press the following keys to enter the service mode Additional functions key 2 key 8 key Additional functions key 5 Select PRINT using the or key and then press the OK key 6 Select PRINT SW using the or key and then press the OK key Confirm that the following message is displayed Message PRINT SW 001 00000000 7 Press the following keys and confirm the message key 1 key 1 key Message PRINT SW 011 ...

Страница 82: ...sage appears on the control panel display press the following keys to enter the service mode 2 key 8 key 5 Select PRINT using or and then press the OK 6 Select PRINT SW using or and then press the OK Confirm that the following message is displayed Message PRINT SW 001 00000000 7 Press the following keys and confirm the message key 1 key 1 key Message PRINT SW 011 00000000 8 Position the cursor to ...

Страница 83: ...1 of the paper front guide counterclockwise to release it Slide the paper front guide 2 to fit to the size of the paper to be used and then turn the lever clockwise to lock it F 2 33 5 Turn the paper trailing edge registration plate 1 to the left to remove it Re attach it to fit to the size of the paper to be loaded F 2 34 6 Slide the paper size detection lever 1 to fit to the paper size F 2 35 7 ...

Страница 84: ...ppress noise attach the ferrite core as close as possible to the USB port of the iR body F 2 39 2 2 8 Attaching the Ferrite Core 0012 6451 iR2016i iR2020i 1 Attach the ferrite core 2 to the user s USB cable and then connect the USB cable to the USB port of the host machine To reduce noise attach the ferrite core as close to the USB port of the host machine as possible F 2 40 2 2 9 Checking the Ima...

Страница 85: ...ountry Region 0012 6454 iR2016i iR2020i 1 Press the following keys to display the service mode screen 2 Key 8 Key 2 Select CLEAR using or and then press the OK 3 Select TYPE using or and then press the OK 4 Using or select the country region type that conforms to the communication standard used in the country region where the machine is used 5 Press the OK When Please Wait disappears the selected ...

Страница 86: ...ff line 2 Affix the label printed in the user selected language F 2 43 C Document size label The purpose of this label is to facilitate the size adjustment made from the view point of each user 1 Align the side guide rear 1 to A4 A3 LTR 11X17 2 2 Affix the label of the series matching the document size label 3 to the feeder cover Adjust the label position by moving it back and forth in the directi...

Страница 87: ...elect REPORT using the or key and then press the OK key 3 Select REPORT OUTPUT using the or key and then press the OK key 4 Select SPEC LIST using the or key and then press the OK key 5 When SPEC REPORT is displayed check that BDL IMAGE is set to ON MEMO SPEC REPORT TOTAL MEMORY 128MB BDL IMAGE 600 must be set to ON TOTAL MEMORY 256MB BDL IMAGE 1200 must be set to ON 6 Contact the system administr...

Страница 88: ...wing keys to display the service mode screen 2 Key 8 Key 2 Select REPORT using or and then press the OK 3 Select REPORT OUTPUT using or and then press the OK 4 Select SPEC LIST using or and then press the OK 5 When SPEC REPORT is displayed check that BDL IMAGE is set to ON MEMO SPEC REPORT BDL IMAGE 1200 must be set to ON 6 Contact the system administrator of the customer to make network settings ...

Страница 89: ...machine follow the following flow of work so that the work will become effective F 2 46 Cassette feeding module installation Duplex unit installation Additional finisher tray installation Serial interface board installation Power supply kit installation Inner 2 way tray installation DADF installation Card reader installation Finisher installation Host machine installation ...

Страница 90: ...tallation Additional finisher tray installation 256MB expansion RAM installation Serial interface board installation Host machine installation Inner 2 way tray installation UFRII LT printer kit installation 1 Super G3 FAX board installation FAX panel installation Finisher installation PCL printer kit installation Power supply kit installation 1 DADF installation Card reader installation 1 This acc...

Страница 91: ...odule installation Duplex unit installation 1 Additional finisher tray installation Serial interface board installation Host machine installation Inner 2 way tray installation Card reader installation Super G3 FAX board installation Finisher installation PCL printer kit installation 2 1 This accessory comes standard with the iR2020i and iR2016i for North America 2 This accessory comes standard wit...

Страница 92: ... is required 2 5 2 Checking the Contents 0011 1081 iR2016J iR2016 iR2020 iR2016i iR2020i Card reader E1 F 2 49 The repeating harness TP screw M3x12 and toothed washer are not used Card reader attachment D1 F 2 50 1 Card reader E1 1 pc 2 TP screw M3x12 1 pc 3 Toothed washer 1 pc 4 Repeating harness A 1 pc 1 Card reader mount 1 pc 2 Card reader cover 1 pc 1 2 3 4 1 4 5 7 6 2 3 ...

Страница 93: ...emove the four screws and then detach the rear cover 1 F 2 52 3 Remove the screw 1 from the card reader MEMO The removed screw will be used later F 2 53 4 Remove the screw 1 securing the ground cable and then separate the card reader 3 from the card reader mount 2 F 2 54 3 Harness cover base lid 3 pcs 4 Repeating harness B 1 pc 5 Edge saddle 1 pc 6 TP screw 2 pcs 7 Binding screw M4x6 4 pcs 1 2 1 1...

Страница 94: ...d cable take care not to cut or damage them F 2 56 6 Using the supplied binding screw M4x6 1 connect the ground cable to the reader mount Attach the supplied edge saddle 3 to the card reader mount F 2 57 7 Connect the connector 1 of the supplied repeating harness B to the connector 2 on the card reader Using the supplied binding screw M4x6 secure the repeating harness B clamp 4 Disconnect the shor...

Страница 95: ...two blind seals 1 from the reader left cover F 2 60 10 Using the two supplied TP screws M4x16 attach the card reader to the reader When tightening the screws take care not to damage the repeating harness B F 2 61 11 Slide the card reader cover 1 to attach it to the card reader mount 2 3 4 1 5 2 1 1 1 ...

Страница 96: ...M4x6 secure the card reader cover 2 F 2 64 13 Affix the two supplied harness covers bases at the right rear of the machine with it aligned with the bottom line of the reader F 2 65 14 Affix the supplied harness cover base 1 at the back of the machine with it aligned with the bottom line of the reader 1 1 1 2 1 ...

Страница 97: ...e processor PCB F 2 67 16 Using the supplied binding screw M4x6 1 secure the repeating harness B clamp 2 F 2 68 17 Using the three harness covers lids 2 secure the repeating harness B 1 to the harness covers bases F 2 69 18 Using a nipper remove the precut portion 1 of the rear cover as shown below 1 2 1 1 2 1 2 ...

Страница 98: ...al Functions Key 3 Select ACC using the and key and then press the OK key 4 Select CARD using the and key and then press the OK key 5 Specify the first ID number of the card ID numbers to be registered and then press the OK key Sequential Card ID numbers of 100 cards are automatically registered in the department ID starting with the specified card ID number When an optional ROM is added card ID n...

Страница 99: ...o display the service mode screen 2 Key 8 Key 3 Select ACC using and and then press the OK 4 Select CARD using and and then press the OK 5 Specify the first ID number of the card ID numbers to be registered and then press the OK Sequential Card ID numbers of 1000 cards are automatically registered in the department ID starting with the specified card ID number 6 Press key to enter the user mode 7 ...

Страница 100: ...2020i Before installing make sure the host machine is turned off If it is turned on go through the following 1 Turn off the main power switch 2 Disconnect the power cable from the power outlet 3 Disconnect the power cable 1 Heater PCB unit 1 pc 2 Heater switch harness 1 pc 3 Cassette heater harness 1 pc 4 Heater PCB harness 1 pc 5 Clamp 4 pcs 6 Edge saddle small 2 pcs 7 Edge saddle large 1 pc 8 P ...

Страница 101: ...ver 2 3 Remove the five screws 3 Remove the two hooks 4 and then detach the lower right cover 5 4 Remove the screw 6 and then detach the upper right cover 7 F 2 77 5 Remove the two screws 1 and then the delivery tray 2 When removing or reinstalling the delivery tray be careful not to damage the paper holder 3 ...

Страница 102: ...F 2 79 2 6 3 Installing the Heater PCB 0011 3365 iR2016J iR2016 iR2020 iR2016i iR2020i 1 Install the heater PCB unit 2 using the two supplied TP screws M3x8 1 2 Install the heater switch 3 on the right side panel Install the heater switch with the OFF position on the left and the ON position on the right just like the main power switch ...

Страница 103: ...PCB Route the other harness 3 to the front of the host machine through the saddle F 2 81 4 Install the edge saddle small 1 on the power supply unit at the front of the host machine and then connect the header switch harness 2 routed to the front of the host machine to the connector J15 on the power supply PCB through the edge saddle ...

Страница 104: ...ss through the clamps installed in step 5 F 2 83 7 Install the edge saddle small 1 8 Connect the heater harness 2 to the connector J1902 on the heater PCB unit pass the harness through the installed edge saddle and then route the harness to the front of the host machine through the hole 3 F 2 84 9 Pass the heater harness 1 through the wire saddle 2 and then connect it to the connector J17 3 on the...

Страница 105: ...the delivery tray be careful not to damage the paper holder 11 Attach the upper right cover of the host machine 1 screw 12 Attach the lower right cover of the host machine 5 screws 13 Attach the rear cover of the host machine 4 screws 14 Close the front cover of the host machine ...

Страница 106: ...eader Heater Harness 0011 3371 iR2016J iR2016 iR2020 iR2016i iR2020i Before installing make sure the host machine is turned off If it is turned on go through the following 1 Turn off the main power switch 2 Disconnect the power cable from the power outlet 3 Disconnect the power cable 1 Reader heater 2 pcs 2 Heater harness 1 pc 3 Harness guide 1 pc 4 Right heater base 1 pc 5 Heater cover 2 pcs 6 Cl...

Страница 107: ...our screws 1 and then detach the rear cover 2 3 Remove the five screws 3 Remove the two hooks 4 and then detach the lower right cover 5 4 Remove the screw 6 and then detach the upper right cover 7 F 2 89 5 Remove the three screws 1 and then detach the rear left cover 2 ...

Страница 108: ... 3 7 Disconnect the harness 4 from the four wire saddles 5 8 Remove the two screws 6 and then detach the flexible cable cover 7 F 2 91 The reader flexible cables are stuck to the flexible cable cover so do not pull the cover forcibly 9 Turn over the reader flexible cable cover 1 and then secure to the back of the reader temporarily using a screw 2 ...

Страница 109: ... 35 F 2 92 10 Pass the heater harness 1 though the harness guide 2 with the clamp 3 of the heater harness aligned with the notch 4 in the harness guide F 2 93 11 Remove the four screws 1 and then the metal plate 2 ...

Страница 110: ...Install the metal plate removed in step 11 4 screws 19 Return the reader flexible cable cover in place and then connect the reader flexible cables to the image processor PCB 2 7 3 Removing Reader Components 0011 3373 iR2016J iR2016 iR2020 iR2016i iR2020i Installation precautions are as follows Do not touch the top surface of the contact sensor Be careful not to allow foreign objects to enter the r...

Страница 111: ...or removing the parts at the left of the reader differs between the machine with a copyboard cover and the machine with a DADF Follow the appropriate procedure a Machine with a Copyboard Cover 1 Remove the five screws 1 and then detach the upper left cover 2 of the reader F 2 97 2 Remove the two screws 1 and then detach the blind plate 2 ...

Страница 112: ... 1 and then detach the stream reading glass holder 2 2 Remove the stream reading glass 3 F 2 99 Mount the stream reading glass with the notch 1 of the sheet material affixed to the glass is at the front left F 2 100 3 Remove the screw 1 and then remove the jump board 2 ...

Страница 113: ...the front side 1 of the drive belt in the direction of the arrow to move the contact sensor 2 to the center Do not touch the top surface of the contact sensor F 2 103 2 Install the heater base 2 using a screw 1 3 Install the reader heater 3 on the header base 2 using a screw 4 Connect the connector 5 of the heater Install the wire saddle 6 and route the cable 7 ...

Страница 114: ...ter 2 2 40 F 2 104 4 Attach the heater cover 1 using a screw 2 F 2 105 5 Install the reader heater 1 using a screw 2 Connect the connector 3 of the heater F 2 106 6 Attach the heater cover 1 using a screw 2 ...

Страница 115: ...9 Install the copyboard glass 10 Install the right glass holder of the reader 2 screws 11 Attach the rear left cover of the host machine 3 screws 12 Attach the upper right cover of the host machine 1 screw 13 Attach the lower right cover of the host machine 5 screws 14 Attach the rear cover of the host machine 4 screws ...

Страница 116: ...i Before installing the cassette heater unit 30 make sure the host machine is turned off If it is turned on go through the following 1 Turn off the main power switch 2 Disconnect the power cable from the power outlet 3 Disconnect the power cable F 2 109 1 Remove the four screws 1 and then detach the rear cover 2 F 2 110 2 8 3 Installing the Cassette Heater 0011 3620 iR2016J iR2016 iR2020 iR2016i i...

Страница 117: ...sette heater harness 4 4 Place the other harness 5 at the position shown below Connect this connector to the heater of the cassette when connecting the cassette heater to the cassette at the second or lower stage F 2 112 5 Attach the rear cover 4 screws 6 Turn on the main power switch of the host machine 7 Turn on the heater switch 1 and make sure that the cassette heater is powered ...

Страница 118: ...Chapter 2 2 44 F 2 113 When installing the heater for the cassette at the second or lower stage detach the rear cover of the cassette and follow the procedure mentioned in this procedural manual ...

Страница 119: ...15 2 Remove the 4 screws and then detach the rear cover 1 F 2 116 3 Connect the connector of the control card cable 1 to the connector J320 2 on the image processor PCB F 2 117 4 Using the binding screw M4x6 1 secure the control card cable clamp 2 F 2 118 5 Using a nipper remove the precut portion 1 of the rear cover as shown below F 2 119 6 Attach the rear cover with the control card cable routed...

Страница 120: ...Chapter 2 2 46 ...

Страница 121: ...Chapter 3 Main Controller ...

Страница 122: ......

Страница 123: ... 3 6 3 4 3 Flow of Image Data for the Fax Transmission 3 7 3 4 4 Flow of Image Data for the Fax Reception Function 3 7 3 4 5 Flow of Image Data for the PDL Function 3 8 3 5 Parts Replacement Procedure 3 9 3 5 1 Main Controller PCB 3 9 3 5 1 1 Removing the Rear Cover 3 9 3 5 1 2 Removing the Left Cover Rear 3 9 3 5 1 3 Removing the RAM Cover 3 9 3 5 1 4 Removing the SDRAM 3 9 3 5 1 5 Removing the L...

Страница 124: ......

Страница 125: ... unit image input processing card printer unit interface fax image processing etc Image memory SDRAM Temporarily retains image data 128 MB 256 MB max Flash ROM Stores system software and retains user data service data USB port USB2 0 interface Item Description Image Processor PCB Controls system operation memory printer unit output image processing printer unit image input processing card printer ...

Страница 126: ...l mechanisms of the Image Processor PCB according to connectors F 3 3 T 3 3 Connector Description J300 Not used J301 USB memory connection slot J303 USB port J304 LAN PCB connection slot Image Processor PCB USB port DC controller PCB Reader Unit Image memory SDRAM Flash ROM J310 J319 J316 J314 J318 J308 IC140 IC10S IC11 IC1 BAT951 J315 J317 J320 J300 JEM1 J313 J304 J312 J309 J301 J303 J311 ...

Страница 127: ...ows the construction of the modules associated with image processing J308 Reader ADF connection slot J309 Reader Book connection slot J310 Power supply connection slot J312 SERIAL PCB connection slot J314 DC controller PCB connection slot J315 SOFT ID PCB connection slot J316 SOFT counter PCB connection slot J317 New Card Reader connection slot J318 Control panel connection slot J319 Extend ROM PC...

Страница 128: ...ion and editing SDRAM Reader controller PCB image memory program temporary storage Processes the image data read by the reader unit Reader unit input image processing block Processes image data for output to the printer unit Printer unit output image processing block Image Processor PCB DC controller PCB Reader Unit Binary processing error diffusion To compression expansion editing block Edge emph...

Страница 129: ...ocessor PCB processes the image data coming from the reader unit for output to the printer unit Image processor PCB to printer unit output image processing block Reader image processing block PDL image processing block SDRAM Enlargement reduction Rotation Integration Compression Expansion Image processor PCB to printer unit output image processing block Reader image processing block SDRAM Enlargem...

Страница 130: ...for the SEND Function 0010 8694 iR2016 iR2020 iR2016i iR2020i The following is the flow of image data when the SEND function is in use Image processor PCB To DC controller PCB Compression expansion editing block Binary density conversion Enlargement reduction Smoothing Image processing block for printer unit Image processing block for reader unit Reader unit Image processor PCB Data compression Da...

Страница 131: ...8697 iR2016 iR2020 iR2016i iR2020i The following is the flow of image data when the fax reception function is in use Image processing block for reader unit Reader unit mage processor PCB Data rotation Data expansion Resolution conversion SDRAM USB1 1 To network compression data Ethernet port Image processing block for reader unit Image processing block for FAX Super G3 Fax Board Image processor PC...

Страница 132: ... function is in use F 3 14 Image processing block for printer unit Image processing block for fax Super G3 Fax Board Image processor PCB Data compression Data rotation Data expansion SDRAM DC controller PCB Rendering processing block Compression expansion editing block Processing block for printer unit DC controller PCB Image processor PCB SDRAM Ethernet PDL ...

Страница 133: ...over 0010 8714 iR2016 iR2020 iR2016i iR2020i 1 Remove the four screws 1 and then detach the RAM cover 2 F 3 17 3 5 1 4 Removing the SDRAM 0010 8715 iR2016 iR2020 iR2016i iR2020i 1 Release two lock levers 1 in the direction of arrow A and remove SDRAM 2 F 3 18 3 5 1 5 Removing the LAN Cover 0010 8716 iR2016 iR2020 iR2016i iR2020i 1 Remove the four screws 1 and then detach the LAN cover 2 F 3 19 3 5...

Страница 134: ... 1 7 Removing the IP Cover 0010 8717 iR2016 iR2020 iR2016i iR2020i 1 Remove a connector 1 of IP LAN cable and a cable clamp 2 F 3 25 2 Release SOFT ID cable 1 from the cable clamp 2 F 3 26 3 Release a claw 1 of cable guide and detach the cable guide 2 upward F 3 27 4 Open a core 1 F 3 28 5 Remove the two screws 1 and then detach the flexible cable guide 2 1 2 1 1 2 1 1 1 2 1 2 1 2 1 2 1 ...

Страница 135: ...tion panel of the host machine 2 Using the arrow keys on the operation panel display TEST MODE 3 Press the OK key 4 Press the 2 key SCAN TEST appears 5 Press the 3 key SHEET POS ADJ appears The optical system starts scanning Several seconds later automatic adjust ment of the reading position finishes and OK appears If automatic adjustment fails NG appears Perform the following pro cedure Clean the...

Страница 136: ...st ment of the reading position finishes and OK appears If automatic adjustment fails NG appears Perform the following pro cedure Clean the white roller of the DADF and the document glass of the host ma chine and then retry auto adjustment 3 5 2 SDRAM 3 5 2 1 Removing the Rear Cover 0010 8704 iR2016J iR2016 iR2020 iR2016i iR2020i 1 Remove the four screws 1 and then detach the rear cover 2 F 3 33 3...

Страница 137: ...Chapter 4 Original Exposure System ...

Страница 138: ......

Страница 139: ...4 3 3 Enlargement Reduction 4 10 4 3 3 1 Magnification Change in Vertical Scan Direction 4 10 4 3 3 2 Magnification Change in Horizontal Scan Direction 4 10 4 3 4 Detecting the Size of Originals 4 10 4 3 4 1 Outline 4 10 4 3 4 2 Outline of Original Size Detection 4 11 4 3 5 Dirt Sensor Control 4 12 4 3 5 1 Outline 4 12 4 3 6 Image Processing 4 14 4 3 6 1 Outline 4 14 4 3 6 2 CMOS Sensor Drive 4 15...

Страница 140: ...Removing the Right Cover Lower 4 24 4 4 5 3 Removing the Right Cover Upper 4 24 4 4 5 4 Removing the Left Cover Rear 4 24 4 4 5 5 Removing the Reader Rear Cover 4 24 4 4 5 6 Removing the Copyboard Cover Open Close Sensor Front Rear 4 25 4 4 6 Contact Sensor HP Sensor 4 25 4 4 6 1 Removing the Copyboard glass 4 25 4 4 6 2 Removing the ADF Reading Glass 4 25 4 4 6 3 Removing the Contact Sensor HP Se...

Страница 141: ...original scan width 304 mm CIS drive control Drive control by reader motor M401 Original size detection 1 BOOK mode Vertical scan direction Detection by reflection type sensor AB INCH Horizontal scan direction Detection by reflection type sensor AB INCH 2 When ADF is used Width Detection by original width sensor PCB in ADF Length Detection by photo sensor in ADF 1 The control method depends on the...

Страница 142: ... Detects the original size INCH A 6 Reader motor M401 Pulse motor Controls drive of the carriage 7 Reader heater 1 Prevents condensation inside the original glass 8 Original sensor 1 SR404 Detects the original size AB INCH A INCH AB 9 Original sensor 2 SR405 Detects the original size AB A INCH AB 10 Contact image sensor CIS Uses LEDs for indirect exposure LED Photoconductor 11 CISHP sensor SR401 P...

Страница 143: ...r Front SR402 4 1 6 Control System Configuration iR2016 iR2016J iR2016i 0012 6045 iR2016J iR2016 iR2016i The control system configuration of the original exposure system is shown below 2 Reader controller PCB Controls drive of the reader unit and image processing 3 Reader motor M401 Pulse motor Controls drive of the carriage 4 Reader heater 1 Prevents condensation inside the original glass 5 Conta...

Страница 144: ...20J iR2020i 0010 4245 iR2020 iR2020i The functional configuration of the reader controller PCB is shown below F 4 5 T 4 5 Jack No Function J401 Supplies power 24 VDC from the main body printer J402 Supplies power 5 VC 3 3 VDC from the main body printer J403 Communicates with the main body printer to control the ADF J404 Communicates with the main body printer J405 Connected to the copyboard open c...

Страница 145: ...rive the motor J413 Connected to the original sensor 3 original sensor 4 and original sensor 5 Jack No Function J401 Supplies power 24 VDC from the main body printer J402 Supplies power 5 VC 3 3 VDC from the main body printer J403 Communicates with the main body printer to control the ADF J404 Communicates with the main body printer J405 Connected to the copyboard open close sensor J406 Connected ...

Страница 146: ...D CISHP sensor SR401 Shading position Shading position Shading position Leading edge of original 1 CIS position check CISHP sensor HP Backward movement Forward movement Start key ON SCRW SCFW STBY STBY Reader motor M401 LED CISHP sensor SR401 Black shading White shading Leading edge of original Shading position Shading position Trailing edge of original Original glass reading start position 1 Move...

Страница 147: ...r signal Detects the open close status of the copyboard cover Backward movement Forward movement Black shading White shading Start key ON SCFW SCRW STBY STBY Reader motor M401 LED CISHP sensor SR401 Stream reading position Trailing edge of original Shading position Shading position Shading position Stream reading start position 1 Black shading White shading Original scan CS HP sensor HP Original g...

Страница 148: ...i iR2020i The original is exposed to light and read using the contact image sensor CIS to read the image on a line by line basis T 4 7 Component Function LED Illuminates the original Light guide Illuminates the entire image line with the LED light Rod lens array Collects the light reflected by the original CMOS sensor array Receives the light that passed through the rod lens array Reader controlle...

Страница 149: ...rrection for the input brightness signal F 4 17 After replacing the contact image sensor CIS go through the following steps to perform inter channel output correction 1 Enter the service mode Sequentially press the User Mode key 2 key 8 key and User Mode key on the operation panel 2 Using the arrow keys on the operation panel display TEST MODE 3 Press the OK key 4 Press the 2 key SCAN TEST appears...

Страница 150: ...sor PCB 4 3 3 2 Magnification Change in Horizontal Scan Direction 0010 4254 iR2016J iR2016 iR2020 iR2016i iR2020i In the horizontal scan direction magnification is changed as follows depending on the selected magnification rate 1 When magnification is reduced to 50 99 a In the Book mode Data is processed on the image processor PCB with the original scan speed held at 118 mm sec b When the ADF is u...

Страница 151: ...l size identification process 1 is performed B5 A4R A4 STMT R LTR R LTR 11 17 LGL B5R Index plate Original sensor 3 B4 A3 AB Configration Inch Configration Original sensor 5 Upper left corner of original Upper left corner of original Vertical scan direction Vertical scan direction Horizontal scan direction Horizontal scan direction Original sensor 1 Original sensor 2 Original sensor 4 Original sen...

Страница 152: ... is detected with original sensors as follows F 4 25 For Chinese paper the following sizes are detected 8K Equivalent to B4 size 16K Equivalent to B5 size 4 3 5 Dirt Sensor Control 4 3 5 1 Outline 0010 4257 iR2016J iR2016 iR2020 iR2016i iR2020i The machine changes the original read position or corrects the read image depending on the presence absence of dust on the stream reading glass or ADF plat...

Страница 153: ... is performed once at position C If dust is also detected at position C a relevant message is displayed on the operation panel In this case move back to position A and the original is scanned at position A At job start Dust bypass Presence absence of dust is detected at all points A B and C in this order at job end The original is read at the point where least dust is detected F 4 27 Immediately b...

Страница 154: ...ffset correction CMOS sensor output A D conversion 2 Digital image processing Shading correction CMOS sensor Number of lines 1 Number of pixels Total 7488 incl 7176 effective pixels Pixel size 32 x 46 9 um Shading correction Shading correction Made for each job Shading adjustment Made in the Service mode Reader controller PCB CMOS sensor drive analog image processing A D conversion and shading cor...

Страница 155: ...levels by the A D converter 4 3 6 5 Shading Correction Outline 0010 4262 iR2016J iR2016 iR2020 iR2016i iR2020i The CMOS sensor outputs are necessary even for the following reasons even when the density of the original is uniform 1 Variation in sensitivity among CMOS sensor pixels 2 Variation in light intensity of rod lens array The machine performs shading correction to even out the CMOS sensor ou...

Страница 156: ...lue stored in the shading correction circuit to use the difference between the two as the shading correction value The machine uses this shading correction value to correct the variation among CMOS sensor pixels when scanning the original thus evening out the image density level F 4 32 CMOS sensor output Original density Standard white plate Characteristics before correction Target value Measureme...

Страница 157: ...n value X Service mode SCAN SCAN NUMERIC No 213 Correction value Y Service mode SCAN SCAN NUMERIC No 214 Correction value Z Service mode SCAN SCAN NUMERIC No 215 Also rewrite the values on the service label F 4 36 4 4 1 3 Removing the ADF Reading Glass 0010 4296 iR2016J iR2016 iR2020 iR2016i iR2020i 1 Open the copyboard cover or ADF 2 Remove the two screws 1 and then remove the glass retainer 2 3 ...

Страница 158: ...6J iR2016 iR2020 iR2016i iR2020i 1 Remove the three screws 1 and then detach the left cover rear F 4 42 4 4 2 5 Removing the Reader Rear Cover 0010 6093 iR2016J iR2016 iR2020 iR2016i iR2020i 1 Open the copyboard cover or ADF 2 Remove the screw and then detach the small cover 2 F 4 43 3 Remove the screw 1 and then disconnect the ground cable 2 of the ADF harness 4 Disconnect the four connectors 3 a...

Страница 159: ...7 F 4 48 4 4 2 7 Removing the Reader Controller PCB 0010 4300 iR2016J iR2016 iR2020 iR2016i iR2020i MEMO This machine stores adjustment values in the image processor PCB not the reader controller PCB Accordingly you need not input adjustment values after replacing the reader controller PCB 1 Remove the screw 1 and then detach the cover 2 F 4 49 2 Disconnect the connector 1 and flexible cable 2 fro...

Страница 160: ...three screws 1 and remove the reader controller PCB 2 from the mount F 4 55 4 4 3 Scanner Motor 4 4 3 1 Removing the Rear Cover 0010 6095 iR2016J iR2016 iR2020 iR2016i iR2020i 1 Remove the four screws 1 and then detach the rear cover 2 F 4 56 4 4 3 2 Removing the Right Cover Lower 0010 6096 iR2016J iR2016 iR2020 iR2016i iR2020i 1 Open the front cover 2 Remove the five screws 1 Remove the two hooks...

Страница 161: ...onnect the four connectors 3 and then remove the ADF harness 4 F 4 61 When installing the ADF harness 4 fit the harness band 5 in the groove in the reader rear cover 5 Remove the four screws 1 and then detach the reader rear cover 2 F 4 62 4 4 3 6 Removing the Scanner Motor 0010 4303 iR2016J iR2016 iR2020 iR2016i iR2020i 1 Disconnect the connector 1 and then remove the two screws 2 2 Remove the sp...

Страница 162: ...6J iR2016 iR2020 iR2016i iR2020i 1 Remove the three screws 1 and then detach the left cover rear F 4 67 4 4 4 5 Removing the Reader Rear Cover 0010 6104 iR2016J iR2016 iR2020 iR2016i iR2020i 1 Open the copyboard cover or ADF 2 Remove the screw and then detach the small cover 2 F 4 68 3 Remove the screw 1 and then disconnect the ground cable 2 of the ADF harness 4 Disconnect the four connectors 3 a...

Страница 163: ...016i iR2020i 1 Pull the drive belt front 1 in the direction of the arrow to move the contact sensor 2 to the position shown below F 4 74 2 Remove the rear side of the contact sensor 1 from the carriage 3 Disconnect the flexible cable 2 and then remove the contact sensor 1 F 4 75 When removing or installing the contact sensor unit take care not to touch the light guide and rod lens array F 4 76 4 4...

Страница 164: ...completion of automatic adjustment OK is displayed 4 4 5 Copyboard Cover Open Close Sensor 4 4 5 1 Removing the Rear Cover 0010 6107 iR2016J iR2016 iR2020 iR2016i iR2020i 1 Remove the four screws 1 and then detach the rear cover 2 F 4 77 4 4 5 2 Removing the Right Cover Lower 0010 6108 iR2016J iR2016 iR2020 iR2016i iR2020i 1 Open the front cover 2 Remove the five screws 1 Remove the two hooks 2 an...

Страница 165: ... Sensor HP Sensor 4 4 6 1 Removing the Copyboard glass 0010 6113 iR2016J iR2016 iR2020 iR2016i iR2020i 1 Open the copyboard cover or ADF 2 Remove the two screws 1 remove the glass retainer 2 and then remove the copyboard glass 3 F 4 85 When removing the copyboard glass take care not to touch the following Glass surface Standard white plate Dirt on these parts can show up as white black lines in th...

Страница 166: ...tion of the arrow to move he contact sensor 2 to the center 2 Remove the two screws 3 and then remove the contact sensor 4 together with the mount 3 Remove the contact sensor HP sensor F 4 90 4 4 7 Original Size Sensor 4 4 7 1 Removing the Copyboard glass iR2020 iR2020J iR2020i 0010 6115 iR2020 iR2020i 1 Open the copyboard cover or ADF 2 Remove the two screws 1 remove the glass retainer 2 and then...

Страница 167: ...o move the contact sensor 5 to the left F 4 95 4 Disconnect the connector 1 and then remove the harness from the edge saddle clamp 2 5 Remove the three screws 3 and then remove the original sensor vertical scan direction 4 together with the mount F 4 96 6 Disconnect the connector 1 and then remove the original sensor vertical scan direction 2 F 4 97 4 4 7 3 Removing the Original Sensor Horizontal ...

Страница 168: ...lass 0010 6117 iR2016J iR2016 iR2020 iR2016i iR2020i 1 Open the copyboard cover or ADF 2 Remove the two screws 1 remove the glass retainer 2 and then remove the copyboard glass 3 F 4 101 When removing the copyboard glass take care not to touch the following Glass surface Standard white plate Dirt on these parts can show up as white black lines in the image If dirt is found remove it with lint free...

Страница 169: ...iner 2 3 Remove the ADF reading glass 3 F 4 107 When removing the ADF reading glass take care not to touch the glass surface Dirt on these parts can show up as white black lines in the image If dirt is found remove it with lint free paper moistened with alcohol When installing the ADF reading glass position the cut portion 1 of the ADF reading glass sheet at the front left corner F 4 108 4 4 8 5 R...

Страница 170: ...Chapter 4 4 30 F 4 110 4 Remove the screw 1 and then detach the heater cover 2 F 4 111 5 Disconnect the connector 1 remove the screw 2 and then remove the reader heater left 3 F 4 112 1 2 4 3 1 2 1 2 3 ...

Страница 171: ...Chapter 5 Laser Exposure ...

Страница 172: ......

Страница 173: ...5 2 1 3 Horizontal Synchronization Control 5 4 5 2 1 4 Horizontal Synchronization Control 5 4 5 2 2 Controlling the Intensity of Laser Light 5 4 5 2 2 1 Automatic Photocurrent Control APC 5 4 5 2 3 Controlling the Laser Scanner Motor 5 4 5 2 3 1 Laser Scanner Motor Control 5 4 5 2 4 Controlling the Laser Shutter 5 5 5 2 4 1 Laser Shutter Control 5 5 5 3 Parts Replacement Procedure 5 7 5 3 1 Laser ...

Страница 174: ......

Страница 175: ...d a latent image is formed on the photoconductor drum 5 1 2 Specifications and Control Mechanism 0011 2159 iR2016J T 5 1 5 1 3 Specifications and Control Mechanism 0010 9039 iR2016 iR2020 iR2016i iR2020i T 5 2 5 1 4 Main Components 0010 4799 iR2016J iR2016 iR2020 iR2016i iR2020i Laser beam Number of laser beams 1 beams Scanner Motor Type of motor DC brushless motor Rotation control Constant speed ...

Страница 176: ...anner motor control 4 Automatic photocurrent control APC Name Function 1 Photoconductive drum Receives laser beams to form a latent image 2 Laser mirror 1 loop back mirror Reflects a laser beam toward laser mirror 2 3 Laser mirror 2 loop back mirror Reflects a laser beam toward the photoconductor drum 4 BD PCB Generates a BD signal 5 Polygonal mirror Scans the photoconductive drum with a laser bea...

Страница 177: ...response to video signals The DC controller PCB sends laser control signals CNTRL0 CNTRL1 and CNTRL2 which are used to switch between laser driver operation modes to the laser driver IC along with video signals VDO1 VDO1 The laser driver IC controls laser emission ON OFF according to the combination of CNTRL0 CNTRL1 and CNTRL2 signals The following table shows combinations of laser control signals...

Страница 178: ...vertical synchronization signal to recognize the leading edge of paper Upon detection of arrival of the fed paper at the prescribed position the DC controller PCB starts sending the BD signal to the image porcessor PCB The image processor PCB recognizes the leading edge of paper at the start of the continuous BD signal it recognizes the trailing edge of paper at the end of the continuous BD signal...

Страница 179: ...iR2016J iR2016 iR2020 iR2016i iR2020i When the drum unit is drawn out the interlocked laser shutter moves down shutting off the laser beam path When opening of the front cover or left door is detected the laser scanner motor and laser outputs turn off DC Controller PCB J205 BD P ACC P DEC P FG IC5 ...

Страница 180: ...Chapter 5 5 6 F 5 4 Laser shutter control 1 Laser shutter 2 Laser mirror 1 3 Laser mirror 2 4 Polygonal mirror 5 Laser beam 1 2 3 4 5 1 2 3 4 1 2 3 4 5 5 OPEN CLOSE ...

Страница 181: ... 2 Remove the five screws 1 Remove the two hooks 2 and then detach the right cover lower 3 F 5 6 5 3 1 3 Removing the Delivery Tray 0010 6176 iR2016J iR2016 iR2020 iR2016i iR2020i 1 Remove the two screws 1 and then detach the delivery tray 2 F 5 7 5 3 1 4 Removing the Laser Scanner Unit 0010 6177 iR2016J iR2016 iR2020 iR2016i iR2020i 1 Remove the two pieces of sponge 1 2 Disconnect the three conne...

Страница 182: ......

Страница 183: ...Chapter 6 Image Formation ...

Страница 184: ......

Страница 185: ...e of the Transfer Unit 6 6 6 8 1 1 Outline 6 6 6 8 2 Controlling the Transfer Bias 6 7 6 8 2 1 Transfer Roller Bias Control 6 7 6 8 3 Separation Mechanism 6 7 6 8 3 1 Static Eliminator Bias Control 6 7 6 9 Photosensitive Drum Cleaning 6 8 6 9 1 Outline 6 8 6 9 2 Waste Toner Full Detection 6 8 6 10 Parts Replacement Procedure 6 9 6 10 1 Drum Unit 6 9 6 10 1 1 Removing the Drum Unit 6 9 6 10 2 Devel...

Страница 186: ......

Страница 187: ...y charging roller a drum unit integrated with a drum cleaner a toner bottle a developing assembly a transfer charging roller and so on Photosensitive drum Drum type OPC drum Drum diameter 3mm Cleaning mechanism Cleaning blade Processing speed 106 7mm sec Primary charging Charging method Roller charging AC DC ng roller diameter 14mm Transfer charging Charging method Roller charging DC Charging roll...

Страница 188: ...veloping DC bias voltage is held higher than usual during application of the developing AC bias voltage F 6 3 During printing To prevent fogging of the drum the developing DC bias is held higher than usual except during image formation To prevent the toner remaining on the photosensitive drum from sticking to the transfer charging roller the transfer roller bias which is lower than that applied du...

Страница 189: ...d developing cylinder and a positive or negative DC voltage is applied to the transfer charging roller according to the instruction of the CPU on the DC controller PCB The primary DC bias and developing DC bias are changed according to the image density information sent from the image processor PCB thus adjusting the image density A negative DC voltage is applied to the electrostatic discharge nee...

Страница 190: ... DC bias drive signal PRDCFOT and primary DC bias output level signal PRDCPWM to apply the voltage generated by superimposing the primary AC bias over the primary DC bias to the primary charging roller The primary AC bias is detected by the primary AC bias current detection circuit and is fed back to the AC generator circuit via the comparison circuit The primary DC bias is detected by the primary...

Страница 191: ... is applied for warm up rotation The developing DC bias is detected by the developing DC bias detection circuit and is fed back to the DC generation circuit via the comparison circuit thus con trolling the DC bias voltage The developing DC bias voltage changes with the primary DC bias voltage according to the image density information sent from the image processor PCB The remaining toner level is ...

Страница 192: ...t 6 8 1 1 Outline 0010 4287 iR2016J iR2016 iR2020 iR2016i iR2020i The transfer unit consists of a transfer roller 1 and an static eliminator 2 The transfer roller is driven by the photosensitive drum The static eliminator is biased to separate paper from the drum JP7 JP8 JP1 JP2 TNRCHKT TNRCHKD DVACFOT DVDCPWM DVDCFOT To developing cylinder From remaining toner level sensor Developing bias circuit...

Страница 193: ...3 1 Static Eliminator Bias Control 0011 1658 iR2016J iR2016 iR2020 iR2016i iR2020i Two types of biases a high output bias and a low output bias are applied to the static eliminator using the static eliminator bias drive signal DISDCFOT and static eliminator bias output level signal DSCPWM issued from the DC controller PCB according to the type of the print sequence thus allowing the printing paper...

Страница 194: ...ner box using the waste toner feed screw in the drum unit A torque limiter is provided at the end of the waste toner feed screw is provided with a torque limiter When the waste toner box is filled with waste toner the torque limiter goes on to stop the waster toner feed screw As a result the sensor flag of the waster toner full sensor SR206 is pushed intermittently reporting the waste toner full c...

Страница 195: ...ing the drum unit open the left door fully to pre vent the damage to the drum unit To prevent exposure of the drum cover the drum unit with a few sheets of paper and place it in a safe place 6 10 2 2 Removing the Rear Cover 0010 6182 iR2016J iR2016 iR2020 iR2016i iR2020i 1 Remove the four screws 1 and then detach the rear cover 2 F 6 18 6 10 2 3 Removing the Right Cover Lower 0010 6183 iR2016J iR2...

Страница 196: ...nel display press the following keys to enter the service mode Additional Functions key 2 key 8 key Additional Functions key 5 Select PRINT using the or key and then press the OK key 6 Select PRINT SW using the or key and hen press the OK key Confirm that the following message is displayed Message PRINT SW 001 00000000 7 Press the following keys and confirm the message key 1 key 1 key Message PRIN...

Страница 197: ...Chapter 7 Pickup Feeding System ...

Страница 198: ......

Страница 199: ...Cassette Pickup Operation 7 7 7 3 3 Cassette Paper Size Detection 7 8 7 4 Manual Feed Pickup Unit 7 9 7 4 1 Overview 7 9 7 4 2 Post pickup Control after Multi Manual Feed Pickup 7 9 7 5 Parts Replacement Procedure 7 10 7 5 1 Pickup Roller 7 10 7 5 1 1 Removing the Cassette Paper Pickup Roller 7 10 7 5 2 Cassette Pickup Assembly 7 10 7 5 2 1 Removing the Lower left Cover 7 10 7 5 2 2 Removing the C...

Страница 200: ...eder Connector Cover 7 14 7 5 9 5 Removing the Multifeeder Unit 7 15 7 5 9 6 Removing the Multifeeder Pickup Solenoid 7 15 7 5 10 Registration Roller 7 15 7 5 10 1 Removing the Drum Unit 7 15 7 5 10 2 Removing the Registration Roller 7 15 7 5 11 Registration Clutch 7 15 7 5 11 1 Removing the Rear Cover 7 15 7 5 11 2 Removing the Registration Clutch 7 16 7 5 12 Separation Roller 7 16 7 5 12 1 Remov...

Страница 201: ...USA Item Function Operation method Pickup method Cassette Clow retard Multi manual feed tray Duplo separation Paper stack Cassette Plain Paper 300Sheets 64g m2 260Sheets 75g m2 250Sheets 80g m2 125Sheets 90g m2 Multi manual feed tray Plain paper Large 50Sheets 64g m2 1 Small 100Sheets 64g m2 Large 50Sheets 75g m2 Small 80Sheets 75g m2 Large 50Sheets 80g m2 Small 80Sheets 80g m2 Large 50Sheets 90g ...

Страница 202: ... Multi pickup roller 5 Registration roller 6 Duplex print paper feed roller 3 7 Transfer roller 8 Fixing roller 9 Duplex print paper feed roller 2 10 Duplex print paper feed roller 1 11 Second delivery roller 12 First delivery roller 7 1 4 Paper Path Drawing Printer on its own 0011 1941 iR2016J iR2016 iR2020 iR2016i iR2020i F 7 3 1 Cassette pickup 2 Manual feed pickup 3 Delivery from copy tray 1 1...

Страница 203: ...option 7 1 6 Paper Path Drawing Duplex Unit A1 Finisher U1 0011 0974 iR2016J iR2016 iR2020 iR2016i iR2020i F 7 5 1 Cassette pickup 2 Manual feed pickup 3 Both sides re paper feed option 1 4 Finisher U1 option 1 This comes standard with the iR2020i iR2016i for USA 7 1 7 Paper Path Drawing Duplex A1 0011 0900 iR2016J iR2016 iR2020 iR2016i iR2020i 3 2 1 3 4 2 1 ...

Страница 204: ...h Drawing Duplex A1 Inner 2Way Tray E1 0011 1969 iR2016J iR2016 iR2020 iR2016i iR2020i F 7 7 1 Cassette pickup 2 Manual feed pickup 3 Delivery from copy tray 1 4 Delivery from copy tray 2 option 5 Both sides re paper feed option 1 1 This comes standard with the iR2020i iR2016i for USA 7 1 9 Paper Path Drawing Inner 2Way Tray E1 0011 1956 iR2016J iR2016 iR2020 iR2016i iR2020i 1 3 2 4 1 3 2 4 5 ...

Страница 205: ...kup feeding system is shown below F 7 9 1 Cassette 1 paper presence absence sensor SR204 2 Registration sensor SR209 3 Manual feed paper presence absence sensor SR208 4 Duplex print paper sensor 2 SR1003 Option 1 5 Fixed paper delivery sensor SR202 6 First delivery sensor SR203 7 Duplex print paper sensor 1 SR1002 option 1 8 Second delivery sensor SR1102 option 1 This comes standard with the iR202...

Страница 206: ...Sensor 0011 0733 iR2016J iR2016 iR2020 iR2016i iR2020i Paper Trailing Edge Stationary Jam at First Delivery Sensor The first delivery sensor cannot detect absence of paper within the prescribed time after the registration sensor has been turned off T 7 6 Stationary Jam at First Delivery Sensor The first delivery sensor cannot detect absence of paper within the prescribed time after it has detected...

Страница 207: ...en because its toothless portion is positioned at the relay gear and therefore these gears are not engaged with each other 1 The DC controller PCB issues a cassette pickup solenoid drive signal CSTFD When the solenoid is turned on the control arm pushes the cam to rotate the pickup roller drive gear slightly F 7 11 2 When the pickup roller drive gear is engaged with the pickup roller shaft gear dr...

Страница 208: ...r size lever When the cassette is inserted in the iR host machine the paper size lever pushes the paper size switches provided in the iR host machine to allow the DC controller PCB to detect presence of the cassette and the size of paper Paper size switches are arranged as shown below Paper sizes are determined by the combinations of the switches pushed by the paper size lever F 7 14 T 7 8 ON The ...

Страница 209: ...against the manual feed pickup roller On the opposite side of the pickup roller is mounted a separation pad that separates only one sheet of paper from others and feeds it to the next section c Manual feed Tray Pickup Drive Mechanism pickup solenoid drive signal MFPD sent from the DC controller PCB Rotation of the main motor drives the pickup drive power transfer gear The DC controller PCB issues ...

Страница 210: ...F 7 18 7 5 2 2 Removing the Cassette Pickup Assembly 0011 0654 iR2016J iR2016 iR2020 iR2016i iR2020i 1 Detach the cassette rear cover 2 screws 2 Remove the five screws 1 and one screw with toothed washer 2 3 Disconnect the three connectors 3 and then remove the cassette pickup assembly 4 F 7 19 Install the cassette pickup assembly with the ground plate 1 outside the side plate F 7 20 7 5 3 Cassett...

Страница 211: ...tor 1 and then remove the retry sensor 2 F 7 25 7 5 5 Cassette Paper Sensor 7 5 5 1 Removing the Lower left Cover 0012 6066 iR2016J iR2016 iR2020 iR2016i iR2020i 1 Detach the lower left cover 2 by opening the rear support 1 with a slightly strong force applied in the direction of the arrow F 7 26 7 5 5 2 Removing the Cassette Pickup Assembly 0011 2938 iR2016J iR2016 iR2020 iR2016i iR2020i 1 Detach...

Страница 212: ...Detach the cassette rear cover 2 screws 2 Remove the five screws 1 and one screw with toothed washer 2 3 Disconnect the three connectors 3 and then remove the cassette pickup assembly 4 F 7 31 Install the cassette pickup assembly with the ground plate 1 outside the side plate F 7 32 7 5 6 3 Removing the Cassette Pickup Solenoid 0011 0659 iR2016J iR2016 iR2020 iR2016i iR2020i 1 Remove the harness 1...

Страница 213: ... bearing 1 and then remove the multi paper roller 2 F 7 37 When installing the multifeeder pickup roller pay attention to the orien tation Left side axis 1 Long Right side axis Short 2 F 7 38 7 5 8 Manual Feed Tray paper sensor 7 5 8 1 Removing the Drum Unit 0011 0672 iR2016J iR2016 iR2020 iR2016i iR2020i 1 Open the front cover 1 2 Turn the developer pressure release lever 2 clockwise and then ope...

Страница 214: ...clockwise and then open the left door 3 3 Draw out the drum unit 4 F 7 43 To prevent exposure to light cover the drum with several sheets of copy paper and place it in a safe place Open the left door fully to prevent the damage to the drum unit 7 5 9 2 Removing the Transfer Registration Unit 0011 2966 iR2016J iR2016 iR2020 iR2016i iR2020i 1 Remove the four screws 1 and then remove the transfer reg...

Страница 215: ...R2016i iR2020i 1 Open the front cover 1 2 Turn the developer pressure release lever 2 clockwise and then open the left door 3 3 Draw out the drum unit 4 F 7 49 To prevent exposure to light cover the drum with several sheets of copy paper and place it in a safe place Open the left door fully to prevent the damage to the drum unit 7 5 10 2 Removing the Registration Roller 0011 0677 iR2016J iR2016 iR...

Страница 216: ...016J iR2016 iR2020 iR2016i iR2020i 1 Open the front cover 1 2 Turn the developer pressure release lever 2 clockwise and then open the left door 3 3 Draw out the drum unit 4 F 7 54 To prevent exposure to light cover the drum with several sheets of copy paper and place it in a safe place Open the left door fully to prevent the damage to the drum unit 7 5 13 2 Removing the Transfer Registration Unit ...

Страница 217: ...ickup roller pay attention to the orien tation Left side axis 1 Long Right side axis Short 2 F 7 58 7 5 13 5 Removing the Separation Pad 0011 0671 iR2016J iR2016 iR2020 iR2016i iR2020i 1 I use a minus screwdriver and remove separation pad 1 F 7 59 1 2 1 2 1 ...

Страница 218: ......

Страница 219: ...Chapter 8 Fixing System ...

Страница 220: ......

Страница 221: ...ng the Drum Unit 8 9 8 4 2 2 Removing the rear cover 8 9 8 4 2 3 Removing the Left Cover Rear 8 9 8 4 2 4 Removing the Left Door 8 9 8 4 2 5 Removing the Fixing Unit 8 10 8 4 2 6 Removing the Fixing Film Unit 8 10 8 4 2 7 Removing the Pressure Roller 8 12 8 4 3 Fixing Film 8 13 8 4 3 1 Removing the Drum Unit 8 13 8 4 3 2 Removing the rear cover 8 13 8 4 3 3 Removing the Left Cover Rear 8 13 8 4 3 ...

Страница 222: ......

Страница 223: ...r Fixing temperature detection 1 Main thermistor TH1 Temperature control and fault detection 2 Sub thermistor TH2 Fault detection 3 Thermo switch TP1 Fault detection Fixing temperature control 1 Warm up temperature control 2 Normal temperature control 3 Sheet to sheet temperature control Protection functions 1 Detection of error in temperature control by thermistor 2 Detection of temperature rise ...

Страница 224: ...1 Inner delivery roller 4 Pressure roller 2 Fixing film speed sensor SR202 Fixing delivery sensor 3 Fixing film unit M201 Fixing drive motor 1 Fixing film speed sensor 4 Thermo switch TP1 2 Sub thermistor TH2 5 Pressure roller 3 Main thermistor TH1 6 Fixing film unit 2 3 1 4 M201 SR202 1 2 3 4 5 6 ...

Страница 225: ...alue 8 2 2 2 Controlling the Fixing Film Temperature 0011 2071 iR2016J iR2016 iR2020 iR2016i iR2020i This machine performs fixing temperature control according to the fixing heater temperature as mentioned below 1 Warm up temperature control Upon receipt of a print command from the DC controller the fixing heater heats to the temperature below the target paper present section temperature 2 Paper p...

Страница 226: ...16i iR2020i The paper passage detection mechanism of the fixing unit is shown below F 8 4 If a delay jam is detected by the fixing delivery sensor SR202 the fixing motor is stopped immediately to prevent paper from winding around the fixing roller Fixing mode Paper type Target initial fixing temperature 1 Initial number of sheets 2 Condition Normal Plain paper colored paper recycled paper label sh...

Страница 227: ... The temperature rise detected by the main thermistor is less than 5 deg C when energization of the fixing heater starts when the temperature detected by the main thermistor is less than 100 deg C or when 1 sec has lapsed since start of energization 5 The main thermistor has detected temperatures less than 115 deg C continuously for 400 or more msec since 1 second has lapsed after detection of 100...

Страница 228: ...ors detected an abnormally low temperature 140 deg C during temperature control E003 0000 ABNORMALLY LOW TEMPERATURE detected by main thermistor The temperature detected by the main thermistor does not reach the target temperature during initial rotation after it has reached the target temperature E003 0001 ABNORMALLY LOW TEMPERATURE detected by sub thermistor The temperature detected by the sub t...

Страница 229: ...e rear cover 0010 9894 iR2016J iR2016 iR2020 iR2016i iR2020i 1 Remove the four screws 1 and then detach the rear cover 2 F 8 7 8 4 1 3 Removing the Left Cover Rear 0010 9895 iR2016J iR2016 iR2020 iR2016i iR2020i 1 Remove the three screws 1 and then detach the left cover rear F 8 8 8 4 1 4 Removing the Left Door 0010 9909 iR2016J iR2016 iR2020 iR2016i iR2020i 1 Remove the screw 1 securing the door ...

Страница 230: ...i 1 Remove the two screws 1 and then detach the inner cover 2 at the upper front F 8 12 2 Remove the screw 1 and then detach the heater harness cover 2 Disconnect the connector 3 F 8 13 3 Disconnect the two connectors 1 and then release the fixing unit harness from the wire saddle 2 F 8 14 4 Raise the delivery upper guide 1 Remove the three screws 2 and then remove the fixing unit 3 F 8 15 1 1 2 1...

Страница 231: ...our screws 1 and then detach the rear cover 2 F 8 17 8 4 2 3 Removing the Left Cover Rear 0010 9938 iR2016J iR2016 iR2020 iR2016i iR2020i 1 Remove the three screws 1 and then detach the left cover rear F 8 18 8 4 2 4 Removing the Left Door 0010 9939 iR2016J iR2016 iR2020 iR2016i iR2020i 1 Remove the screw 1 securing the door support band Remove the connector 2 and reusable band 3 and release the d...

Страница 232: ... 3 Disconnect the two connectors 1 and then release the fixing unit harness from the wire saddle 2 F 8 24 4 Raise the delivery upper guide 1 Remove the three screws 2 and then remove the fixing unit 3 F 8 25 8 4 2 6 Removing the Fixing Film Unit 0010 9941 iR2016J iR2016 iR2020 iR2016i iR2020i 1 Release the hooks 1 and then remove the spur unit 2 by sliding it F 8 26 2 Remove the resin ring 1 and t...

Страница 233: ...nnect the sensor harness 2 Remove the screw 3 release the hook 4 and then remove the sensor holder 5 F 8 32 When installing the electrode plate 1 place it under the three claws 2 as shown below F 8 33 7 Remove the ground cable 1 from the holder and then free the fixing unit AC harness F 8 34 8 Remove the two pressure springs 1 remove the pressure plate by turning it in the direction of the arrow F...

Страница 234: ... 1 of the side plate as shown below F 8 39 10 Remove the delivery roller unit 1 and then remove the fixing film unit 2 F 8 40 11 Remove the spacer F 1 and spacer R 2 by sliding them F 8 41 8 4 2 7 Removing the Pressure Roller 0010 9942 iR2016J iR2016 iR2020 iR2016i iR2020i 1 Raise the claw 1 of the fixing unit inlet guide and remove the slide the fixing unit inlet guide 2 by sliding it in the dire...

Страница 235: ...in a safe place 8 4 3 2 Removing the rear cover 0010 9924 iR2016J iR2016 iR2020 iR2016i iR2020i 1 Remove the four screws 1 and then detach the rear cover 2 F 8 46 8 4 3 3 Removing the Left Cover Rear 0010 9925 iR2016J iR2016 iR2020 iR2016i iR2020i 1 Remove the three screws 1 and then detach the left cover rear F 8 47 8 4 3 4 Removing the Left Door 0010 9926 iR2016J iR2016 iR2020 iR2016i iR2020i 1 ...

Страница 236: ...0i 1 Remove the two screws 1 and then detach the inner cover 2 at the upper front F 8 51 2 Remove the screw 1 and then detach the heater harness cover 2 Disconnect the connector 3 F 8 52 3 Disconnect the two connectors 1 and then release the fixing unit harness from the wire saddle 2 F 8 53 4 Raise the delivery upper guide 1 Remove the three screws 2 and then remove the fixing unit 3 F 8 54 1 1 2 ...

Страница 237: ...ease the fixing unit harness 2 from the wire saddle 1 F 8 58 4 Remove the screw 1 and then remove the fixing paper guide 2 F 8 59 5 Remove the two screws 1 and then remove the right side stay 1 and left side stay 2 F 8 60 6 Disconnect the connector 1 and then disconnect the sensor harness 2 Remove the screw 3 release the hook 4 and then remove the sensor holder 5 F 8 61 When installing the electro...

Страница 238: ...re pressed against the rib 4 of the flange cap F 8 65 F 8 66 9 Release the claw 1 of the pressure cam remove the pressure cam 2 from the pressure shaft and then pull out the pressure shaft 3 in the direction of the arrow F 8 67 When installing the pressure cam position it inside the bent portion 1 of the side plate as shown below F 8 68 10 Remove the delivery roller unit 1 and then remove the fixi...

Страница 239: ...he four screws 1 and then detach the rear cover 2 F 8 72 8 4 4 3 Removing the Left Cover Rear 0010 9952 iR2016J iR2016 iR2020 iR2016i iR2020i 1 Remove the three screws 1 and then detach the left cover rear F 8 73 8 4 4 4 Removing the Left Door 0010 9954 iR2016J iR2016 iR2020 iR2016i iR2020i 1 Remove the screw 1 securing the door support band Remove the connector 2 and reusable band 3 and release t...

Страница 240: ... connectors 1 and then release the fixing unit harness from the wire saddle 2 F 8 79 4 Raise the delivery upper guide 1 Remove the three screws 2 and then remove the fixing unit 3 F 8 80 8 4 4 6 Removing the Fixing Delivery Sensor 0010 9960 iR2016J iR2016 iR2020 iR2016i iR2020i 1 Remove the resin ring 1 and then remove the fixing pressure release lever 2 F 8 81 When installing the fixing pressure ...

Страница 241: ...er place the electrode plate 1 under the three claws F 8 88 8 4 5 Fixing Film Sensor 8 4 5 1 Removing the Drum Unit 0010 9913 iR2016J iR2016 iR2020 iR2016i iR2020i 1 Open the front cover 1 2 Turn the developing assembly locking lever 2 clockwise to open the left door 3 3 Draw out the drum unit 4 F 8 89 When attaching or detaching the drum unit open the left door fully to pre vent the damage to the...

Страница 242: ...nd 3 and release the duplex unit harness from the wire saddle 4 F 8 92 2 Open the left door until it sops and pull out the hinge shaft 1 MEMO When a duplex unit option is installed remove it before pulling out the hinge shaft for each access F 8 93 3 Lift the left door with both hands to release it from the door rotation shaft 1 and then remove the left door F 8 94 8 4 5 5 Removing the Fixing Unit...

Страница 243: ...e the fixing unit harness from the wire saddle 2 F 8 97 4 Raise the delivery upper guide 1 Remove the three screws 2 and then remove the fixing unit 3 F 8 98 8 4 5 6 Removing the Fixing Film Sensor 0010 9922 iR2016J iR2016 iR2020 iR2016i iR2020i 1 Disconnect the connector 1 release the two hooks 2 and then remove the film sensor 3 F 8 99 2 1 1 3 2 1 2 1 2 3 2 1 2 3 1 2 ...

Страница 244: ......

Страница 245: ...Chapter 9 External and Controls ...

Страница 246: ......

Страница 247: ...oving the Left Cover Rear 9 7 9 4 2 4 Removing the Left Door 9 7 9 4 2 5 Removing the Fixing Unit 9 8 9 4 2 6 Removing the SDRAM 9 8 9 4 2 7 Removing the SDRAM 9 8 9 4 2 8 Removing the LAN Cover 9 9 9 4 2 9 Removing the IP Cover 9 9 9 4 2 10 Removing the IP Cover 9 10 9 4 2 11 Removing the Image Processor PCB Mount 9 10 9 4 2 12 Removing the Fixing Drive Unit 9 11 9 4 3 Power Supply Unit 9 12 9 4 ...

Страница 248: ...ear Cover 9 17 9 4 10 2 Removing the Main Motor 9 17 9 4 11 Fixing Driver Motor 9 17 9 4 11 1 Removing the Rear Cover 9 17 9 4 11 2 Removing the Left Cover Rear 9 17 9 4 11 3 Removing the RAM Cover 9 17 9 4 11 4 Removing the SDRAM 9 18 9 4 11 5 Removing the LAN Cover 9 18 9 4 11 6 Removing the IP Cover 9 18 9 4 11 7 Removing the IP Cover 9 19 9 4 11 8 Removing the Image Processor PCB Mount 9 19 9 ...

Страница 249: ...012 6049 iR2016i iR2020i The machine s control panel consists of the following PCBs and is controlled by the ASIC of the image processor PCB F 9 2 9 2 Fans 9 2 1 Overview iR2020 iR2020J iR2016 iR2016J 0011 2095 iR2016J iR2016 iR2020 This machine is provided with a fan to cool the fixing unit ASIC CPU LED LCD Key SW Image Processor PCB Cntrol Panel PCB Control Panel PCB for FAX Option LED Key SW AS...

Страница 250: ...Full speed control When the CPU on the DC controller outputs a fan full speed signal FAN_FULL the fan drive voltage switching circuit supplies a 24 V fan drive voltage to turn the heat exhaust fan at the full speed 2 Half speed control When the CPU on the engine controller outputs a fan half speed signal FAN_HALF the fan drive voltage switching circuit supplies a 16 V fan drive voltage to turn the...

Страница 251: ... V is supplied to the motors fan electromagnetic clutch solenoid etc 5 V and 3 3 V are supplied to the sensor etc There are two types of 24 V voltages 24 V which is normaly supplied from the low voltage power supply and 24 VR which is cut off when the front cover or the left door is opened The 24 VR also plays the role of a door open detection signal DOPEN This signal allows the CPU to detect that...

Страница 252: ...n Generates DC power from AC power for the options Main power switch SW1 Supplies AC power to the power supply PCB Front cover switch SW2 Detects opening closing of the front cover and cuts off 24 VR Left door switch SW3 Detects opening closing of the left door and cuts off 24 VR Output 24V 5V 5VR 3 3V 3 3VR Rated output voltage 24V 5 1V 5 1V 3 4V 3 4V Output voltage tolerance 10 ÅA 5 3 ÅA 4 3 ÅA ...

Страница 253: ...en detach the rear cover 2 F 9 10 9 4 1 3 Removing the Left Cover Rear 0011 0052 iR2016J iR2016 iR2020 iR2016i iR2020i 1 Remove the three screws 1 and then detach the left cover rear F 9 11 9 4 1 4 Removing the Main Motor 0011 0053 iR2016J iR2016 iR2020 iR2016i iR2020i 1 Disconnect the connector 1 remove three screws 2 and then remove the main motor 3 F 9 12 9 4 1 5 Removing the Registration Clutc...

Страница 254: ...it 2 F 9 17 6 Release the gear stopper 1 from the shaft and then remove the gear 2 F 9 18 7 Remove the six screws 1 and then remove the main drive unit 2 F 9 19 Since the gears in the main drive unit are not secured gears will fall if the main drive unit is inclined If gears should fall install them at the positions shown below F 9 20 9 4 2 Fixing Drive Assembly 9 4 2 1 Removing the Drum Unit 0011...

Страница 255: ...2 9 4 2 3 Removing the Left Cover Rear 0011 0610 iR2016J iR2016 iR2020 iR2016i iR2020i 1 Remove the three screws 1 and then detach the left cover rear F 9 23 9 4 2 4 Removing the Left Door 0011 0611 iR2016J iR2016 iR2020 iR2016i iR2020i 1 Remove the screw 1 securing the door support band Remove the connector 2 and reusable band 3 and release the duplex unit harness from the wire saddle 4 F 9 24 2 ...

Страница 256: ... connectors 1 and then release the fixing unit harness from the wire saddle 2 F 9 29 4 Raise the delivery upper guide 1 Remove the three screws 2 and then remove the fixing unit 3 F 9 30 9 4 2 6 Removing the SDRAM 0011 0614 iR2016J iR2016 iR2020 iR2016i iR2020i 1 Remove the four screws 1 and then detach the RAM cover 2 F 9 31 9 4 2 7 Removing the SDRAM 0011 0615 iR2016J iR2016 iR2020 iR2016i iR202...

Страница 257: ...R2020 iR2016i iR2020i 1 Remove a connector 1 of IP LAN cable and a cable clamp 2 F 9 34 2 Release SOFT ID cable 1 from the cable clamp 2 F 9 35 3 Release a claw 1 of cable guide and detach the cable guide 2 upward F 9 36 4 Open a core 1 F 9 37 5 Remove the two screws 1 and then detach the flexible cable guide 2 F 9 38 6 Remove the 10 screws 1 and then detach the IP cover 2 1 2 A A 1 2 1 1 2 1 2 1 ...

Страница 258: ...42 4 Remove the two screws 1 and then detach the flexible cable guide 2 F 9 43 5 Remove the 10 screws 1 and then detach the IP cover 2 F 9 44 9 4 2 11 Removing the Image Processor PCB Mount 0011 0630 iR2016J iR2016 iR2020 iR2016i iR2020i 1 Disconnect the two reader flexible cables 1 Release the harness 2 from the wire saddles 3 Remove the two screws 4 and then detach the flexible cable cover 5 1 1...

Страница 259: ...e image processor PCB with the PCB mount F 9 47 9 4 2 12 Removing the Fixing Drive Unit 0011 0631 iR2016J iR2016 iR2020 iR2016i iR2020i 1 Release the claw 1 on the gear cover and then remove the gear cover 2 by sliding it in the direction of the arrow F 9 48 2 Release the gear stopper 1 and then remove the gear 2 F 9 49 3 Remove the four screws 1 and then remove the fixing drive unit 2 5 1 4 3 2 2...

Страница 260: ... 9 52 9 4 3 3 Removing the Delivery Tray 0010 9968 iR2016J iR2016 iR2020 iR2016i iR2020i 1 Remove the two screws 1 and then detach the delivery tray 2 F 9 53 9 4 3 4 Removing the Main Power Supply PCB 0010 9969 iR2016J iR2016 iR2020 iR2016i iR2020i 1 Remove the connector 1 and screw 2 and then remove the power supply PCB 3 F 9 54 F 9 55 9 4 4 Control Panel 9 4 4 1 Removing the Reader Front Cover 0...

Страница 261: ...move the two screws 1 and then turn over the operation panel unit 2 F 9 59 2 Disconnect the flexible cable holder 1 and disconnect the connector 3 of the flexible cable 2 to remove the operation panel unit 4 F 9 60 9 4 5 DC Controller PCB 9 4 5 1 Removing the Rear Cover 0010 9963 iR2016J iR2016 iR2020 iR2016i iR2020i 1 Remove the four screws 1 and then detach the rear cover 2 F 9 61 9 4 5 2 Removi...

Страница 262: ...livery Tray 0011 0415 iR2016J iR2016 iR2020 iR2016i iR2020i 1 Remove the two screws 1 and then detach the delivery tray 2 F 9 65 9 4 6 4 Removing the Option Power Supply PCB 0011 0416 iR2016J iR2016 iR2020 iR2016i iR2020i 1 Disconnect the connector J16 1 on the power supply PCB F 9 66 2 Disconnect the connector J53 1 on the power supply PCB Remove the three screws 2 and then remove the option powe...

Страница 263: ... iR2016i iR2020i 1 Remove the connector 1 and screw 2 and then remove the power supply PCB 3 F 9 71 F 9 72 9 4 7 5 Removing the HVT PCB 0010 9975 iR2016J iR2016 iR2020 iR2016i iR2020i 1 Remove the connector 1 and screw 2 and then remove the HVT PCB F 9 73 When installing the HVT PCB check that the contacts on the high voltage electrode plate 1 touch the contacts on the PCB F 9 74 9 4 8 Fixing Heat...

Страница 264: ...harge fan 1 F 9 78 9 4 9 Fan Filter 9 4 9 1 Removing the Fan Filter 0011 0418 iR2016J iR2016 iR2020 iR2016i iR2020i 1 Open the left door until it stops 2 Remove the four screws 1 and then remove the transfer registration unit 2 F 9 79 3 Disconnect the connector 1 and then release the harness from the wire saddle 2 F 9 80 4 Remove the two screws 1 and then remove the duct 2 1 1 2 2 1 2 1 1 1 1 2 2 ...

Страница 265: ...iR2020 iR2016i iR2020i 1 Disconnect the connector 1 remove three screws 2 and then remove the main motor 3 F 9 84 9 4 11 Fixing Driver Motor 9 4 11 1 Removing the Rear Cover 0011 0406 iR2016J iR2016 iR2020 iR2016i iR2020i 1 Remove the four screws 1 and then detach the rear cover 2 F 9 85 9 4 11 2 Removing the Left Cover Rear 0011 0407 iR2016J iR2016 iR2020 iR2016i iR2020i 1 Remove the three screws...

Страница 266: ...emove the four screws 1 and then detach the LAN cover 2 F 9 89 9 4 11 6 Removing the IP Cover 0011 0624 iR2016 iR2020 iR2016i iR2020i 1 Remove a connector 1 of IP LAN cable and a cable clamp 2 F 9 90 2 Release SOFT ID cable 1 from the cable clamp 2 F 9 91 3 Release a claw 1 of cable guide and detach the cable guide 2 upward F 9 92 4 Open a core 1 F 9 93 5 Remove the two screws 1 and then detach th...

Страница 267: ...p 2 F 9 96 2 Release a claw 1 of cable guide and detach the cable guide 2 upward F 9 97 3 Open a core 1 F 9 98 4 Remove the two screws 1 and then detach the flexible cable guide 2 F 9 99 5 Remove the 10 screws 1 and then detach the IP cover 2 F 9 100 9 4 11 8 Removing the Image Processor PCB Mount 0011 0626 iR2016J iR2016 iR2020 iR2016i iR2020i 1 2 1 1 1 2 1 2 1 2 1 1 2 1 1 1 2 ...

Страница 268: ...ing Unit Drive Motor 0011 0629 iR2016J iR2016 iR2020 iR2016i iR2020i 1 Disconnect the connector 1 remove the two screws 2 and then remove the fixing motor 3 F 9 104 9 4 12 Left Door 9 4 12 1 Removing the Drum Unit 0010 9897 iR2016J iR2016 iR2020 iR2016i iR2020i 1 Open the front cover 1 2 Turn the developing assembly locking lever 2 clockwise to open the left door 3 3 Draw out the drum unit 4 F 9 1...

Страница 269: ...he Left Door 0010 9900 iR2016J iR2016 iR2020 iR2016i iR2020i 1 Remove the screw 1 securing the door support band Remove the connector 2 and reusable band 3 and release the duplex unit harness from the wire saddle 4 F 9 108 2 Open the left door until it sops and pull out the hinge shaft 1 MEMO When a duplex unit option is installed remove it before pulling out the hinge shaft for each access F 9 10...

Страница 270: ......

Страница 271: ...Chapter 10 Maintenance and Inspection ...

Страница 272: ......

Страница 273: ... 1 10 1 1 Overview 10 1 10 1 2 Reader Unit 10 1 10 1 3 Printer Unit 10 1 10 2 Durables and Consumables 10 1 10 2 1 Overview 10 1 10 2 2 Reader Unit 10 1 10 2 3 Printer Unit 10 1 10 3 Scheduled Servicing Basic Procedure 10 2 10 3 1 Scheduled Servicing 10 2 ...

Страница 274: ......

Страница 275: ...2020 iR2016i iR2020i The machine has parts that may require replacement once or more during the period of product warranty because of wear or damage Replace them as needed by referring to their indicated estimated lives Checking the Timing of Replacement Use the following service mode item to check the timing of replacement COUNTER DRBL 1 FX UNIT Fixing Unit TR ROLL Transfer roller DV UNIT C Devel...

Страница 276: ...dure 10 3 1 Scheduled Servicing 0011 2842 iR2016J iR2016 iR2020 iR2016i iR2020i The reader and printer unit does not have items that require scheduled servicing Be sure to clean the copyboard glass and the ADF reading glass during every service visit 5 4 3 2 1 ...

Страница 277: ...Chapter 11 Standards and Adjustments ...

Страница 278: ......

Страница 279: ...016i 11 1 11 2 Image Formation System 11 1 11 2 1 Procedure after Replacing the Developing Assembly 11 1 11 3 Electrical Components 11 1 11 3 1 Procedure after Replacing the Image Processor PCB iR2020 iR2020J iR2016 iR2016J 11 1 11 3 2 Procedure after Replacing the Image Processor PCB iR2020i iR2016i 11 1 11 3 3 Procedure after Replacing the USB Memory iR2020i iR2016i 11 2 11 3 4 Actions to Take b...

Страница 280: ......

Страница 281: ...de 11 Close the front cover The machine will run in the developer idling mode for about 1 minute 12 When the machine stops the idling mode ends Install the toner cartridge following the above mentioned procedure 11 3 Electrical Components 11 3 1 Procedure after Replacing the Image Processor PCB iR2020 iR2020J iR2016 iR2016J 0011 2555 iR2016J iR2016 iR2020 If you have replaced the image processor P...

Страница 282: ...4 Message SYSTEM SW004 00000000 8 Press the Reset key to exit the service mode 9 Turn off the main power switch and then turn it on again 10 Start the PC and connect it to this machine with a USB cable 11 Open My Computer on the PC to check that the Removable Disk icon is displayed If the Removable Disk icon is not displayed repeat the above procedure starting with step 1 12 Double click the Remov...

Страница 283: ...Chapter 11 11 3 ...

Страница 284: ......

Страница 285: ...Chapter 12 Correcting Faulty Images ...

Страница 286: ......

Страница 287: ... 1 6 Others 12 2 12 2 Outline of Electrical Components 12 2 12 2 1 Clutch Solenoid 12 2 12 2 1 1 List of Clutches Solenoids 12 2 12 2 2 Motor 12 2 12 2 2 1 List of Motors 12 2 12 2 3 Fan 12 3 12 2 3 1 List of Fans 12 3 12 2 4 Sensor 12 4 12 2 4 1 List of Sensors 12 4 12 2 5 Switch 12 6 12 2 5 1 List of Switches 12 6 12 2 6 Lamps Heaters and Others 12 6 12 2 6 1 List of Lamps Heaters and Others 12 ...

Страница 288: ......

Страница 289: ...ion Fixing Check whether the fixing film and pressure roller are free from wear scratches dirt and deformation Check whether the fixing thermistor is broken Check whether the thermo switch is conductive Paper transport Check whether the paper transport path is free from foreign objects such as paper chips Check whether the paper pickup feed and separation rollers are free from paper dust Also chec...

Страница 290: ...ng a toner cartridge developing unit or drum unit right after it has been brought in from a cold to warm place to avoid condensation Be sure to leave it alone for a while 1 to 2 hr opening it after it has become fully used to the temperature of the site 12 2 Outline of Electrical Components 12 2 1 Clutch Solenoid 12 2 1 1 List of Clutches Solenoids 0011 2720 iR2016J iR2016 iR2020 iR2016i iR2020i R...

Страница 291: ...CB Error M401 FK2 1066 J409 Symbol Name Function M201 Fixing motor Drives the fixing unit M203 Polygon motor Drives the laser scanner M204 Main motor Drives the main parts of the printer Symbol Part No DC controller PCB Error M201 FK2 1067 J202 E007 E808 M203 Scanner unit FM2 3383 iR2016J 2020J FM2 3384 iR2016 2016i 2020 2020i J205 M204 FK2 1080 J208 E010 Symbol Name Function FM1 Heat discharge fa...

Страница 292: ... opening closing of the copyboard cover SR404 Original sensor 1 Detects the original size AB INCH A or INCH AB SR405 Original sensor 2 Detects the original size AB A or INCH AB SR406 Original sensor 3 Detects the original size all destinations SR407 Original sensor 4 Detects the original size AB or INCH AB SR408 Original sensor 5 Detects the original size INCH A CIS1 CIS Reads the original Symbol ...

Страница 293: ... paper SR209 Registration sensor Detects registration paper TH1 Fixing main thermistor Detects the fixing heater temperature TH2 Fixing sub thermistor Detects the fixing heater temperature TP1 Thermo switch Cuts off the heater power supply line when an abnormal temperature is detected Symbol Part No DC controller PCB Jam code SR201 FG3 3501 J217 SR202 WG8 5696 J217 010c 0210 0214 1118 SR203 WG8 56...

Страница 294: ...thers 0011 2725 iR2016J iR2016 iR2020 iR2016i iR2020i Reader Unit Symbol Name Function SW2 Front cover switch Detects opening closing of the front cover SW3 Left door switch Detects opening closing of the left door SW4 Cassette 1 size detection switch Detects the cassette 1 paper size Symbol Part No DC controller PCB Power supply PCB SW2 FM2 4433 J12 SW3 FM2 4433 J12 SW4 WC2 5332 J213 SR101 SR206 ...

Страница 295: ...Symbol Name Function H1 Fixing main heater Used as the main heater for fixing H2 Fixing sub heater Used as the sub heater for fixing H6 Cassette heater Prevents paper in the cassette from absorbing moisture VA1 Varistor Used as a varistor SP1 Speaker Used as a speaker for fax unit Symbol Part No H1 H2 Fixing film unit FM2 3346 120V FM2 3353 230V H6 FK2 1146 100V FK2 1088 230V Symbol Part No Modem ...

Страница 296: ...2 coin vendor interface 7 Modem PCB FM2 4057 control the fax 8 PCL PCB FM2 4061 PCL function control 9 NCU PCB FM2 2790 controls the line switching operation 10 modular PCB FM2 4777 120V FM2 4772 230V fax line interface 11 DC controller PCB FM2 4023 KQW FM2 4024 KQY KQX KQZ FM2 4014 KRE KRL FM2 4015 KRJ KRC KRK KRE FM2 4026 KRM KRU FM2 4016 KRR KRU FM2 4017 KRS KRP KRQ KRT controls the printer uni...

Страница 297: ...Chapter 12 12 9 F 12 11 F 12 12 1 2 3 4 5 6 7 8 9 10 11 12 13 14 15 16 17 ...

Страница 298: ......

Страница 299: ...Chapter 13 Self Diagnosis ...

Страница 300: ......

Страница 301: ... Related to Finisher 13 3 13 3 3 Jam Codes Related to ADF 13 4 13 3 4 Jam Codes Related to Duplex Unit 13 4 13 3 5 Jam Codes Related to Inner 2 way Tray 13 4 13 4 Finisher Error Codes 13 4 13 4 1 Error Code Details 13 4 13 5 FAX Error Codes 13 8 13 5 1 Outline 13 8 13 5 1 1 Error Code Outline 13 8 13 5 2 User Error Code 13 8 13 5 2 1 User Error Code 13 8 13 5 3 Service Error Code 13 8 13 5 3 1 Ser...

Страница 302: ......

Страница 303: ... communication error E520 0000 Offset error E531 0000 Stapling error E540 0001 Paper surface not detected standard tray 0002 Not moved within the specified time standard tray 0003 Sensor not reached within 3 seconds standard tray 0005 Encoder clock failure standard tray E542 0001 Paper surface not detected optional tray 0002 Not moved within the specified time optional tray 0003 Sensor not reached...

Страница 304: ...toner full sensor Replace the DC controller PCB E052 0000 Erroneous connection to duplex unit Disconnection of the duplex unit was detected after power on detection of normal connection to the duplex unit and start of communication Check the connectors of the duplex unit and DC controller PCB Replace the duplex controller PCB Replace the DC controller PCB E100 0000 BD detection PCB failure The BD ...

Страница 305: ...unit Replace the fixing film unit Replace the fixing drive motor Replace the DC controller PCB Replace the power supply PCB Code Name Sensor No Description 0104 Delay jam in paper pickup section SR209 The registration sensor cannot detect the leading edge of paper from the moment paper pickup starts to the moment the jam detection time is reached 0208 Stationary jam in paper pickup section SR209 T...

Страница 306: ...r absence Pull out the document PI11 The Document set sensor has been held off since start of pickup 000c Delivery reversal sensor delay PI6 PI7 The delivery reversal sensor does not detect paper since the paper has been fed by the predetermined distance since the read sensor was turned on 000d Delivery reversal sensor stationary PI6 The trailing edge of paper is not detected when the paper has be...

Страница 307: ...ffset HP sensor failure The offset motor was driven for 1000 ms in the HP sensor escape direction but the offset HP sensor did not turn off Check the connector of the offset HP sensor Check the connector of the offset motor Replace the offset HP sensor Replace the offset motor Replace the finisher controller PCB E531 0001 Staple unit failure Staple HP sensor failure Finisher controller PCB failure...

Страница 308: ... tray shift motor Replace the finisher controller PCB 0003 Standard tray shift motor or finisher controller PCB failure Standard tray HP sensor failure Standard tray clock sensor failure Standard tray shift motor load failure The standard tray was operated but it did not reach the sensor within 300 ms Check the connector of the standard tray HP sensor Check the connector of the standard tray clock...

Страница 309: ...place the optional tray HP sensor Replace the optional tray clock sensor Replace the optional tray shift motor Replace the finisher controller PCB 0005 Optional tray motor or finisher controller PCB failure Optional tray HP sensor failure Optional tray clock sensor failure Optional tray shift motor load failure The encoder clock signal was not detected two or more times when the optional tray was ...

Страница 310: ...on when 1000 ms have lapsed since the shutter unit had performed open operation resulting in incomplete open operation Check the connector of the shutter open sensor Check the connector of the shutter clutch Check the connector of the shutter motor Replace the shutter open sensor Replace the shutter clutch Replace the shutter drive motor Replace the finisher controller PCB 0002 Shutter drive motor...

Страница 311: ...ine and suffer T1 timeout 0674 Tx at time of V 34 transmission a shift in procedure from phase 3 and phase 4 to the control channel and thereafter stops causing the machine to release the line and suffer T1 timeout 0675 Rx at time of V 34 reception a shift in procedure from phase 3 and phase 4 to the control channel and thereafter stops causing the machine to release the line and suffer T1 timeout...

Страница 312: ...0782 Tx at time of ECM transmission DCN is received after transmission of EOR EOM 0783 Tx at time of ECM transmission the procedural signal has been transmitted more than specified after transmission of EOR EOM or T5 time out 60 sec has occurred 0784 Tx at time of ECM transmission ERR is received after transmission of EOR EOM 0785 Tx at time of ECM transmission no meaningful signal is received aft...

Страница 313: ...Chapter 14 Service Mode ...

Страница 314: ......

Страница 315: ...0 14 3 5 1 List of Functions 14 10 14 3 5 2 Detailed Discussions of Bit 1 14 10 14 3 5 3 Detailed Discussions of Bit 2 14 10 14 3 6 SSSW SW12 14 10 14 3 6 1 List of Functions 14 10 14 3 7 SSSW SW13 14 11 14 3 7 1 List of Functions 14 11 14 3 7 2 Detailed Discussions of Bit 2 14 11 14 3 8 SSSW SW14 14 11 14 3 8 1 List of Functions 14 11 14 3 8 2 Detailed Discussions of Bit 2 14 11 14 3 8 3 Detailed...

Страница 316: ...1 Count type select 14 16 14 6 Setting of Scanner Functions SCANNER 14 19 14 6 1 Setting of Bit Switch 14 19 14 6 2 Numeric Parameter Functional configuration 14 19 14 6 3 024 CIS scan position during ADF scanning 14 20 14 6 4 026 Distance from the standby position of CIS to the shading start point 14 20 14 6 5 031Vertical scan start position adjustment 14 20 14 6 6 032Horizontal scan start positi...

Страница 317: ...n adjustment cassette 1 14 25 14 7 2 7 036 Left end registration adjustment cassette 2 14 25 14 7 2 8 037 Left end registration adjustment cassette 3 14 25 14 7 2 9 038 Left end registration adjustment cassette 4 14 25 14 7 2 10 039 Left end registration adjustment duplex unit 14 25 14 7 2 11 040 Target fixing temperature adjustment manual feed tray 14 25 14 7 2 12 041 Target fixing temperature ad...

Страница 318: ...6i 14 37 14 15 4 D RAM Test 1 D RAM TEST 14 39 14 15 5 Scan Test 2 SCAN TEST 14 39 14 15 6 Print Test 3 PRINT TEST 14 40 14 15 7 MODEM Test 4 MODEM TEST 14 40 14 15 8 Function Test 6 FUNCTION TEST iR2020 iR2020J 14 42 14 15 9 Function Test 6 FUNCTION TEST iR2016 iR2016J 14 46 14 15 10 Function Test 6 FUNCTION TEST iR2020i 14 50 14 15 11 Function Test 6 FUNCTION TEST iR2016i 14 53 14 15 12 Roller c...

Страница 319: ...port export of user information through USB COUNTER Use it to check estimates for maintenance parts replacement REPORT Use it to generate reports on various service data DOWNLOAD Use it to download firmware to the ROM of a PCB in question CLEAR Use it to reset various data to initial settings ROM Displays ROM information such as version numbers and checksums TEST MODE Makes various status checks s...

Страница 320: ...16i 0012 6182 iR2016i iR2020i 1 Selecting User Mode Press the User mode key 2key 8key User mode key sequentially SSSW NUMERIC Param NUMERIC Param TEXT PHOTO 2 Selecting a Menu Item Select the Menu item using the left right arrow key 3 Press the OK key 5 Registering Setting Data Enter data using the keypad and press the OK key 6 Press the Stop key or User mode key to end service mode AUTO 01 NUMERI...

Страница 321: ...nctions key sequentially SSSW NUMERIC Param NUMERIC Param 2 Selecting a Menu Item Select the Menu item using the left arrow right arrow on the touch panel 3 Press OK 5 Registering Setting Data Enter data using the keypad and then press OK 6 Press the Stop Additional functions Reset key to end the service mode NUMERIC Param 3 NUMER I C P a r am 001 001 002 00 2 0 0 10 4 Selecting a Prarameter Selec...

Страница 322: ...1 3500 35sec 0 9999 T 30 T1 timer for reception 012 not used 013 1300 13sec 500 3000 T30 EOL timer 014 not used 015 120 1200ms 0 999 hooking detection time setting 016 4 4sec 0 9 fax tel switch over function between line acquisition and pseudo RBTtransmission 017 100 1000ms 0 999 pseudo RBT signal pattern ON time setting 018 0 0ms 0 999 pseudo RBT signal pattern OFF time short setting 019 200 2000...

Страница 323: ...n correction superfine 045 47 0 to 200 one unit 0 1mm Horizontal scan end position correction fine 046 47 0 to 200 one unit 0 1mm Horizontal scan end position correction standard 047 16 0 to 32 one unit 0 1 Vertical scan magnification correction scanning on ADF 048 16 0 to 32 one unit 0 1 Horizontal scan magnification correction scanning on ADF 049 053 Not used 054 16 0 to 32 one unit 0 1 Pickup m...

Страница 324: ...end registration adjustment duplex unit 40 6 30 to 0 1 unit 5 deg C Target fixing temperature adjustment multi 41 6 30 to 0 1 unit 5 deg C Target fixing temperature adjustment cassette 1 42 6 30 to 0 1 unit 5 deg C Target fixing temperature adjustment cassette 2 43 6 30 to 0 1 unit 5 deg C Target fixing temperature adjustment cassette 3 44 6 30 to 0 1 unit 5 deg C Target fixing temperature adjustm...

Страница 325: ... areas under user registration setting SERVICE DATA Use it to clear the counters numerator date and start data form the system dump list COUNTER Use it to clear the maintenance parts counter data and each mode counter data SOFT CNT Not used TYPE Use it to clear the user data and the service data by specified settings HST ACTIVITY Use it to clear the contents of the communications control report AC...

Страница 326: ...6J iR2016 iR2020 iR2016i iR2020i T 14 2 1 Only for the iR2020i iR2016 model ROM Item Function MAIN Use it to indicate the version of the ROM SYSTEM on the image processor PCB MAIN2 Use it to indicate the version of the ROM BOOT on the image processor PCB OPROM Use it to indicate the version of option ROM ECONT Use it to indicate the version of the ROM on the DC controller PCB TEST MODE 1 9 Item Fu...

Страница 327: ...1 Be sure to change bit 4 before changing this bit if errors still occur change this bit When high speed is selected only high speed signals images will be received after transmission of the CFR signal 14 3 4 4 Detailed Discussions of Bit 4 0011 1742 iR2016J iR2016 iR2020 iR2016i iR2020i Use it to select the time length during which low speed signals are ignored after transmission of the CFR signa...

Страница 328: ...les that follow and select an appropriate time length When do not enable is selected using bit 7 the time out length for a single page for all modes will depend on the setting of bit 0 and bit 1 T 14 6 T 14 7 T 14 8 Bit Function 1 0 0 not used 1 Conversion from mm to inch text mode convert do not convert 2 Conversion from mm to inch text photo mode convert do not convert 3 not used 4 not used 5 no...

Страница 329: ...e machine will indicate that it reads and records at an inch configuration resolution using the DIS DCS or DTC signal 14 3 9 SSSW SW28 14 3 9 1 List of Functions 0011 1754 iR2016J iR2016 iR2020 iR2016i iR2020i T 14 11 14 3 9 2 Detailed Discussions of Bit 0 0011 1755 iR2016J iR2016 iR2020 iR2016i iR2020i Select whether to use the V 8 protocol when calling If NO is selected the V 8 protocol is inhib...

Страница 330: ...led Discussions of Bit 5 0011 3592 iR2016J iR2016 iR2020 iR2016i iR2020i When Detect with the new method is selected tone is detected for 3 5 seconds before call origination in order to discriminate between dial tone and voice If dial tone is detected and the time since line seizure is 3 5 seconds or longer call origination takes place immediately If the time since line seizure is less than 3 5 se...

Страница 331: ... display the waste toner full warning as a drum replacement required message or as E019 displayed on an operator call Select 1 to display a rum replacement required message on an operator call Select 0 to display E019 on an service call 14 4 Setting of Menu Switch Menu 14 4 1 Menu Switch Composition 0011 1768 iR2016J iR2016 iR2020 iR2016i iR2020i T 14 15 14 4 2 No 005 NL equalizer 0011 1770 iR2016...

Страница 332: ...34 primary channel between 2 4K and 33 6K bps in increments of 2400 bps 0 2 4K to 13 33 6K bps 14 4 7 No 010 Frequency of the pseudo CI signal 0011 1775 iR2016J iR2016 iR2020 iR2016i iR2020i You may select a frequency for the pseudo CI signal Some types of external telephones do not ring when the fax tel switch over function is ON To sound the ring change the pseudo CI signal 14 5 Setting of Numer...

Страница 333: ...arameter if errors occur frequently at time of communication because of the condition of the line Memo Any of the following error codes may be indicated because of the condition of the line 0005 0018 The line condition identification time is between when the dial signal is transmitted and when the line condition is cut for the transmitting party while it is between when the DIS signal is transmitt...

Страница 334: ...nge the type of soft counter 4 of the control panel to suit the needs of the user No 60 Use it to change the type of soft counter 5 of the control panel to suit the needs of the user No 61 Use it to change the type of soft counter 6 of the control panel to suit the needs of the user The default type settings of soft counter is different from models Soft Counter Specifications The soft counters are...

Страница 335: ...l copy S 1 221 Copy Bk1 1 1 222 Copy Bk2 2 1 227 Copy Bk L 1 228 Copy Bk S 1 237 Copy Bk L 2 sided 1 238 Copy Bk S 2 sided 1 249 CopyA Bk1 1 1 250 CopyA Bk2 2 1 255 CopyA Bk L 1 256 CopyA Bk S 1 265 CopyA Bk L 2 sided 1 266 CopyA Bk S 2 sided 1 277 Local copy Bk1 1 1 278 Local copy Bk2 2 1 283 Local copy Bk L 1 284 Local copy Bk S 1 293 Local copy Bk L 2 sided 1 294 Local copy Bk S 2 sided 1 301 P...

Страница 336: ... 726 Recieved print Bk S 2 sided 1 801 Report print Total1 802 Report print Total2 803 Report print L 804 Report print S 809 Report print Bk1 810 Report print Bk2 815 Report print Bk L 816 Report print Bk S 825 Report print Bk L 1 826 Report print Bk S 1 Serial No on counter check screen Counter type Scan system Bk 1 sided L Bk 1 sided S Bk 2 sided L Bk 2 sided S Total scan E mail scan FileS hare ...

Страница 337: ...ndby position of CIS to the shading start point 22 6 48 one unit 0 1mm 027 030 Not used 031 Vertical scan start position adjustment 35 0 70 one unit 0 1mm 032 Horizontal scan start position adjustment 115 50 150 one unit 0 1mm 033 Vertical scan magnification correction 16 0 32 one unit 0 1 034 Not used 035 036 Reader motor speed adjustment 474 037 040 Not used 041 Vertical scan start position adju...

Страница 338: ...canning direction 14 6 8 035 036 Reader motor speed change 0011 2010 iR2016J iR2016 iR2020 iR2016i iR2020i Though no market adjustment work needs to be carried out enter factory defaults at image processor PCB replacement 14 6 9 041 Vertical scan start position adjustment when scanning on a document fed from ADF 0011 2011 iR2016J iR2016 iR2020 iR2016i iR2020i Adjust the position at which vertical ...

Страница 339: ...ion of vertical scanning of a document fed from the ADF The larger the adjustment value the more the image stretches in the vertical scan ning direction 14 6 16 048 Horizontal scan magnification correction when scanning on a document fed from ADF 0011 2027 iR2016J iR2016 iR2020 iR2016i iR2020i Correct the magnification of horizontal scanning of a document fed from the ADF The smaller the adjustmen...

Страница 340: ...on again 14 6 24 213 XYZ correction value X of standard white plate iR2020i iR2016i 0012 6233 iR2016i iR2020i If you replaced the image processor PCB enter values indicated on the service label If you have replaced the document glass enter values indicated on the new document glass and write the values on the service label F 14 4 14 6 25 214 XYZ correction value Y of standard white plate iR2020i i...

Страница 341: ...6i iR2020i Select whether to enable or disable black belt addition mode If the user uses paper that causes fixed toner on paper to be fused and adhered to drum selecting Yes will clean the drum by forming a black band on the drum surface during the reverse rotation which is performed after printing on 50 sheets Implementation of this mode could result in a drum life falling short of its life expec...

Страница 342: ... of Bit 1 0011 1897 iR2016J iR2016 iR2020 iR2016i iR2020i Select whether to halt stapling job when a finisher installed has run out of staples Select Enable to halt staple jobs when the finisher has run out of staples 14 7 1 3 4 Detailed Discussions of Bit 2 0011 1898 iR2016J iR2016 iR2020 iR2016i iR2020i Select whether to display a tray full message when the maximum allowable stapled document cou...

Страница 343: ...stration margin of paper picked from cassette 4 The larger the adjustment value the wider the left end margin of the image becomes 14 7 2 10 039 Left end registration adjustment duplex unit 0011 1910 iR2016J iR2016 iR2020 iR2016i iR2020i Adjust the left end registration margin of paper picked from a duplex unit The larger the adjustment value the wider the left end margin of the image becomes 14 7...

Страница 344: ...sizes listed below 14 8 Setting of System Functions SYSTEM 14 8 1 Bit Switch Settings 0011 1934 iR2016J iR2016 iR2020 iR2016i iR2020i SSSW SW03 functional configuration T 14 22 Bit 6 details Select whether to enable the host machine to work as a USB storage device or not If the host machine is plugged into a PC with this setting enabled it allows user registration data user data and telephone regi...

Страница 345: ... vendor use CONTROL Set the PDL printer output control where the control card I F CC V is supported 0 Enable printing without a card mounted 1 Enable printing with a card mounted in position Maintenance counter list Item Counter Explanation TOTAL Total counter SERVICE1 Service total counter 1 SERVICE2 Service total counter 2 TTL Total counter COPY Total copy counter PDL PRT PDL print counter FAX P...

Страница 346: ...0 iR2016i iR2020i System Dump List Use it to check the history of communications both successful and error Item Explanation SERVICE DATA LIST Service mode service soft switch output SSSW MENU NUMERIC Param SPECIAL NCU SCAN PRINT SYSTEM ROM start date SYSTEM DATA LIST Service mode service soft switch output SSSW MENU NUMERIC Param SPECIAL NCU SCAN PRINT SYSTEM ROM start date System dump list output...

Страница 347: ...d in connection with different modem speeds Standard Fine Super Fine Ultra Fine 6 Total number of pages transmitted and received for each coding method 7 Total number of pages transmitted and received in each mode 8 Total number of pages printed scanned 9 Total number of occurrences for error code T 14 25 It provides error information on the 3 most recent communications Indication sample 280 1 7 3...

Страница 348: ...n transmitted 8 RX procedural signal received TX procedural signal transmitted 14 11 4 Counter List 0011 1177 iR2016J iR2016 iR2020 iR2016i iR2020i Explanation Maintenance supplies counter output For more detailed information about the maintenance supplies counter output execute service mode Display counter information Counters 14 11 5 Error Log List 0011 1180 iR2016J iR2016 iR2020 iR2016i iR2020i...

Страница 349: ...3 Jam time 4 Jam recovery time 5 Location 3 Host machine 4 ADF 5 Finisher 6 Occurrence category 0 Host machine 1 ADF 2 Finisher JAM ERR LOG REPORT 07 12 2005 13 07 FAX 001 1 2 3 4 5 6 7 8 9 10 1 2 3 4 5 6 7 8 JAM 01 04 12 12 17 20 03 4 1 0012 000026 1 A4 20 04 12 12 17 20 03 4 1 0012 000026 1 A4 ERR 01 04 12 12 17 15 36 3 0010 0000 000691 20 04 12 12 17 15 36 3 0010 0000 000691 ...

Страница 350: ...ry reversal sensor delay jam 000d Delivery reversal sensor stationary jam 000e ADF cover open error 000f User ADF open error 0010 Pickup NG Finisher 0130 Inlet sensor delivery delay jam 0231 Inlet sensor delivery stationary jam 0033 Bundle delivery jam 0035 Stapler jam 1036 Power on jam 1137 Door open jam 8 Total counter display 9 Pickup stage position 0 Manual feed tray 1 Cassette 1 2 Cassette 2 ...

Страница 351: ... 046 047 048 054 213 214 215 WRITE ADJ PRM 031 032 033 034 035 036 037 038 039 OPTYION ROM USB MEMORY DELIVERY FULL SENSOR 1 DELIVERY FULL SENSOR 2 USB SERIAL No MAC ADDRESS _ _ _ _ _ _ _ _ _ _ _ _ _ _ _ _ _ _ _ _ _ _ _ _ _ _ _ _ _ _ _ _ _ _ _ _ _ _ _ _ _ _ _ _ _ _ _ _ _ _ _ _ _ _ _ _ _ _ _ _ _ _ _ _ _ _ _ _ _ _ _ _ _ _ _ _ _ _ _ _ _ _ _ _ _ _ _ _ _ _ _ _ _ _ _ _ _ _ _ _ _ _ _ _ _ _ _ _ _ _ _ _ _ ...

Страница 352: ... in the system dump list TYPE Initializes user data and service data to suit specified destination settings SOFT CNT Not used HST ACTIVITY Initializes the activity report ACCOUNT Clears print histories JAM Clears the jam history ERR Clear the error error code history ALARM Clears the alarm history CARD Clears department management information held in the controller before the card reader is demoun...

Страница 353: ...ing mode 0 ROLLER CLEAN Used to clean the delivery roller or ADF pickup roller by idling them 14 15 2 Test Mode Menu List iR2020 iR2020J iR2016 iR2016J 0011 0885 iR2016J iR2016 iR2020 Test mode menu list To invoke test mode follow these steps 1 Enter service mode Press the operation panel user mode key 2 key 8 key and user mode key in this order 2 Press the operation panel arrow keys to show TEST ...

Страница 354: ...EST TC9600bps 7 G3 SIGNAL TX TEST 12000bps 8 G3 SIGNAL TX TEST 14400bps 5 DTMF TEST 0 9 DTMF transmission test 0 G3 SIGNAL TX TEST 300bps 1 G3 SIGNAL TX TEST 2400bps 2 G3 SIGNAL TX TEST 4800bps 3 G3 SIGNAL TX TEST 7200bps 4 G3 SIGNAL TX TEST 9600bps 5 G3 SIGNAL TX TEST TC7200bps 6 G3 SIGNAL TX TEST TC9600bps 7 G3 SIGNAL TX TEST 12000bps 8 G3 SIGNAL TX TEST 14400bps 9 G3 SIGNAL TX TEST TC9600bps G3...

Страница 355: ...S3 0 of of of of 6 NCR Sts NCR xxxxx DPT MGN OK RDY 0101 4 ADF FEED TEST ADF delivery operation test 5 BOOK FEED TEST Book copy operation test 6 6 6 SPEAKER FREQ 1 VOL 2 Speaker volume and buzzer frequency test 7 Operation Panel Operation panel key LCD and LED test 8 FUNCTION TEST LAMP TEST ALL Lamp test 9 LINE TEST 1 3 Line signal reception test 0 ROLLER CLEAN 0 PRT 1 ADF Printer and ADF roller c...

Страница 356: ...EST TC9600bps 7 G3 SIGNAL TX TEST 12000bps 8 G3 SIGNAL TX TEST 14400bps 5 DTMF TEST 0 9 DTMF transmission test 0 G3 SIGNAL TX TEST 300bps 1 G3 SIGNAL TX TEST 2400bps 2 G3 SIGNAL TX TEST 4800bps 3 G3 SIGNAL TX TEST 7200bps 4 G3 SIGNAL TX TEST 9600bps 5 G3 SIGNAL TX TEST TC7200bps 6 G3 SIGNAL TX TEST TC9600bps 7 G3 SIGNAL TX TEST 12000bps 8 G3 SIGNAL TX TEST 14400bps 9 G3 SIGNAL TX TEST TC9600bps G3...

Страница 357: ...NORMAL 1 LATCH 0 SENSOR NORMAL 0 2 0 CAS 0 REG 0 DEL 0 MULTI 0 1 TONER 0 FULL 0 2ND DEL 0000 2 OP1 0000 OP2 0000 OP3 0000 PATH 0000 1 SENSOR LATCH 0 2 0 CAS 0 REG 0 DEL 0 MULTI 0 1 TONER 0 FULL 0 2ND DEL 0000 2 OP1 0000 OP2 0000 OP3 0000 PATH 0000 2 SWITCH CHECK 0 1 0 CAS 0000 LOCK 0000 1 OP1 0000 OP2 0000 OP3 0000 3 DS ON DES of HPS ON BCVS of 4 REF xxx ANT xxx ANT REF xxx 5 BSCT on BDAC A3 BDSS3...

Страница 358: ...0889 iR2016J iR2016 iR2020 iR2016i iR2020i MODEM test 4 MODEM TEST These tests test modem and NCU transmission and reception The modem tests check whether signals are sent correctly from the modem by comparing the sound of the signals from the speaker with the sounds from a normal modem End this test by pressing the Stop key Relay Test Press 1 or 2 on the keypad on the Modem test menu to select re...

Страница 359: ...he speaker To select a different transmission speed use the keypad MEMO The output level of individual signals is in keeping with the setting made in service mode DTMF Signal Transmission Test A press on 5 on the MODEM test menu selects the DTMF signal transmission test In the test the following DTMF signals from the modem are transmitted using the telephone line terminal and the speaker The numbe...

Страница 360: ... TEST menu to select the sensor test LCD indications change as the associated sensors turn on and off Keypad Baud rate 0 3429baud 1 3200baud 2 3000baud 3 2800baud 4 2743baud 5 2400baud Left right arrow key Transmission speed 2400bps 4800bps 7200bps 9600bps 12000bps 14400bps 16800bps 19200bps 21600bps 24000bps 26400bps 28800bps 31200bps 33600bps Keypad Item Explanation 1 G3 signal transmission test...

Страница 361: ...te 2 retry sensor SR6 0 Document presence 1 Document absenc Cassette 2 paper sensor SR5 0 Document presence 1 Document absence OP2 0 0 Cassette 3 retry sensor SR6 0 Document presence 1 Document absence Cassette 3 paper sensor SR5 0 Document presence 1 Document absence OP3 0 0 Cassette 4 retry sensor SR6 0 Document presence 1 Document absence Cassette 4 paper sensor SR5 0 Document presence 1 Docume...

Страница 362: ... LCD are erased when the correspond ing keys are pressed When the entire character display is erased operation key test 2 launches only on models with the FAX feature installed As in 1 the test succeeds if the characters appearing in the LCD are erased when the corresponding keys are pressed Operation key test 1 correspondence diagram Press numeric keypad key 4 BSCT on BDOC A3 BDSS3 0 of of of of ...

Страница 363: ...nce diagram F 14 22 The flow of operation panel testing is shown below Similar to the LCD display L M Q O R N S A B C D E F J I U P H G T K 01 A 02 B 03 C 04 D 05 E 06 F 07 G 08 H 09 I 10 J 11 K 12 L 13 M 14 N 15 O 16 P 17 Q 18 R 19 S 20 T 7 8 6 0 1 3 5 4 2 9 ...

Страница 364: ...nnection terminal the LCD display changes from OFF to ON indicating the received frequency The LCD displays the status of CML CNG and FED detection from left to right with ON OFF indications Numeric keypad key 3 turns off the CML relay to detect CNG 14 15 9 Function Test 6 FUNCTION TEST iR2016 iR2016J 0012 6447 iR2016J iR2016 Function test 6 FUNCTION TEST Press the numeric keypad key 6 on the test...

Страница 365: ...nce 1 Document absence No 2 delivery sensor SR1101 0 Document presence 1 Document absence TONER 0 FULL 0 2ND DEL 0 0 Press numeric keypad key 1 OP1 0 0 Cassette 2 retry sensor SR6 0 Document presence 1 Document absenc Cassette 2 paper sensor SR5 0 Document presence 1 Document absence OP2 0 0 Cassette 3 retry sensor SR6 0 Document presence 1 Document absence Cassette 3 paper sensor SR5 0 Document p...

Страница 366: ...ration panel Operation key test Press the start key after the LCD lamp test to select operation key test 1 The test succeeds if the characters appearing in the LCD are erased when the correspond ing keys are pressed When the entire character display is erased operation key test 2 launches only on models with the FAX feature installed As in 1 the test succeeds if the characters appearing in the LCD...

Страница 367: ...nce diagram F 14 28 The flow of operation panel testing is shown below Similar to the LCD display L M Q O R N S A B C D E F J I U P H G T K 01 A 02 B 03 C 04 D 05 E 06 F 07 G 08 H 09 I 10 J 11 K 12 L 13 M 14 N 15 O 16 P 17 Q 18 R 19 S 20 T 7 8 6 0 1 3 5 4 2 9 ...

Страница 368: ...etected on the telephone line connection terminal the LCD display changes from OFF to ON indicating the received frequency The LCD displays the status of CML CNG and FED detection from left to right with ON OFF indications Numeric keypad key 3 turns off the CML relay to detect CNG 14 15 10 Function Test 6 FUNCTION TEST iR2020i 0012 6266 iR2020i Function test 6 FUNCTION TEST Press the numeric keypa...

Страница 369: ...nce 1 Document absence No 2 delivery sensor SR1101 0 Document presence 1 Document absence TONER 0 FULL 0 2ND DEL 0 0 Press numeric keypad key 1 OP1 0 0 Cassette 2 retry sensor SR6 0 Document presence 1 Document absenc Cassette 2 paper sensor SR5 0 Document presence 1 Document absence OP2 0 0 Cassette 3 retry sensor SR6 0 Document presence 1 Document absence Cassette 3 paper sensor SR5 0 Document p...

Страница 370: ...The touch panel LCD displays from left to right CI CI frequency hook port and FC with indications of 1 ON and 0 OFF Test menu 2 Press numeric keypad key 2 on the LINE DETECT menu to select test menu 2 When the CNG signal is detected on the telephone line connection terminal the touch panel LCD display changes from OFF to ON indicating the received frequency The touch panel LCD displays the status ...

Страница 371: ...mission test 6 1 G3 480 bps Tx Press numeric keypad key 1 on the FUNCTION TEST menu to select the G3 signal transmission test This test transmits 4800 bps G3 signals from the telephone line connection terminal and speaker Sensor test 6 3 SENSOR This mode is used to verify the status of the unit sensors from the touch panel LCD indications Press numeric keypad key 3 on the FUNCTION TEST menu to sel...

Страница 372: ...te 2 retry sensor SR6 0 Document presence 1 Document absenc Cassette 2 paper sensor SR5 0 Document presence 1 Document absence OP2 0 0 Cassette 3 retry sensor SR6 0 Document presence 1 Document absence Cassette 3 paper sensor SR5 0 Document presence 1 Document absence OP3 0 0 Cassette 4 retry sensor SR6 0 Document presence 1 Document absence Cassette 4 paper sensor SR5 0 Document presence 1 Docume...

Страница 373: ...nges from OFF to ON indicating the received frequency The touch panel LCD also displays the on hook or off hook state of an external telephone set as detected The touch panel LCD displays from left to right CI CI frequency hook port and FC with indications of 1 ON and 0 OFF Test menu 2 Press numeric keypad key 2 on the LINE DETECT menu to select test menu 2 When the CNG signal is detected on the t...

Страница 374: ...eypad key 3 turns off the CML relay to detect CNG 14 15 12 Roller cleaning mode 0 ROLLER CLEAN 0011 0891 iR2016J iR2016 iR2020 iR2016i iR2020i Roller cleaning mode 0 ROLLER CLEAN Press numeric keypad key 0 in test mode to select roller cleaning mode Press numeric keypad keys 1 and 2 during this test to enter the following menus Numeric keypad key 1 Press the start key clean the ADF pickup feed rol...

Страница 375: ...Chapter 15 Upgrading ...

Страница 376: ......

Страница 377: ... Registering the System Software 15 4 15 2 3 Connection 15 6 15 3 Downloading System Software 15 7 15 3 1 Downloading System 15 7 15 3 1 1 Downloading Procedure 15 7 15 3 1 2 Downloading Procedure 15 12 15 3 2 Downloading RUI and Language 15 18 15 3 2 1 Downloading Procedure 15 18 15 3 3 Downloading BOOT 15 18 15 3 3 1 Downloading Procedure 15 18 15 3 4 Other Upgrade Methods 15 18 15 3 4 1 Downloa...

Страница 378: ......

Страница 379: ...F 15 1 When using the SST select DOWNLOAD in the service mode to place the main unit in the download mode The finisher need not enter the download mode 15 1 4 Overview of Service Support Tool 0012 7008 iR2016i iR2020i Type System software type Upgrade tool Remarks SST Main unit System main controller Yes The main controller also controls the reader Boot boot program Yes Option PCL PCL printer kit ...

Страница 380: ...achine name iR2020 Unit name Main controller System Boot program Boot PCL board PCL The system software registration program is explained below taking System as an example Preparation Have the following ready PC in which SSTv3 21 or later is installed System CD supplied with iR2020 System Software Registration Procedure 1 Start the PC 2 Insert the system CD in the PC 3 Start SST 4 Click the Regist...

Страница 381: ...stem CD is displayed Uncheck the checkboxes of unnecessary folders and system software programs and then click the REGISTER button This machine allows two or more system software programs to be register at the same time However it does not allow two or more them to be downloaded at the same time If two or more software programs need to be upgraded download them one by one ...

Страница 382: ...re registered with the names listed below Software Programs Preinstalled in Main Unit Machine name iR2020i_MF7200 Unit name Main controller System Boot program Boot 16MB ROM PCB PCL_op 32MB ROM PCB PCL_common No use for this model Preparation Have the following ready PC in which SSTv3 21 or later is installed System CD supplied with iR2020i MF7200 System Software Registration Procedure 1 Start the...

Страница 383: ...stem CD is displayed Uncheck the checkboxes of unnecessary folders and system software programs and then click the REGISTER button This machine allows two or more system software programs to be register at the same time However it does not allow two or more them to be downloaded at the same time If two or more software programs need to be upgraded download them one by one ...

Страница 384: ...ck the OK button F 15 10 15 2 3 Connection 0011 2632 iR2016J iR2016 iR2020 iR2016i iR2020i 1 Turn off the main power switch of this machine and then disconnect the cables connected to this machine 2 Connect USB connector on the back of this machine to the PC using the USB cable 1 F 15 11 1 ...

Страница 385: ... start SST 2 When the power switch is turned on the Found New hardware Wizard appears Click Cancel F 15 12 3 Select MFP in Target Selection and then select iR2020 in Model List F 15 13 4 Double click the System folder in Model List to check the system software version Select USB in Interface and then click the START button F 15 14 5 Turn on the power switch of the host machine ...

Страница 386: ...e host machine in the downloading wait mode DOWNLOAD CONNECTED is displayed 9 Press the OK button on the SST screen displayed on the display of the PC F 15 15 10 When connection is complete the following screen appears Click the OK button F 15 16 11 Click System Software Download on the Selecting a Job screen MEMO This machine does not use the Upload the Backup Data and Download the Backup Data fu...

Страница 387: ...on of the system software to download from the list Check that the selected version is displayed in Selected Version and then click the START button F 15 18 13 When downloading starts the progress of downloading is displayed by the progress bar ...

Страница 388: ...is displayed F 15 20 Never turn off the power switch of the machine while the data is being written to the flash ROM If it becomes impossible to start this machine after turning its power switch off the image processor PCB must be replaced 15 When writing of the data to the Flash ROM is complete its result is displayed Click the OK button ...

Страница 389: ...Chapter 15 15 11 F 15 21 16 When the Selecting a Job screen appears click Return to Main Menu F 15 22 17 Click the OK button to return to the menu screen of SST ...

Страница 390: ...of the host machine and then turn off on the main power switch 15 3 1 2 Downloading Procedure 0012 7016 iR2016i iR2020i 1 Turn on the power switch of the PC and start SST 2 When the power switch is turned on the Found New hardware Wizard appears Click Cancel F 15 25 3 Select MFP in Target Selection and then select iR2020i_MF7200 in Model List ...

Страница 391: ...tton F 15 27 5 Turn on the power switch of the host machine 6 Press the following keys on the control panel to enter the service mode 2 Key 8 Key 7 Using or select DOWNLOAD 8 Press the OK key on the control panel to place the host machine in the downloading wait mode No indicated on LCD 9 Press the OK button on the SST screen displayed on the display of the PC ...

Страница 392: ...e following screen appears Click the OK button F 15 29 11 Click System Software Download on the Selecting a Job screen MEMO This machine does not use the Upload the Backup Data and Download the Backup Data functions not displayed on the Selecting a Job screen ...

Страница 393: ...ion of the system software to download from the list Check that the selected version is displayed in Selected Version and then click the START button F 15 31 13 When downloading starts the progress of downloading is displayed by the progress bar ...

Страница 394: ...is displayed F 15 33 Never turn off the power switch of the machine while the data is being written to the flash ROM If it becomes impossible to start this machine after turning its power switch off the image processor PCB must be replaced 15 When writing of the data to the Flash ROM is complete its result is displayed Click the OK button ...

Страница 395: ...Chapter 15 15 17 F 15 34 16 When the Selecting a Job screen appears click Return to Main Menu F 15 35 17 Click the OK button to return to the menu screen of SST ...

Страница 396: ... 0012 7017 iR2016i iR2020i To download the language software use the steps given for the system software 15 3 3 Downloading BOOT 15 3 3 1 Downloading Procedure 0011 3248 iR2016J iR2016 iR2020 iR2016i iR2020i To download the boot software use the steps given for the system software 15 3 4 Other Upgrade Methods 15 3 4 1 Downloading the PCL Software 0011 3249 iR2016J iR2016 iR2020 To download the sof...

Страница 397: ...M PCB of the extension slot use the steps given for the system software When selecting a download version on the following screen be sure to select the version for 16MB ROM This machine does not support the version for 32MB ROM F 15 38 Language Country Region Version for 32MB ROM Common All Version for 16MB ROM op All ...

Страница 398: ......

Страница 399: ...Chapter 16 Service Tools ...

Страница 400: ......

Страница 401: ...Contents Contents 16 1 Service Tools 16 1 16 1 1 Special Tools 16 1 16 1 2 Oils and Solvents 16 1 ...

Страница 402: ......

Страница 403: ...addition when making an electrical check Tester extension pin L shipped FY9 3039 A As an addition when making an electrical check NA 3 Test Chart FY9 9196 A For checking and adjusting images Name Uses Composition Remarks Alcohol cleaning e g glass plastic rubber external covers fluoride family hydrocarbon alcohol surface activating agent water Do not bring near fire Procure locally IPA isopropyl a...

Страница 404: ......

Страница 405: ...Jan 30 2006 ...

Страница 406: ...Download Free Service Manual And Resetter Printer at http printer1 blogspot com ...

Отзывы: