


Chapter 2
2-11
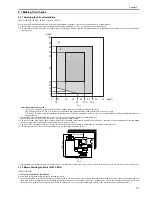
7) Affix the cassette size label [1] to the paper size indication plate [2].
F-2-36
8) Affix the caution sheet printed in an appropriate language.
F-2-37
9) Align the left, right, and leading edges of sheets and load the stack of paper
[1] in the cassette. Make sure that the paper is below the claws [2] of the
cassette.
F-2-38
10) Holding the knob at the center of the cassette, insert the cassette in the
machine it stops.
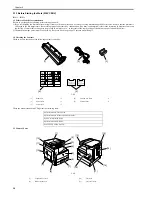
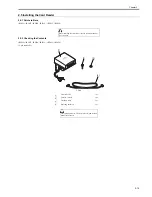
2.2.7 Attaching the Ferrite Core
0017-5530
iR2022i / iR2025 / iR2030 / iR2018 / iR2022 / iR2018i
1) Attach the ferrite core [2] to the user's USB cable, and then connect the
USB cable to the USB port of the host machine.
F-2-39
2.2.8 Checking the Image Quality
0017-5531
iR2022i / iR2025 / iR2030 / iR2018 / iR2022 / iR2018i
1) Plug the power cord into the outlet, and then turn on the main power
switch [2].
Supply of toner will start after the initial rotation. After a few minutes,
supply of toner finishes and the machine stops automatically.
F-2-40
2) Place a document on the document glass, take a copy of it by supplying
paper from the cassette or manual feed tray, and check the printed image.
Also perform the following checks:
- Check whether abnormal sound is heard.
- Check the printed images at all preset magnifications.
- Check whether the document is copied normally on the specified
number of sheets.
2.2.9 Setting the Country/Region
0017-5532
iR2018 / iR2022
1) Press the following keys to display the service mode screen:
Additional Functions Key > 2 Key > 8 Key > Additional Functions Key
2) Select "# CLEAR" using the + or - key, and then press the OK key.
3) Select "TYPE" using the + or - key, and then press the OK key.
4) Using the + or - key, select the country/region type that conforms to the
communication standard used in the country/region where the machine is
used.
5) Press the OK key. When "Please Wait" disappears, the selected country/
region type takes effect.
2.2.10 Setting the Country/Region
0017-5533
iR2022i / iR2025 / iR2030 / iR2018i
1) Press the following keys to display the service mode screen:
> 2 Key > 8 Key >
2) Select "# CLEAR" using
or
, and then press the OK.
3) Select "TYPE" using
or
, and then press the OK.
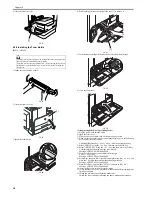
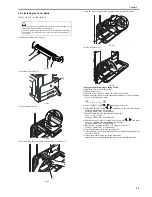
MEMO:
Inserting the cassette into the machine with the inner plate locked into the
cassette will unlock the inner plate automatically. If the inner plate is not
locked, press the "PUSH DOWN" mark on the inner plate to lock it into the
cassette and then load paper.
The installation of the ferrite core does only for the model equipped with the
printer function.
A4
[1]
[2]
[1]
[2]
[1]
To reduce noise, attach the ferrite core as close to the USB port of the host
machine as possible.
Use the specified power supply (rated voltage -/+10% and rated current).
[1]
[2]
[2]
[1]
Содержание imageRunner 2022
Страница 1: ...Aug 8 2007 Service Manual iR2030 2025 2022 2018 Series ...
Страница 2: ......
Страница 6: ......
Страница 20: ...Contents ...
Страница 21: ...Chapter 1 Introduction ...
Страница 22: ......
Страница 57: ...Chapter 1 1 33 ...
Страница 60: ......
Страница 61: ...T 1 11 ...
Страница 64: ......
Страница 65: ...T 1 12 ...
Страница 68: ......
Страница 69: ...Chapter 2 Installation ...
Страница 70: ......
Страница 72: ......
Страница 125: ...Chapter 2 2 53 ...
Страница 126: ......
Страница 127: ...Chapter 3 Main Controller ...
Страница 128: ......
Страница 130: ......
Страница 142: ......
Страница 143: ...Chapter 4 Original Exposure System ...
Страница 144: ......
Страница 170: ......
Страница 171: ...Chapter 5 Laser Exposure ...
Страница 172: ......
Страница 174: ......
Страница 181: ...Chapter 6 Image Formation ...
Страница 182: ......
Страница 184: ......
Страница 196: ......
Страница 197: ...Chapter 7 Pickup Feeding System ...
Страница 198: ......
Страница 217: ...Chapter 8 Fixing System ...
Страница 218: ......
Страница 220: ......
Страница 234: ......
Страница 235: ...Chapter 9 External and Controls ...
Страница 236: ......
Страница 255: ...Chapter 10 RDS ...
Страница 256: ......
Страница 258: ......
Страница 268: ......
Страница 269: ...Chapter 11 Maintenance and Inspection ...
Страница 270: ......
Страница 272: ......
Страница 275: ...Chapter 12 Standards and Adjustments ...
Страница 276: ......
Страница 278: ......
Страница 281: ...Chapter 12 12 3 ...
Страница 282: ......
Страница 283: ...Chapter 13 Correcting Faulty Images ...
Страница 284: ......
Страница 286: ......
Страница 299: ...F 13 11 F 13 12 1 2 3 4 5 6 7 8 9 10 11 12 13 14 15 16 17 ...
Страница 300: ......
Страница 301: ...Chapter 14 Self Diagnosis ...
Страница 302: ......
Страница 304: ......
Страница 317: ...Chapter 15 Service Mode ...
Страница 318: ......
Страница 381: ...Chapter 16 Upgrading ...
Страница 382: ......
Страница 384: ......
Страница 411: ...Chapter 17 Service Tools ...
Страница 412: ......
Страница 413: ...Contents Contents 17 1 Service Tools 17 1 17 1 1 Special Tools 17 1 17 1 2 Oils and Solvents 17 1 ...
Страница 414: ......
Страница 417: ...Aug 8 2007 ...
Страница 418: ......


