CORRECT
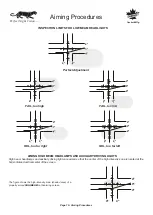
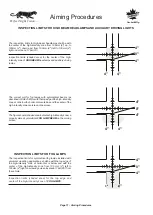
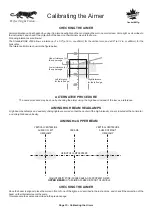
Aimer is ready to test headlight. Turn on headlights and use internal screen to aim the light. Correct beam positioning on the aiming
screen is explained on the following pages. Proper aim for high beams, low beams, Euro beams, driving lights, and fog lights are
explained.
INCORRECT
CORRECT
INCORRECT
fig. 21
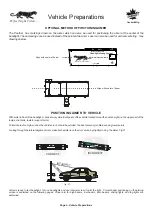
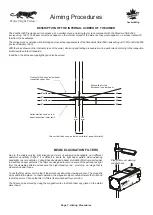
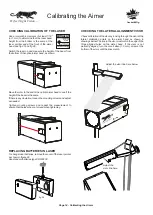
The Panther has markings drawn on the aimer which can also be used for positioning the aimer at the center of the
headlight. These markings can be used instead of the pointer if desired. Laser can also be used for vertical centering. See
drawings below.
Align with center of beam
Vehicle Preparations
OPTIONAL METHOD OF POSITIONING AIMER
POSITIONING AIMER TO VEHICLE
With aimer in front of the headlight, choose two symmetrical points of the vehicle located also at the same height (i.e. the upper part of the
lamps, strut bolts, radiator support bolts).
Points located too high, such as the vehicles roof, should be avoided: the best accuracy is obtained using lower points.
Looking through the lateral alignment visor, make both points lie on the visor's wire, by slightly moving the aimer, Fig.21.
Page 6 - Vehicle Preparations
Align with center of beam
Canbuilt Mfg.
Perfect Night Vision.....
Lift Here
Professional Optical
Headlight Aiming System
Canbuilt Mfg.
Perfect Night Vision...
Содержание OPT-5405
Страница 18: ......
Страница 20: ...NOTES...


