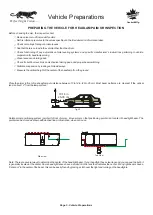
Before checking the aim, the inspector shall;
F
Remove ice or mud from under fenders.
F
Set tire inflation pressures to the values specified on the tire sidewall or information label.
F
Check car springs for sag or broken leaves.
F
See that there is no load in the vehicle other than the driver.
F
Check functioning of any automatic vehicle leveling systems and specific manufacturer's instructions pertaining to vehicle
preparation for headlamp aiming.
F
Clean lenses and aiming pads.
F
Check for bulb burnout, broken mechanical aiming pads, and proper beam switching.
F
Stabilize suspension by rocking vehicle sideways.
F
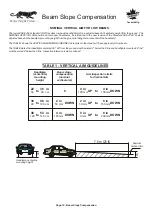
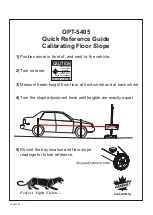
Measure the vertical height of the center of the headlamp from the ground.
Vehicle Preparations
PREPARING THE VEHICLE FOR HEADLAMP AIM OR INSPECTION
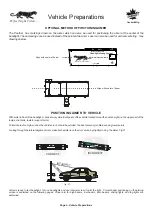
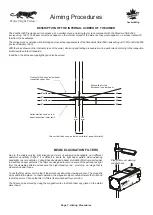
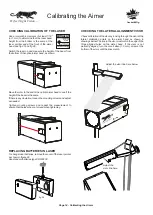
Rotate aimer positioning system (pointer) to front of aimer. Move aimer so that positioning pointer is at center of headlight beam. The
pointer can be stored as shown with dashed lines in illustration, when not in use.
Note: There are several ways to determine the center of the headlight beam. If your headlight has a clear lens and you can see the bulb, it
is generally located at the center. Some headlight lenses have a small dot in the lens that indicates the center. Many light beams have a
“dark spot” in the center of the beam, this can be easily found by placing a cloth over the light and turning on the headlights.
Place the aimer in front of one headlamp at a distance between 10 to 14 in. (25 to 35 cm). Most beam patterns are clearest if the optical
lens is about 12” from the lamp surface.
Page 5 - Vehicle Preparations
25-35 cm
10-14 in
fig. 20
Side view
Top View
Canbuilt Mfg.
Perfect Night Vision.....
Содержание OPT-5405
Страница 18: ......
Страница 20: ...NOTES...


