


31
Proprietary Information: Not for use or disclosure except by written agreement with Calix.
© Calix. All Rights Reserved.
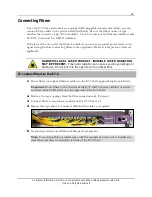
Installing an Intake/Exhaust System
The E7-2 chassis supports an optional field installed front cool air intake and rear heat
exhaust system. The intake/exhaust system assures adequate airflow by redirecting airflow
from the front of the chassis to the rear. Prior to installing the E7-2 chassis, mount the
intake/exhaust system on the unit as described below.
Note
: The intake/exhaust system converts the E7-2 into a 23-inch shelf.
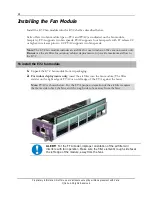
To install an intake/exhaust system
1.
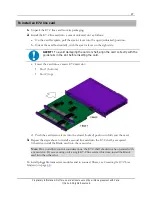
Unpack the intake/exhaust kit from its packaging.
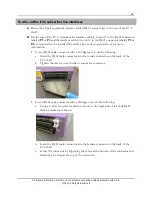
2.
Orient the left rear exhaust plenum on the left side of the E7-2 chassis with the vent in
the back, aligning the plenum's inner mounting holes with the counterpart holes on the
chassis.
Note
: The right and left plenums are not interchangeable.
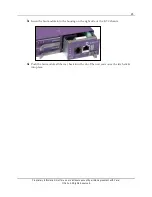
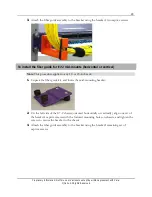
3.
Attach the plenum to the E7-2 chassis as follows:
a.
Route a phillips screw driver through the access hole, and then through the chamber
to the captive screw, and tighten the screw.
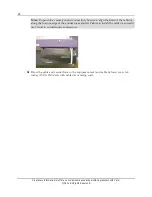
b.
Repeat step 3a to tighten the (5) remaining captive screws, securing the plenum in
place.
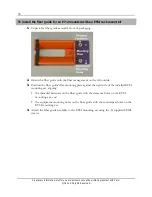
4.
Orient the right front intake plenum on the right side of the E7-2 chassis with the vent in
the front, aligning the plenum's mounting holes with the counterpart holes on the
chassis.
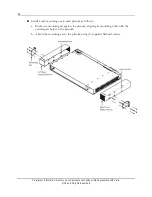
5.
Repeat steps 3a–3b to attach the right front intake plenum to the E7-2 chassis.
Содержание E7-2
Страница 1: ...Calix E7 2 Installation Guide May 2013 220 00320 Rev 13...
Страница 2: ......


