Chapter 7: Configuring VLANs on the SSR
88
CoreWatch User’s Manual
•
Protocol-based VLAN, which divides the physical network into logical VLANs based
on one or more of the following protocols:
–
IP VLAN, which is a VLAN used for IP traffic.
–
IPX VLAN, which is a VLAN used for IPX traffic.
–
Bridged-protocol VLAN, which is a VLAN used for bridged protocols (such as
AppleTalk).
•
Port-based VLAN, which is a VLAN that is independent of the traffic type. Port-based
VLANs treat IP, IPX, and bridged protocols alike.
The ports in a VLAN can be configured as one of the following:
•
Access ports
Access ports can belong to only one VLAN per protocol (IP, IPX, or a bridged protocol).
This is the default for all ports.
On access ports, traffic is sent out without 802.1Q frame format.
•
Trunk ports
Trunk ports can belong to any number of VLANs. Use trunk ports when you want to
connect SSR routers together and send traffic for multiple VLANs on a single network
segment connecting the routers.
On trunk ports, traffic is always sent out with 802.1Q frame format.
VLAN Configuration Tips
The following list includes tips that you should keep in mind while configuring VLANs
on an SSR as discussed later in this chapter:
•
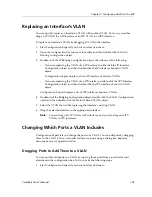
You can quickly add ports to a VLAN, by copying ports as discussed in
“Dragging
Ports to Add Them to a VLAN” on page 103
.
•
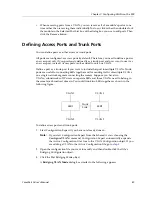
When defining trunk ports, you can define all the ports on a module as trunk ports at
one time rather than defining them individually. To do so, click rather than double-
click the module in the Access Port list box of the dialog box you use to define ports.
Then click the Add button.
•
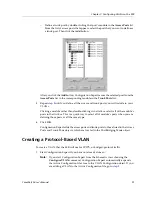
When defining access ports in a dialog box, you can define all the ports on a module as
access ports at one time rather than defining them individually. To do so, click rather
than double-click the module in the Trunk Port list box of the dialog box you use to
define ports. Then click the Remove button.
•
When adding ports to a VLAN, you can add all of a module’s available ports at one
time rather than adding them individually. To do so, click rather than double-click the
module in the Available Port List box of the dialog box you use to add ports. Then click
the Add button.
Содержание CoreWatch
Страница 1: ...CoreWatch User s Manual 9032564 04...
Страница 2: ...Notice 2 CoreWatch User s Manual...
Страница 20: ...Preface 20 CoreWatch User s Manual...
Страница 64: ...Chapter 5 Changing System Settings 64 CoreWatch User s Manual...
Страница 86: ...Chapter 6 Configuring SSR Bridging 86 CoreWatch User s Manual...
Страница 106: ...Chapter 7 Configuring VLANs on the SSR 106 CoreWatch User s Manual...
Страница 206: ...Chapter 12 Configuring QoS on the SSR 206 CoreWatch User s Manual...
Страница 246: ...Chapter 13 Configuring Security on the SSR 246 CoreWatch User s Manual...
Страница 274: ...Chapter 15 Configuring BGP on the SSR 274 CoreWatch User s Manual Figure 184 BGP Peer Group Definition panel Options tab...
Страница 363: ...CoreWatch User s Manual 363 Chapter 16 Configuring Routing Policies on the SSR 9 Click OK...
Страница 364: ...Chapter 16 Configuring Routing Policies on the SSR 364 CoreWatch User s Manual...
Страница 370: ...Chapter 17 Checking System Status 370 CoreWatch User s Manual...
Страница 390: ...Chapter 18 Monitoring Real Time Performance 390 CoreWatch User s Manual...
Страница 396: ...Chapter 19 Checking the Status of Bridge Tables 396 CoreWatch User s Manual...
Страница 430: ...Chapter 20 Checking the Status of Routing Tables 430 CoreWatch User s Manual...
Страница 442: ...Chapter 22 Obtaining Reports 442 CoreWatch User s Manual...
Страница 456: ...Appendix B CoreWatch Menus 456 CoreWatch User s Manual...


