Chapter 6 Drive Replacement
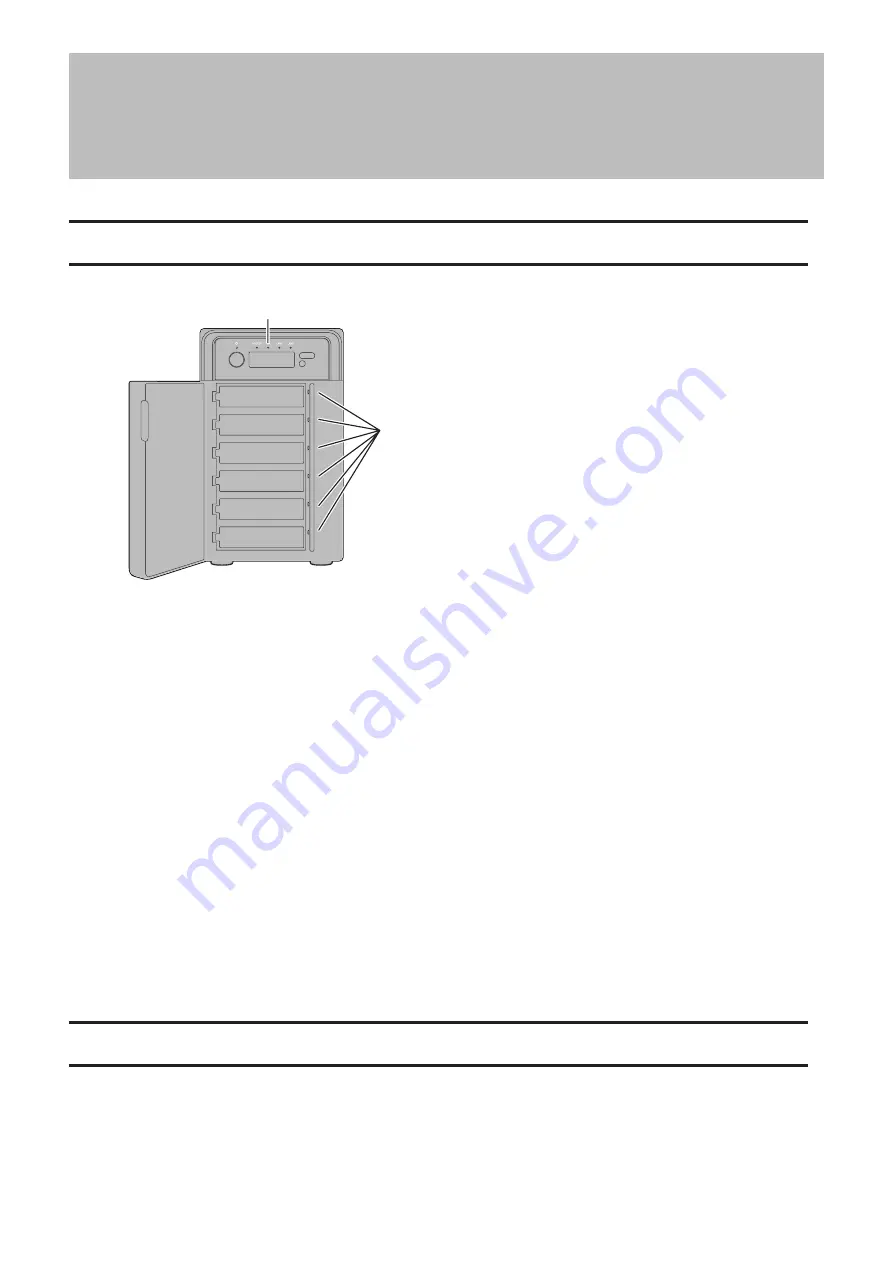
LEDs
If a drive fails or dismounts, the LED will glow as below. To see the status LEDs, open the front cover.
2
1
1
Fail LED
Glows amber if a drive has failed.
2
Status LEDs
The failed drive’s status LED will be glowing a steady amber. It also glows when the drive is dismounted.
If the volume is fragmented by a drive failure, such as in the case of a 3-drive failure in a RAID 6 volume, the LEDs will
glow as above and the “SYSTEM DOWN” message will be displayed on the LCD panel.
Notes:
• For the replacement drive, use a Buffalo OP-HDBN/B series drive. The new drive should be the same size as the
replacement drive.
• The TeraStation is fragile. Handle it with care. Do not drop or bump the TeraStation.
• Use caution when handling the TeraStation in order to avoid personal injury.
• Never disassemble any parts while replacing a drive unless instructed to do so in this manual. Any malfunction or
damage caused by disassembling the TeraStation will void your warranty.
• To avoid damaging the TeraStation with static electricity, ground yourself by touching something made of metal
before handling any sensitive electronic parts.
• Do not change the order of the drives in the TeraStation. For example, pulling out drive 1 and replacing it with
drive 2 may cause data to be corrupted or lost.
Drive Replacement Procedure
Follow the procedure below to replace a defective drive.
78
Содержание TeraStation WSS WSH5010N6
Страница 12: ...8 Choose Everyone and select the Allow checkbox for Change 9 From the Security tab click Edit Add 11...
Страница 25: ...5 Select Custom and click Next 6 Click Add Items 24...
Страница 26: ...7 Select the backup source folders or drives and click OK 8 Click Next 25...
Страница 27: ...9 Specify the schedule to run the backup and click Next 26...
Страница 31: ...5 Select the date when a data backup occurred and click Next 30...
Страница 38: ...3 From the Computer Name tab click Change 4 Select Domain enter a domain name and click OK 37...
Страница 43: ...3 Enter a hostname for the namespace server and click Next 42...
Страница 44: ...4 Enter a name for the namespace and click Next 43...
Страница 49: ...4 Enter a name for the replication group and click Next 48...
Страница 50: ...5 Click Add 6 Enter more than two servers hostnames to join the replication group and click OK 49...
Страница 51: ...7 Click Next 50...
Страница 52: ...8 Select Full mesh and click Next 51...
Страница 54: ...10Select the device as the primary member and click Next 53...
Страница 55: ...11Click Add 12Select the folder as the replication source and click OK 54...
Страница 56: ...13Click Next 55...
Страница 57: ...14Click Edit 56...
Страница 58: ...15Select Enabled and select the folder as the replication destination then click OK 57...
Страница 59: ...16Click Next 58...
Страница 60: ...17Click Create 59...
Страница 69: ...3 Double click Remote Desktop Users 4 Click Add 5 Click Advanced 6 Click Find Now 68...
Страница 70: ...7 Select the user to be added as a group member and click OK 8 Click OK then click OK again 69...
Страница 72: ...4 Enter a group name and click Add 5 Click Advanced 6 Click Find Now 71...


