


4
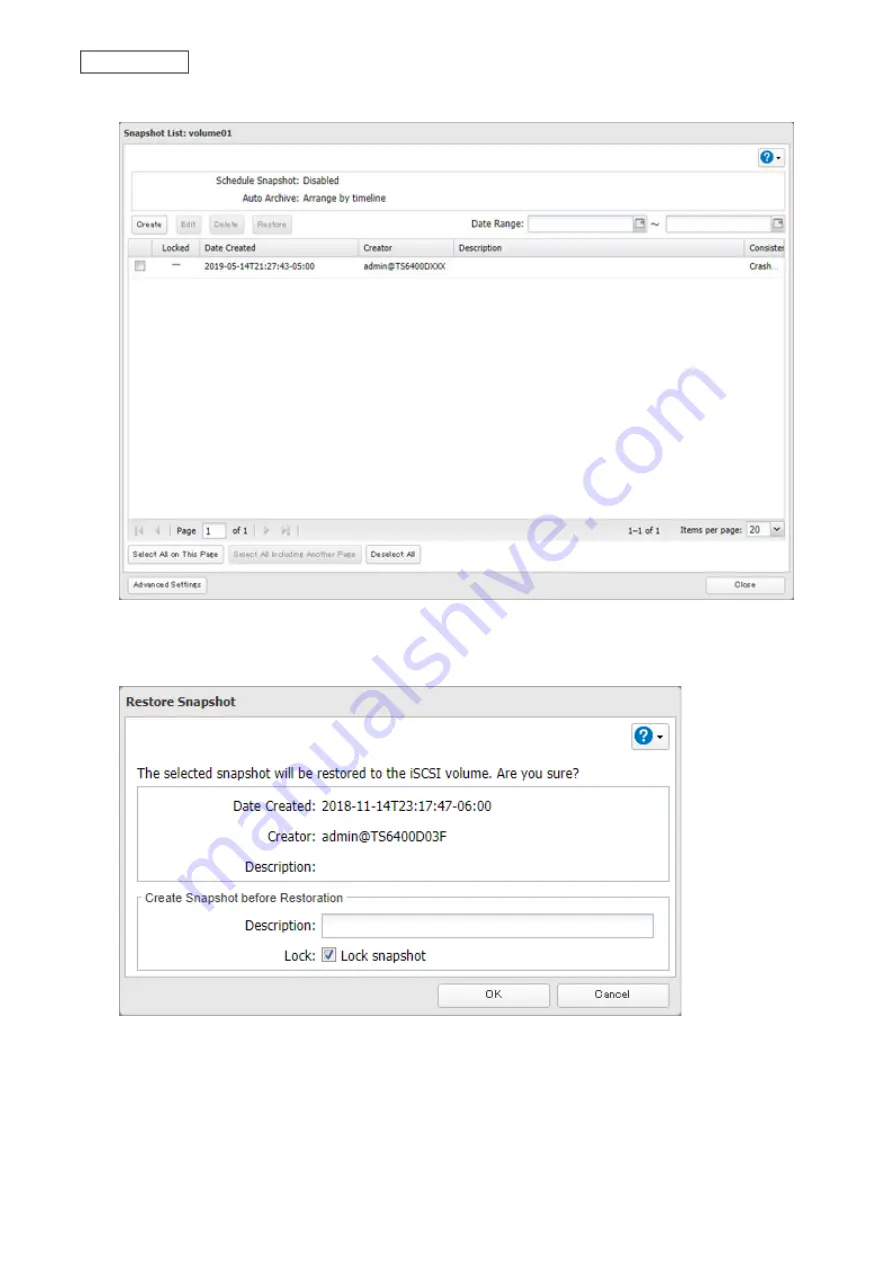
Select the checkbox for the target snapshot and then click
Restore
.
5
A new snapshot will be created before restoring the snapshot. Select or clear the “Lock” checkbox to determine
whether the created snapshot will be locked or unlocked and enter a short description, then click
OK
. A locked
snapshot cannot be deleted due to auto-archiving.
6
Click
OK
when completed.
If you have saved the virtual machine to the iSCSI volume and you are using Snapshot Agent for TeraStation, next
restore the snapshot of the virtual machine using vCenter Server’s management console.
81
Chapter 5 Backup
Содержание TeraStation 6000 Series
Страница 32: ...3 Click Add Group 31 Chapter 3 File Sharing...
Страница 120: ...2 Click Time Machine 119 Chapter 5 Backup...
Страница 121: ...3 Click Select Backup Disk 4 Select the TeraStation then click Use Disk 120 Chapter 5 Backup...
Страница 123: ...7 Time Machine will count down from 120 seconds then backup will begin 122 Chapter 5 Backup...
Страница 131: ...3 From the job list click the job whose settings you want to change 4 Click the Options tab 130 Chapter 6 Remote Access...
Страница 132: ...5 Click Edit 131 Chapter 6 Remote Access...
Страница 136: ...7 Enter the desired job name and click Next 8 Select Backup and click Next 135 Chapter 6 Remote Access...
Страница 144: ...4 Click the Options tab 5 Click Edit 143 Chapter 6 Remote Access...
Страница 153: ...4 Click the Options tab 152 Chapter 6 Remote Access...
Страница 154: ...5 Click Edit 153 Chapter 6 Remote Access...
Страница 169: ...11Click the NFS Rules tab 12Click Add 168 Chapter 7 Advanced Features...
Страница 193: ...3 Click Edit 4 Select or enter the desired MTU size and click OK 192 Chapter 7 Advanced Features...


