


4
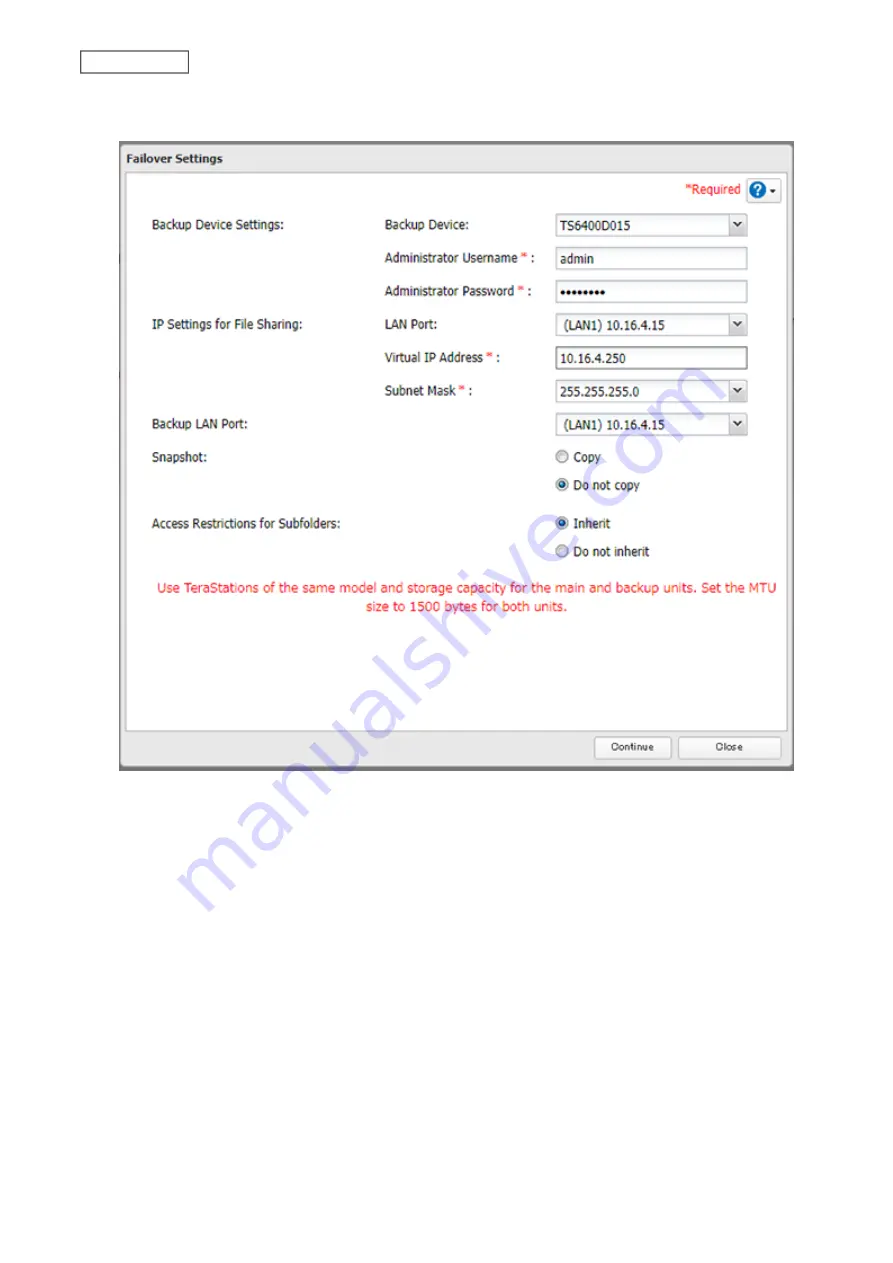
Select a TeraStation to be the backup destination device and enter its administrator username and password
(by default, the username is “admin” and the password is “password”).
5
Select the LAN port to be used for sharing files and enter a virtual IP address and subnet mask. The LAN port
you have selected here will also be used for pinging. If you select the same LAN port as the backup LAN port,
the backup TeraStation will replace the main TeraStation even if just a network error occurs.
About virtual IP addresses
: A virtual IP address is an IP address that will be used for file sharing while failover
is configured. By assigning a different IP address from the one to be assigned to the LAN port, you can access
the TeraStation for sharing files, as well as open Settings using the virtual IP address. This IP address will be
inherited to the backup TeraStation when failover occurs, so you can access the backup TeraStation even if you
don’t know the backup TeraStation’s static IP address.
Configure an unused IP address for the virtual IP; make sure it uses the same segment as the main and backup
TeraStations.
6
Select the LAN port to be used for transferring data via failover.
7
Configure whether or not to inherit the settings of subfolders’ access restrictions to the backup TeraStation,
then click
Continue
.
8
If the administrator username and password is correct, the backup TeraStation will beep. Press and hold the
function button to accept the settings from the main TeraStation. When you press the function button, the
backup TeraStation will stop beeping.
112
Chapter 5 Backup
Содержание TeraStation 6000 Series
Страница 32: ...3 Click Add Group 31 Chapter 3 File Sharing...
Страница 120: ...2 Click Time Machine 119 Chapter 5 Backup...
Страница 121: ...3 Click Select Backup Disk 4 Select the TeraStation then click Use Disk 120 Chapter 5 Backup...
Страница 123: ...7 Time Machine will count down from 120 seconds then backup will begin 122 Chapter 5 Backup...
Страница 131: ...3 From the job list click the job whose settings you want to change 4 Click the Options tab 130 Chapter 6 Remote Access...
Страница 132: ...5 Click Edit 131 Chapter 6 Remote Access...
Страница 136: ...7 Enter the desired job name and click Next 8 Select Backup and click Next 135 Chapter 6 Remote Access...
Страница 144: ...4 Click the Options tab 5 Click Edit 143 Chapter 6 Remote Access...
Страница 153: ...4 Click the Options tab 152 Chapter 6 Remote Access...
Страница 154: ...5 Click Edit 153 Chapter 6 Remote Access...
Страница 169: ...11Click the NFS Rules tab 12Click Add 168 Chapter 7 Advanced Features...
Страница 193: ...3 Click Edit 4 Select or enter the desired MTU size and click OK 192 Chapter 7 Advanced Features...


