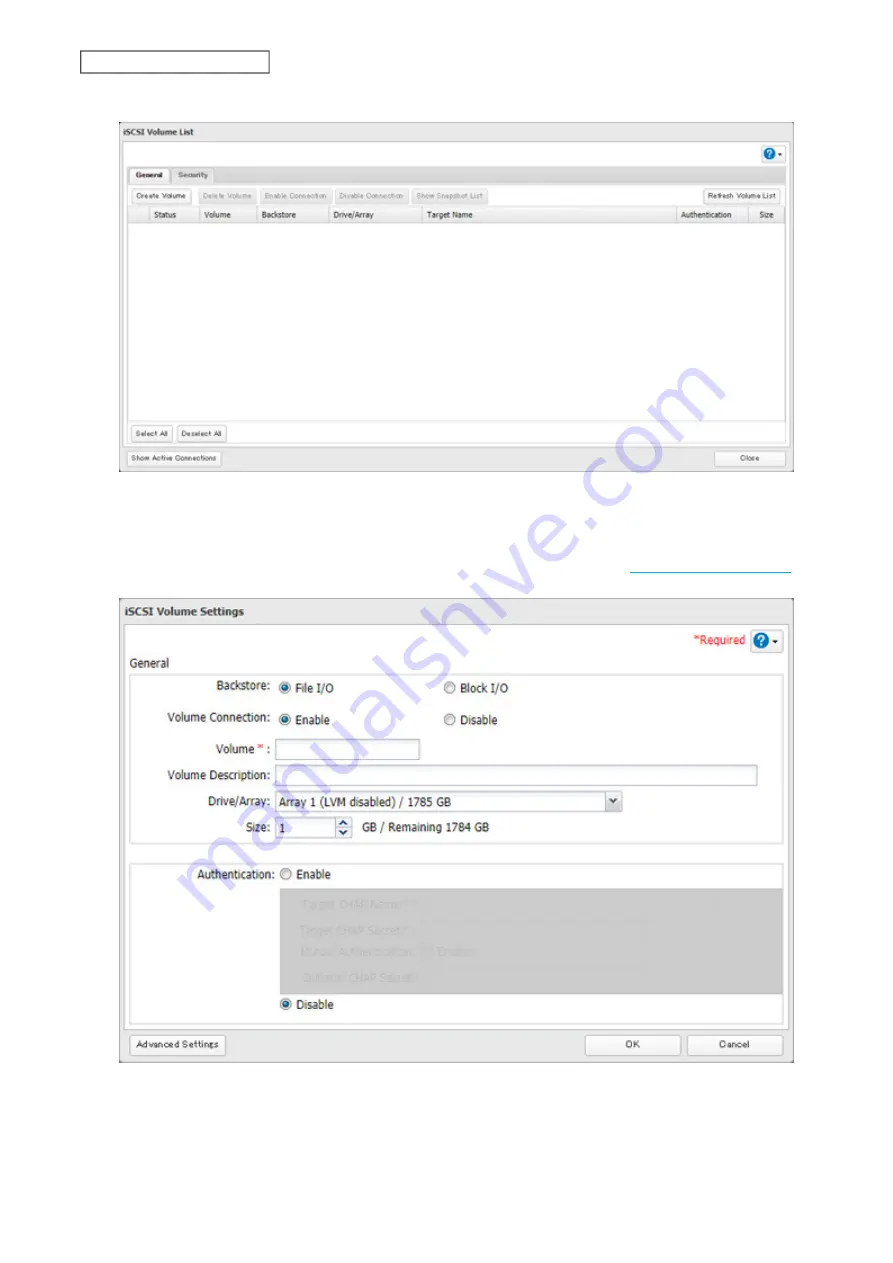
4
Click
Create Volume
.
5
Enter a volume name, volume description, drive or array where a volume will be created, and volume size. Click
OK
when completed.
If you enabled LVM for the target drive or array, or selected “File I/O” for the “Backstore” option, the volume size
that you specify here can be changed later. To change the volume size, refer to the
section below.
6
Click
OK
, then click
OK
again.
64
Chapter 4 Storage Management
Содержание TeraStation 6000 Series
Страница 32: ...3 Click Add Group 31 Chapter 3 File Sharing...
Страница 120: ...2 Click Time Machine 119 Chapter 5 Backup...
Страница 121: ...3 Click Select Backup Disk 4 Select the TeraStation then click Use Disk 120 Chapter 5 Backup...
Страница 123: ...7 Time Machine will count down from 120 seconds then backup will begin 122 Chapter 5 Backup...
Страница 131: ...3 From the job list click the job whose settings you want to change 4 Click the Options tab 130 Chapter 6 Remote Access...
Страница 132: ...5 Click Edit 131 Chapter 6 Remote Access...
Страница 136: ...7 Enter the desired job name and click Next 8 Select Backup and click Next 135 Chapter 6 Remote Access...
Страница 144: ...4 Click the Options tab 5 Click Edit 143 Chapter 6 Remote Access...
Страница 153: ...4 Click the Options tab 152 Chapter 6 Remote Access...
Страница 154: ...5 Click Edit 153 Chapter 6 Remote Access...
Страница 169: ...11Click the NFS Rules tab 12Click Add 168 Chapter 7 Advanced Features...
Страница 193: ...3 Click Edit 4 Select or enter the desired MTU size and click OK 192 Chapter 7 Advanced Features...


