


Configuring Access Restrictions for Shared Folders
You may restrict access to specific shared folders, including external USB drives.
Notes:
• Shared folders with limited access can still be used as backup destinations.
• If you grant both read-only and read and write access to the users or groups, the attribute will become as below:
Group with read and
write access
Group with read-only
access
Group with no access
User with read and write
access
R/W
R
R/W
User with read-only access
R/W
R
R
User with no access
R/W
R
-
R/W: Read and write, R: Read-only, -: No access
Local Users and Groups
1
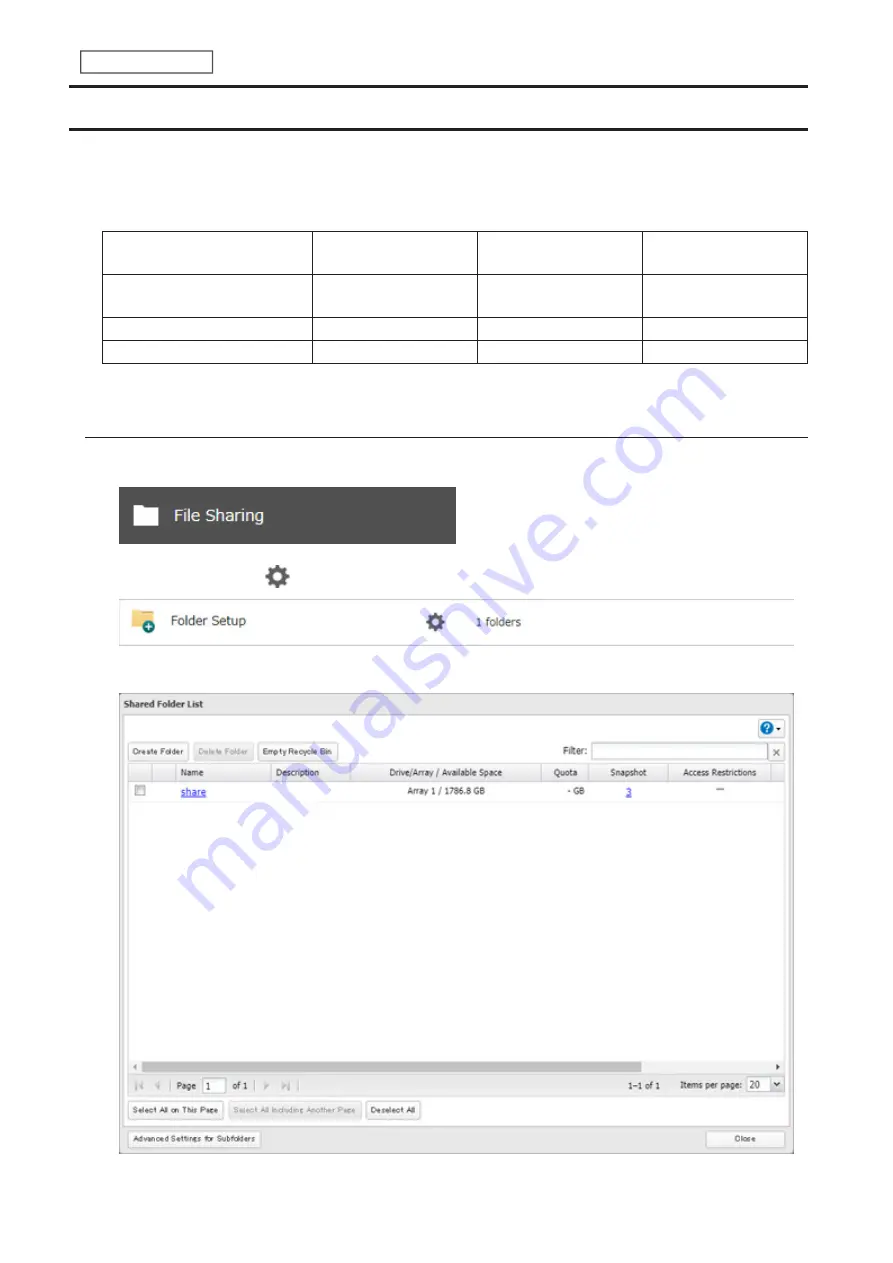
From Settings, click
File Sharing
.
2
Click the settings icon (
) to the right of “Folder Setup”.
3
Click the shared folder that you want to set access restrictions for.
33
Chapter 3 File Sharing
Содержание TeraStation 6000 Series
Страница 32: ...3 Click Add Group 31 Chapter 3 File Sharing...
Страница 120: ...2 Click Time Machine 119 Chapter 5 Backup...
Страница 121: ...3 Click Select Backup Disk 4 Select the TeraStation then click Use Disk 120 Chapter 5 Backup...
Страница 123: ...7 Time Machine will count down from 120 seconds then backup will begin 122 Chapter 5 Backup...
Страница 131: ...3 From the job list click the job whose settings you want to change 4 Click the Options tab 130 Chapter 6 Remote Access...
Страница 132: ...5 Click Edit 131 Chapter 6 Remote Access...
Страница 136: ...7 Enter the desired job name and click Next 8 Select Backup and click Next 135 Chapter 6 Remote Access...
Страница 144: ...4 Click the Options tab 5 Click Edit 143 Chapter 6 Remote Access...
Страница 153: ...4 Click the Options tab 152 Chapter 6 Remote Access...
Страница 154: ...5 Click Edit 153 Chapter 6 Remote Access...
Страница 169: ...11Click the NFS Rules tab 12Click Add 168 Chapter 7 Advanced Features...
Страница 193: ...3 Click Edit 4 Select or enter the desired MTU size and click OK 192 Chapter 7 Advanced Features...


