SELECTING/EDITING/SAVING PATTERNS
151
5
d
If necessary, touch the arrow keys to adjust
the position of the pattern.
(For more details, refer to page 148.)
e
After making the desired changes, touch
.
The pattern editing screen appears again.
Changing the pattern size while
maintaining the desired thread
density (stitch recalculator)
In the embroidery edit screen, the size of the
pattern can be changed while the desired thread
density is maintained.
With this function, the pattern will be enlarged or
reduced at a larger ratio than with normal pattern
resizing.
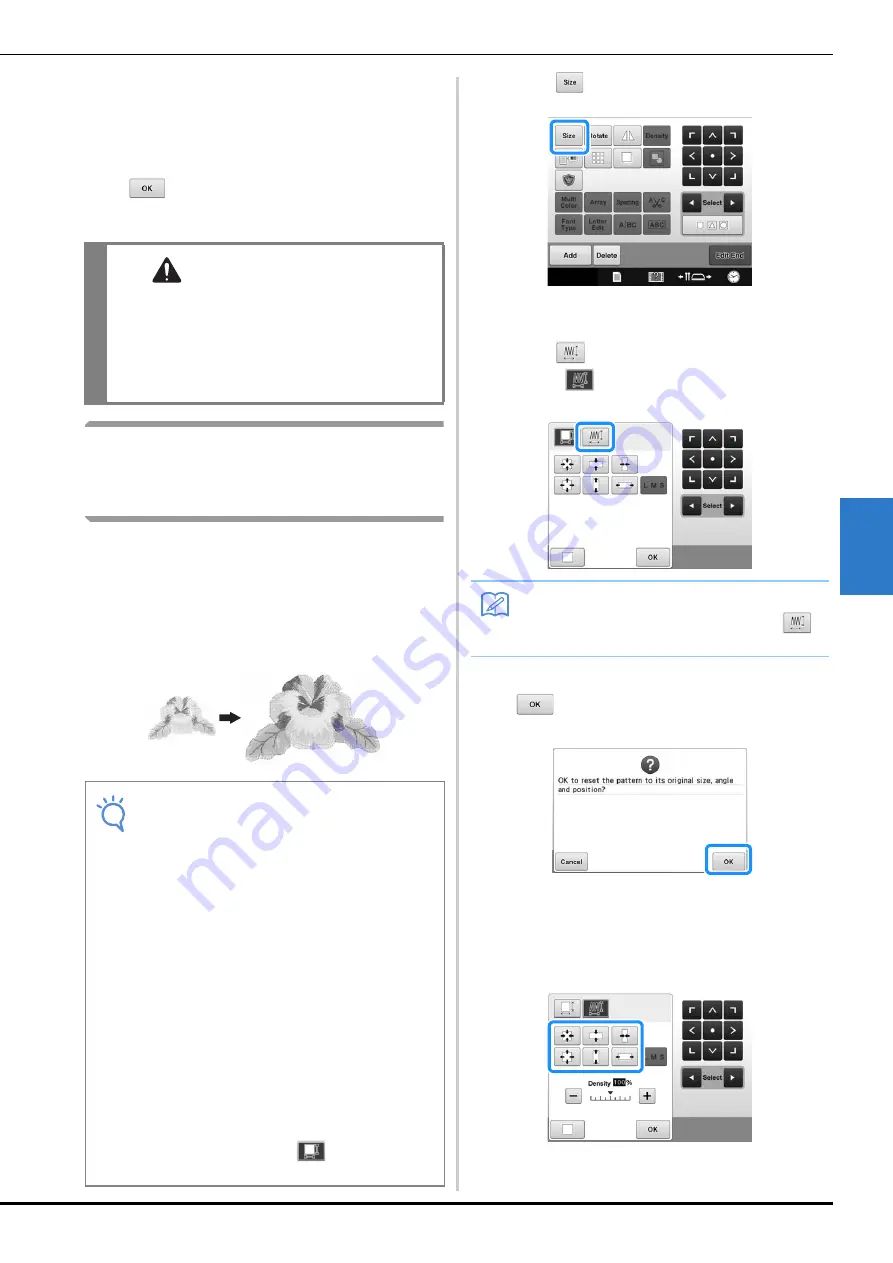
a
Press .
The following screen is displayed. (Refer to
page 150)
b
Press
to enter Stitch Recalculator
mode (
).
c
When the following message appears, touch
.
The pattern will be returned to its original size,
angle, and position as it was before it was edited.
d
Select how to change the pattern size.
(Refer to page 150.)
CAUTION
• After changing the size of the pattern, check
the icons for the embroidery frames that can
be used and use only the indicated frames. If a
frame other than those indicated are used, the
presser foot may hit the embroidery frame and
cause injuries.
Note
• In order to check the finished embroidery
before sewing on your project, sew trial
embroidery using the same fabric and
thread as those in your project.
• This function cannot be used with character
patterns, frame patterns, repeated (border)
patterns and large buttonhole patterns.
However, a repeated pattern can be created
from a pattern resized using this function.
• Patterns with a large number of stitches
(about 100,001 or more) cannot be resized
while maintaining a desired thread density.
The maximum limit for the number of
stitches differs depending on the data size
of pattern.
• If this function is used, thread density is
maintained while the pattern is enlarged/
reduced. However, the needle drop point
pattern is not entirely maintained. Use the
normal resizing mode
depending on
the results of trial embroidering.
Memo
• Stitch Recalculator cannot be used if
does not appear.


