35
Now we need to choose the time that we would like the boiler or
thermo-stove to be switched ON. To do this, there are 2 times
available to start and 2 to stop the boiler: START 1 and STOP 1;
START 2 and STOP 2.
For example:
Start at 09:00 hours / stop at 14:30 hours.
Start at 20:30 hours / stop at 23:00 hours.
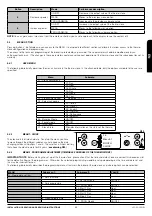
From the previous screen, we press button nº6 and it will show up
(
see drawing D35
):
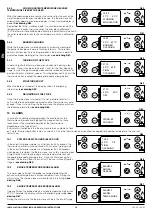
By pressing nº1 and nº2 buttons we modify the value “OFF” and we
set the time of the first start (
see drawing D36
):
In this same way we can proceed to set the first time to stop (
see
drawing D37 and D38
):
In case that you may want to set up just one time to start and stop,
the options START 2 and STOP 2 should be “OFF”.
If you want to set another on and off schedule, introduce the values
of the second schedule as explained previously. This way we will
have set the diary programme with two starting hours and two stops
hours.
It is also possible to schedule one automatic start hour and manual
stop hour (or vice versa).
Example: START 1: 00:1 hours y STOP 08: “off”
or
START 1: “off” and STOP 1: 22:00 hours.
Sub-menu 02-03- Weekly programme
NOTE: Please, make the set up carefully in order to avoid
program intermeshing. Or turning off the boiler in a different
program, at a time when you have set it to run from an alternative
programme.
If we intend to make a weekly set up of the thermo-stove we need
to take into account that, in that case, we have 4 different times to
start and stop. So we need to ascribe to every day of the week the
activation or not, as appropriate.
In order to activate them we need to start from the following screen
(
see drawing D39
):
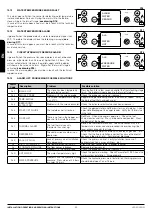
By pressing only once button no. 3, we access the weekly
programme sub-menu of the thermo-stove. By default, it will show
the following screen (
see drawing D40
).
We need to change option “OFF” to “ON” by pressing buttons no.1
and no.2. In this way we are confirming that the weekly set up has
been selected:
Now, we only need to choose the time. we have 4 different times
available to start and stop (
see drawings D41 and D42
):
-
PROGRAMME 1: START 1 and STOP 1
-
PROGRAMME 2: START 2 and STOP 2
-
PROGRAMME 3: START 3 and STOP 3
-
PROGRAMME 4: START 4 and STOP 4
After this, we need to select the activation or deactivation of each
programme depending on the day of the wee. For example (
see
drawing D43
):
Programme 1: Monday (ON), Tuesday (ON), Wednesday (OFF),
Thursday (OFF), Friday (ON), Saturday (ON), and Sunday (OFF.)
Programme 2: Monday (OFF), Tuesday (OFF), Wednesday (ON),
Thursday (OFF), Friday (OFF), Saturday (ON), and Sunday (ON.)
D39
PROGRAMME
WEEKLY
M-2-3
Off
D40
PROGRAMME
WEEKLY
M-2-3-01
START
PROG - 1
12:00
D41
M-2-3-02
STOP
PROG - 1
18:15
D42
M-2-3-02
PROG - 1
On
D43
M-2-3-04
MONDAY
Off
D34
PROGRAMME
DAILY
M-2-2-01
START 1
Off
D35
DAY
M-2-2-02
START 1
09:00
D36
DAY
M-2-2-02
STOP 1
Off
D37
DAY
M-2-2-03
STOP 1
14:30
D38
DAY
M-2-2-03
INSTALLATION, OPERATING AND SERVICING INSTRUCTIONS
HYDRO SERIES
EN
Содержание Dama Hydro
Страница 107: ...106 12 1 DAMA H FT ...
Страница 109: ...108 12 2 LETICIA H FT ...
Страница 111: ...110 12 3 REYNA H FT ...

