


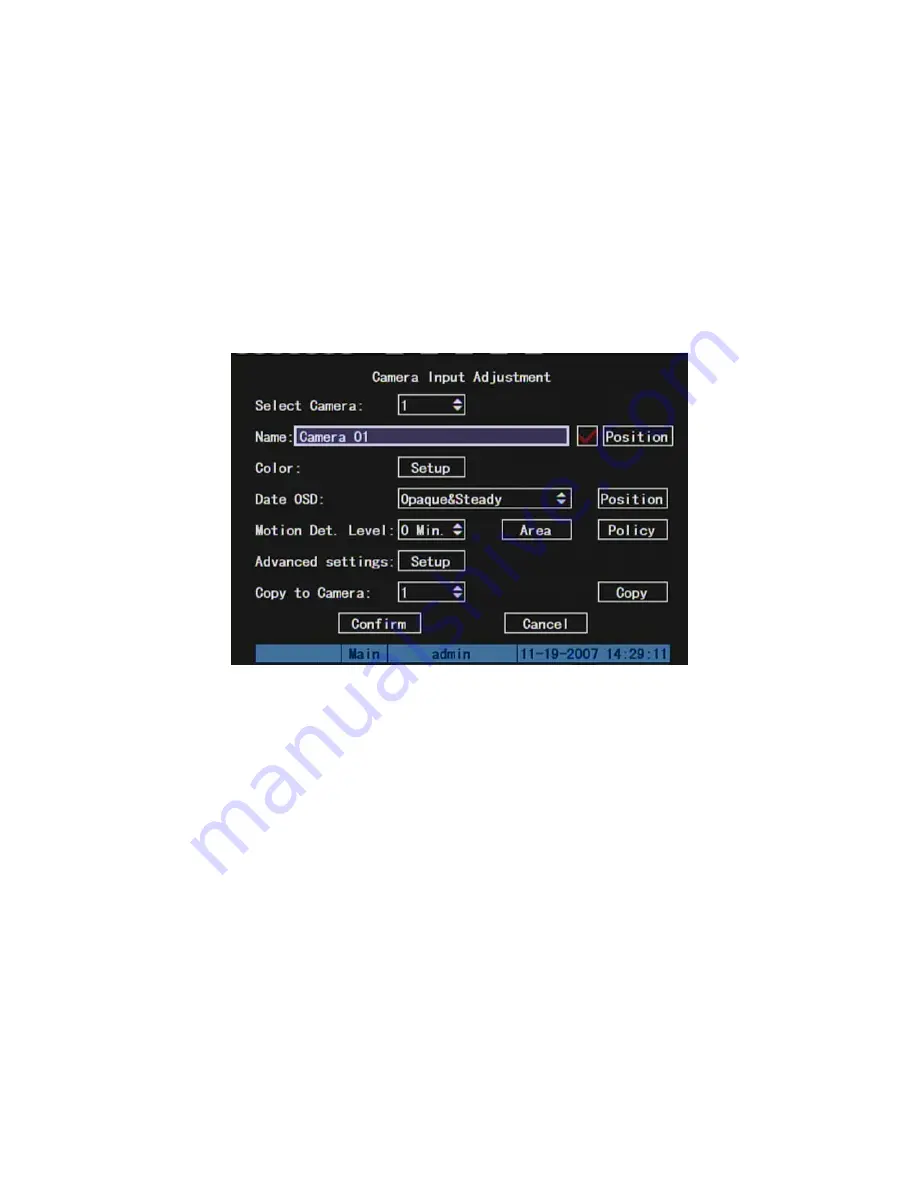
5.5 Camera
Setup
5.5.1 Camera Name Setup
Camera Name
In “Image Setup” menu, you can define name for each camera.
Please notice that
camera’s name can not be copied.
The steps of camera name setup:
Step 1:
Select one camera.
Step 2:
Move “Active Frame” to camera name edit box, press
[
EDIT
]
key to enter into
edit status, you can input digital number, uppercase and lowercase characters (refer to
Chapter 3.4). The camera name can support 32 characters.
Step 3:
Press
[
ENTER
]
key to exit edit status.
Move “Active Frame” to “Confirm” button, press
[
ENTER
]
to save the modification
and you can see the new camera name. Press “Cancel” button or
[
ESC
]
key to abort.
Setup Camera Name Position
If you do not want to display camera name, just disable the check box beside camera
name edit box. The disable flag is “×”. If you enable the check box, you can setup the
camera name position. You can copy the position to any other camera. The setup steps
64
Содержание SVR-80xx-S series
Страница 11: ...1 3 Typical Application 11 ...
Страница 15: ...6 Check all connections and mount back the metal cover of the DVR 7 Switch on the DVR 15 ...
Страница 26: ...How to exit menu Press PREV or ESC key to exit menu and return to preview mode 26 ...
Страница 53: ...In this case press ENTER to return password edit box and input new password again 53 ...
Страница 59: ...59 ...
Страница 60: ...5 4 Day and Time Setup 5 4 1 Day and Time Setting In Display menu you can setup DVR system date and time 60 ...
Страница 69: ...69 ...
Страница 108: ...Step 6 You can preview the image of 192 1 0 2 by using client end software 108 ...
Страница 124: ...In the formula a means alarm occurrence rate 124 ...
Страница 126: ...The corresponding relationship of cross cable 126 ...
Страница 136: ...Suggestions 136 ...