background image

8

Initial startup of Lucca | Charging the battery

Initial startup of Lucca

Protective fi lm and covers

Prior to the initial use, remove the protective fi lm 
from the display. Before inserting an SD card in 
the slot remove the dummy SD card. To protect 
the contacts, you can re-insert the dummy SD 
card after using the Lucca.

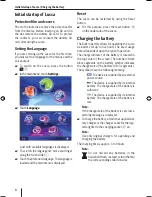
Setting the Language

If you are starting up the Lucca for the fi rst time, 
you must set the language for the menus and the 
voice output. 

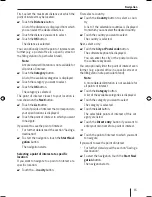
To switch on the Lucca, press the button 


3

.

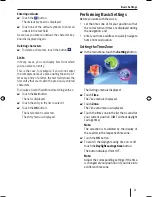
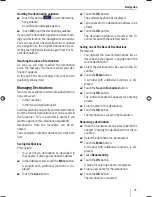
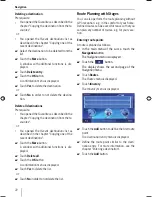
In the main menu, 

touch


Settings

.

Touch 

Language

.

A list with available languages is displayed.

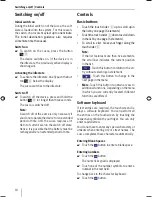
To scroll in the language list, move your fi nger 
along the touch slider 

1

.

Touch the preferred language. The language is 
loaded and the main menu is displayed.

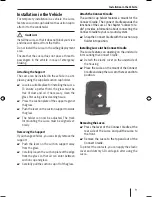
Reset

The Lucca can be restarted by using the Reset 
button.

For this purpose, press the reset button 

<


on the underside of the Lucca.

Charging the battery

The built-in battery allows for operating the Lucca 
via battery for up to fi ve hours. The exact usage 
time is dependent upon the type of operation. 

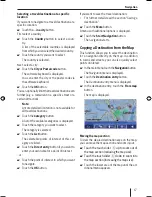
The charge indicator of the battery is located in 
the top center of the screen. The number of dark 
block segments on the battery symbol indicates 
the charge state of the battery (0 to 3 segments). 
The symbols have the following meaning:

: The device is supplied by an external 

power source.

: The device is supplied by its internal 

battery. The charge state of the battery is 
suffi cient.

: The device is supplied by its internal 

battery. The charge state of the battery is 
low.

Note:

If the charge state of the battery is very low, a 
warning message is displayed.

To charge the battery, attach the supplied bat-
tery charger or the charger cable for the ciga-
rette lighter to the charging socket 

8

 an.

Note:

Use only original chargers for operating and 
charging the battery.

The charging time is approx. 5 to 6 hours.

Note:

Do not discard any batteries in the 
household trash; instead, return them to 
the corresponding collection sites. 

Lucca_5_2_long_1_GB.indd   8

Lucca_5_2_long_1_GB.indd   8

07.12.2006   11:26:40 Uhr

07.12.2006   11:26:40 Uhr

Содержание TravelPilot Lucca 5.2

Страница 1: ...Mobile Navigation TravelPilot Lucca 5 2 www blaupunkt com Operating and installation instructions Long version...

Страница 2: ...2 Device Overview 7 8 9 2 3 4 5 6 1...

Страница 3: ...e main menu 5 Touchscreen All entries and the control of Lucca are carried out in a simple and intuitive way by touching the buttons displayed on the touchscreen 6 ZOOM SCROLL touch slider During the...

Страница 4: ...avigating to a point of interest 14 Selecting a point of interest 14 Selecting a point of interest nearby 14 Selecting a point of interest at a speci c location 15 Using the travel guide 16 Selecting...

Страница 5: ...t information 29 Speed 29 Additional Functions during Navigation 30 Inserting an interim destination 30 Approaching the next destination 30 Blocking route segments 30 Manual blocking 30 Unblocking 31...

Страница 6: ...image les 40 Display image folders 40 Rotating image les 40 Changing to the picture browser 40 Con guring the slide show 40 Starting the slide show 40 Playing video les 40 Stopping playback 40 Connect...

Страница 7: ...t yourself and others against accidents View the display only if you are in a safe travel situ ation The street routing and traf c signs have priority over the instructions of the navigation system Fo...

Страница 8: ...Charging the battery The built in battery allows for operating the Lucca via battery for up to ve hours The exact usage time is dependent upon the type of operation The charge indicator of the battery...

Страница 9: ...If you change vehicles you can simply remove the support Push the lever on the suction support away from the glass Carefully loosen the suction plate at the edge from the glass so that air can enter b...

Страница 10: ...h slider 6 up to scroll up in the list by one page 5 elements Touchthetouchslider6downtoscrolldown in the list by one page 5 elements To scroll in a list move your nger along the touch slider 6 Note I...

Страница 11: ...The list element is selected The entry menu is displayed Performing Basic Settings Before you work with the Lucca set the time zone of for your position so that the correct arrival times are displaye...

Страница 12: ...touch the Anti Theft Protection button The Theft protection menu is displayed Touch the Con gure theft protection but ton Follow the instructions and enter a self se lected PIN Touch the OK button Th...

Страница 13: ...ible if a street has been located Touch the button to close the GPS window Navigation General Notes about the Navigation Caution Do not operate the Lucca while driving to protect yourself and others a...

Страница 14: ...ation starts The destination guidance is displayed Navigating to a point of interest The points of interest or POIs include interest spe ci c locations such as airports railway stations and garages Th...

Страница 15: ...cting a point of interest at a speci c location If you want to navigate to a point of interest at a speci c location Touchthe inacitybutton First select a country Touch the Country button to select a...

Страница 16: ...played First select the maximum distance at which the travel destination may be located Touch the Distance button A list of the distances is displayed from which you can select the desired distance To...

Страница 17: ...sted Touch the Direct entry button if you want to enter your own name for a point of interest or Touch the point of interest to which you want to navigate Touch the OK button If you want to save the t...

Страница 18: ...ation Touch the Interim destination button to add the selected destination to a route as the next stage to be approached Touch the Add button to add the selected destination to the end of a route as t...

Страница 19: ...n The Destination entry menu is displayed Touch the Recent destinations button The Recent destinations menu is displayed Touch the desired destination Touch the OK button The destination is copied and...

Страница 20: ...h the map Touch any position on the map a second time A window with additional functions opens Touch the Route options button The Routing options menu is called up For further details read the chapter...

Страница 21: ...ions Prerequisite You speci ed a destination as described in the chapter Entering a destination address In the Address menu touch the More button A window with additional functions is dis played Touch...

Страница 22: ...nations Touch the More button A window with additional functions is dis played Touch Delete all Touch the OK button A con rmation menu is displayed Touch Yes to delete the list or Touch No in order to...

Страница 23: ...e the following buttons Touch the touch slider 6 up to scroll up in the list by one page 5 elements Touchthetouchslider6downtoscrolldown in the list by one page 5 elements Changing the Order Select th...

Страница 24: ...are displayed for each route point Displaying the Route on the Map Touch the Display button to display the com plete route on the map The map is displayed The route is highlighted in blue The speci e...

Страница 25: ...re sponding street type in the calculation of the route Touch the Overview button to display an overview of the route options The route options can also be subsequently changed in the Overview menu Ma...

Страница 26: ...infor mation have priority over the information of the Lucca Working with the Map Map Operation In this section you learn which information and which processing options are available in the map view...

Страница 27: ...ode Move In the move mode button with yellow border you can move the map For this purpose touch the map hold the pen or your nger pressed and move the map area in the desired direction Touch the butto...

Страница 28: ...e section Inserting an interim destination Next destination This function is only available during a navigation on a route with at least one interim point Use this function if you want to skip the nex...

Страница 29: ...ation The Signpost information menu is displayed Touch the Show traf c signs button to acti vate or deactivate the display of the exit traf c signs Touch the button to return to the Set tings menu Spe...

Страница 30: ...ination is selected as the next route point Note You can also select the interim destination directly from the map as described in the sec tion Copying a destination from the map Touch Interim destina...

Страница 31: ...following countries Aus tria Belgium Czech Republic Denmark Germa ny England Finland France Italy Netherlands Norway Spain Sweden and Switzerland Connecting the TMC antenna Connect the supplied TMC a...

Страница 32: ...ettings in the main menu You can perform settings in the main menu of the Lucca for the following areas Language Time Display Factory settings Touchscreen Product information Night mode Anti theft mod...

Страница 33: ...n rm with OK Factory settings In the Factory settings menu you can reset the navigation software to the factory settings and con gure the USB interface Touch the Factory settings button Touch Navigati...

Страница 34: ...second page of the Settings menu touch the Button sound button to activate or deactivate the sound when touching a but ton Con rm the setting with OK Audio video On the second page of the Settings me...

Страница 35: ...nce to the destination Duration Activate this point to display the duration until the arrival Arrival time Activate this point to dis play the estimated time of arrival Touch the buttons to switch the...

Страница 36: ...igns button to change between the following modes Always On speeding only Never Warning in urban areas The Warning in urban areas button shows the level of the speed reading at which you are audibly w...

Страница 37: ...tance Touch this eld to toggle between the display in kilometres and miles Touch OK Display IntheDisplaymenu youcansetthedisplaybright ness for day and night operation On the second page of the Settin...

Страница 38: ...card and the internal memory of the Lucca are displayed as drives Note The USB port is intended for data transfer only Do not attempt to charge the battery of the Lucca via USB Using road maps from th...

Страница 39: ...here that you want to select If you reached the list with the music les Touch the music le you want to play Touch the Play button The music le is played back Navigating through the music les The play...

Страница 40: ...In the playback menu touch the More but ton A selection menu is displayed Touch the Slideshow Timeout button repeat edly until the desired time is displayed Note Thetimeiscountedupinincrementsof ve An...

Страница 41: ...can now start a slide show or a navigation while the media player continuous to play music In the media player menus touch the button to exit the media playback Removing the SD card End the media play...

Страница 42: ...assignment D sub Connect Cradle Pin Type Description 1 6 10 11 5 15 1 Ignition IN Car ignition signal IN 12V 2 GND GND 3 GND GND 4 Analog OUT left Audio line OUT left channel 5 GND TMC Return TMC ant...

Страница 43: ...ow ing e g inside a tunnel The speed signal speedometer signal must be available in the vehicle at the radio connector Technical data TFT display Active colour matrix 4 inch 16 9 diagonal 480 x 272 pi...

Страница 44: ...isposal of old unit EU countries only Do not dispose of your old unit in the house hold trash Use the return and collection systems available to dispose of the old device Warranty We provide a manufac...

Страница 45: ...or information about using the map material in the Lucca please read the chapter Data trans fer Can I play WMA music les with DRM protec tion using the Lucca TheplaybackofWMA leswithDigitalRightsMan a...

Страница 46: ...eption The supplied TMC antenna is not connected or incorrectly aligned Connect the TMC antenna to the Lucca or align the antenna dif ferently The TMC reception is currently not available in all Europ...

Страница 47: ...47 Your notes...
Страница 48: ...1 46 66 706 Italy I 02 369 62331 02 369 62464 Luxembourg L 40 4078 40 2085 Netherlands NL 00 31 24 35 91 338 00 31 24 35 91 336 Norway N 47 64 87 89 60 47 64 87 89 02 Portugal P 2185 00144 2185 00165...

Отзывы: