67
960H H.264 DVR User Manual
SECTION 7: REMOTE CLIENT SOFTWARE
Button
Function
Description
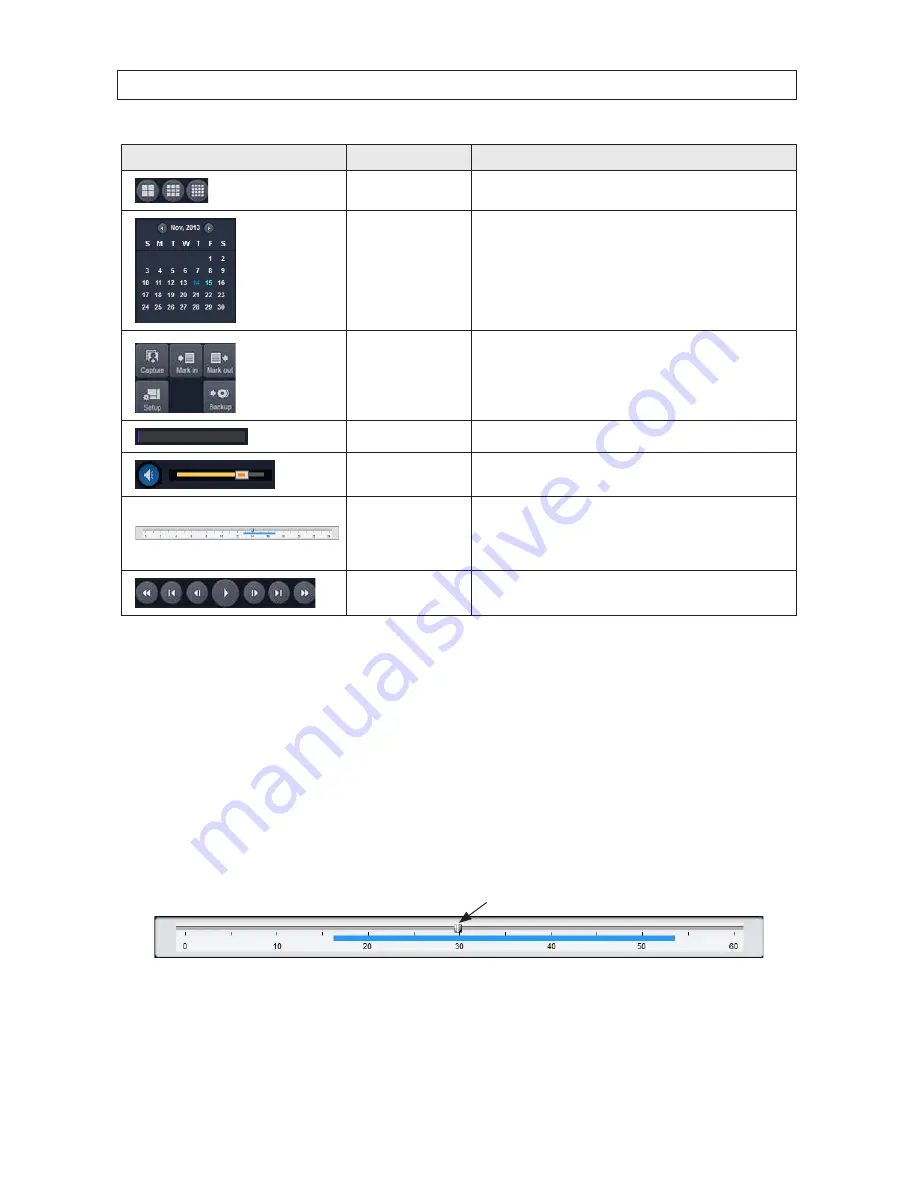
SPLIT-SCREEN MODE
Select a split-screen mode 4-, 9-, or 16-channel display .,
CALENDAR
In the calendar frame, dates with recorded video are colored in dark blue .
Click the date of the recorded video you want to find or play . The date
selected is indicated in light blue .
FUNCTIONS
CAPTURE
: Capture a still image of the screen/camera .
MARK IN
: Set the start time at the marker position
MARK OUT
: Set the end time at the marker position
SETUP
: Display the setup screen of the network viewer .
BACKUP
: Backup the video clip from MARK IN time to MARK OUT time
HDD USAGE
DVR HDD space used Indicator .
AUDIO
Adjust the volume . The audio is on or muted by clicking the speaker icon .
TIMELINE Bar
Displays a timeline for the date selected in the calendar frame . Time spans
when video is recorded are marked in blue . To expand the display for an
hour when video was recorded, drag the marker to the hour you want to
expand, then click the
0 - 60
button (located below the time line) .
PLAYBACK BUTTONS
Use the playback buttons to control video playback . The playback buttons
are labeled with the standard icons used for video play control .
7.6.1 Searching for and playing video recorded by the DVR
1 .
At the Remote Client, connect to the DVR .
2 .
Press the
SEARCH
button . The client will change from live mode to search mode .
3 .
In the calendar frame, click the date when video was recorded .
4 .
Drag the marker on the timeline to the time at which you want to play recorded video . To expand the hour within which the
marker lies, click the
0 - 60
button below the time line .
Marker
5 .
Click the
PLAY
button to begin playing video at the marker position .
Содержание BLK-DH3004D
Страница 61: ...55 960H H 264 DVR User Manual SECTION 6 BACKUP HDPlayerscreen ...
Страница 106: ...100 9 3 6 Setup SECURITY Use the Security submenu to configure system permissions for each user ID SECTION 9 WEBVIEWER ...
Страница 112: ...106 SECTION 9 WEBVIEWER 2 Click OK A snapshot of the screen image will be saved in BMP format ...


