50
SECTION 5: PTZ CONTROL
SECTION 5
PTZ Control
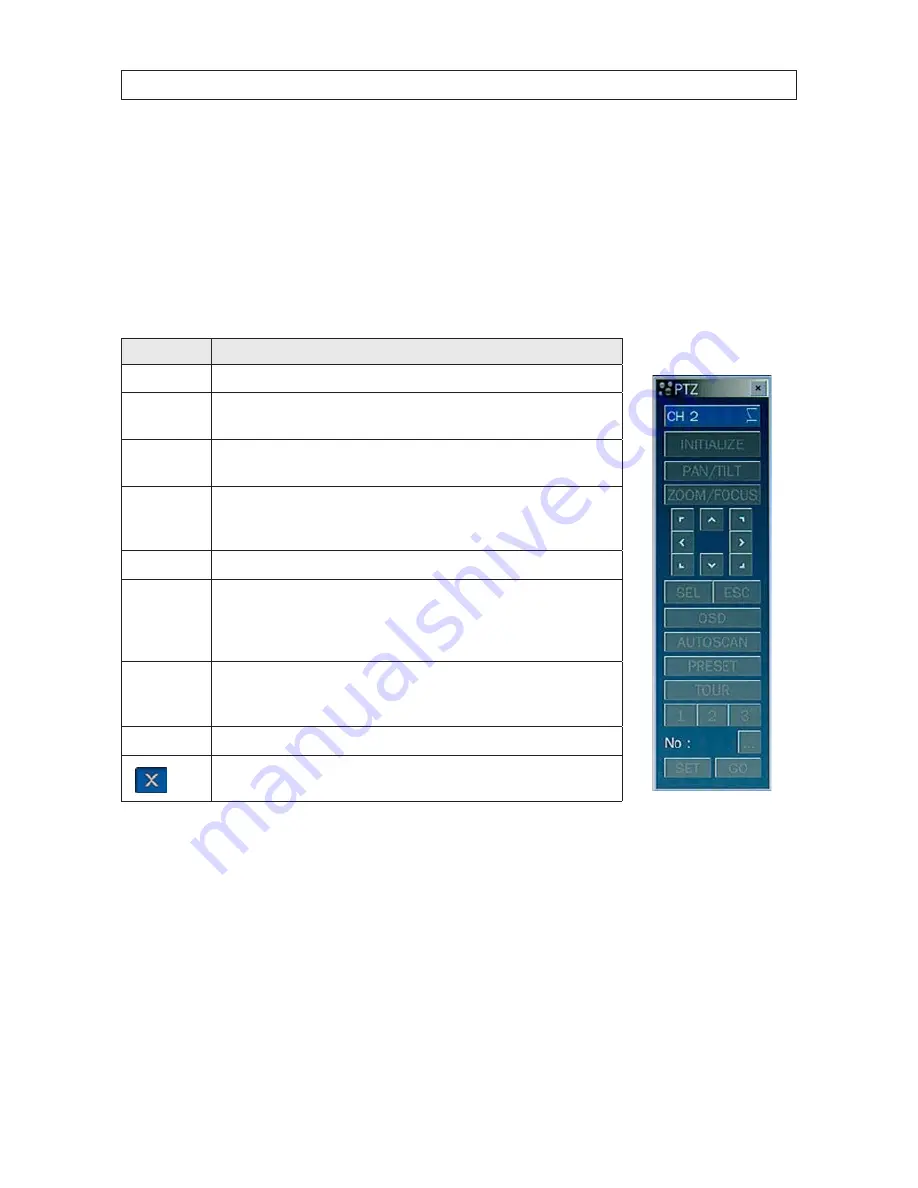
To control the PTZ functions of the camera, select
Camera PTZ
on the OSD menu . Use the
p
,
q
,
t
, and
u
buttons to select the
channel of the PTZ camera and features you want to control .
Table 19. Button functions in PTZ control
Item
Description
INITIALIZE
Initialize the PTZ settings of the selected camera .
PAN / TILT
Select PAN/TILT using the
p
q
t
and
u
button, then and press
SEL
. Adjust the tilt (UP/
DOWN)/pan (LEFT/RIGHT) position using the
p
,
q
,
t
, and
u
buttons .
ZOOM / FOCUS
Select ZOOM/FOCUS using the
p
,
q
,
t
, and
u
buttons, then press
SEL
. Adjust the zoom
(UP/DOWN)/focus (LEFT/RIGHT) position using the
p
,
q
,
t
, and
u
buttons .
OSD
Select OSD to enter the menu . Control keys are Right, Left, UP, Down, Select, Far (REW KEY),
and Near (FF KEY) . Press the
ESC
button to return to the previous menu . Press the
PTZ
button
to close the OSD menu .
AUTOSCAN
Press the right key (
u
) to start auto scan . Press the left key (
t
) to stop auto scan .
PRESET
Select PRESET, then press the left key (
t
) . A number input window will appear . Set the
number (3 digits) using the number key, then press the
SEL
to confirm the preset number for
the current position . Press the right key (
u
) and enter the number (3 digits) to go to the preset
position .
TOUR
Select TOUR and press the right (
u
) key . A number input window will open . Select a number
(1 digit) using a number key, then press
SEL
to start the tour . Press the left (
t
) key to stop the
tour . Preset the number of the tour group in the OSD menu .
NUMBER
For the TOUR and PRESET menu .
Press
ESC
to return to the main menu .
The Preset, Tour, OSD, and Autoscan function are only available on some camera models .
Содержание BLK-DH3004D
Страница 61: ...55 960H H 264 DVR User Manual SECTION 6 BACKUP HDPlayerscreen ...
Страница 106: ...100 9 3 6 Setup SECURITY Use the Security submenu to configure system permissions for each user ID SECTION 9 WEBVIEWER ...
Страница 112: ...106 SECTION 9 WEBVIEWER 2 Click OK A snapshot of the screen image will be saved in BMP format ...


