41
To quit and save the new settings press and hold
the “CAL” button. Release the “CAL” button when
the instrument instructs you to release it. The
screen will then show that the datalogger
adjustments have been saved. Pressing the mode
button at any point in the procedure will return the
settings to their former levels. To proceed to other
adjustments, press and release the “CAL” button at
any time.
4.5.3.4 Setting the communication rate
To access the communications rate settings, first
enter the datalogger adjust mode as discussed in
section 4.5.3.1. Then press and release the Cal
button three times to reach the communications rate
settings. This screen is used to set the speed or
“Baud rate” at which the PhD Ultra sends
information to your personal computer or printer.
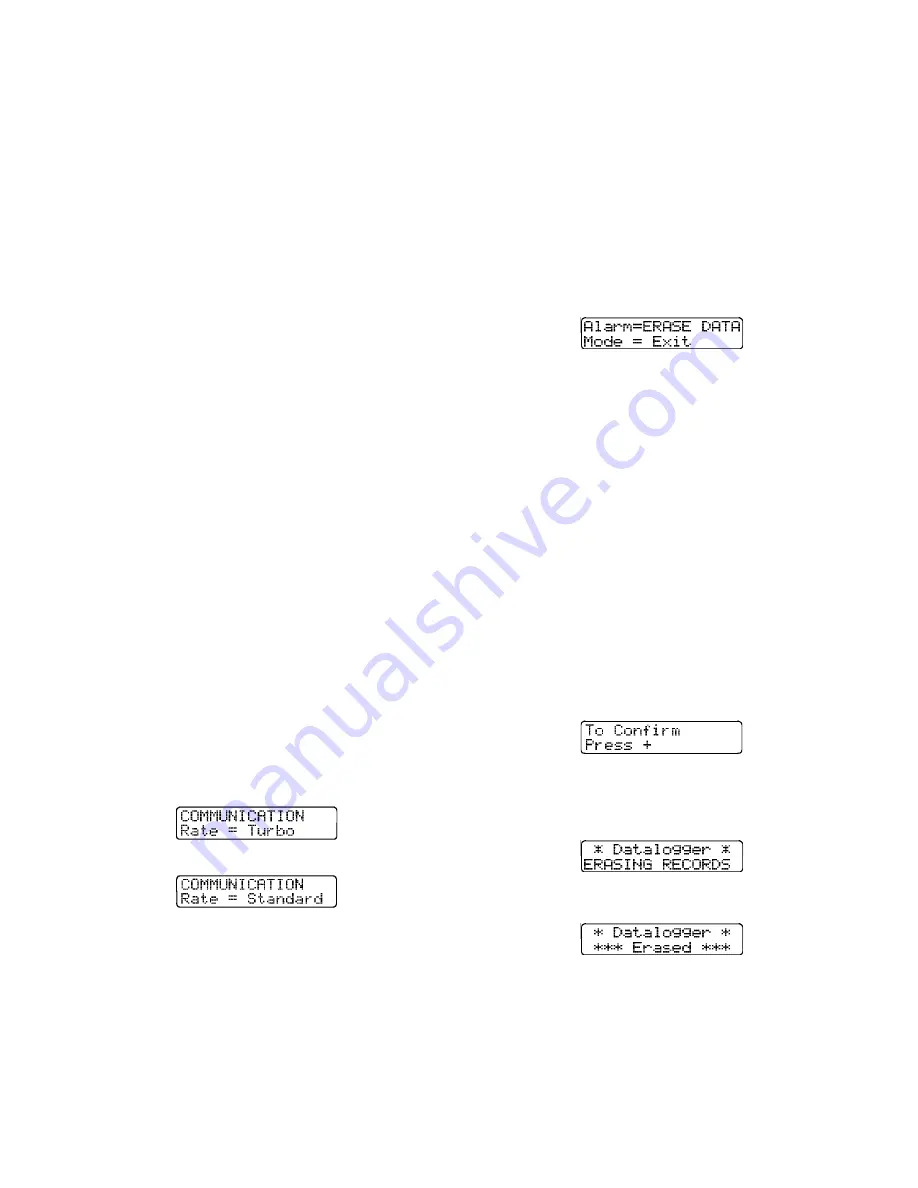
There are two communication rate settings, “Turbo”
(38,200 Baud) or “Standard” (9,600 Baud).
Most personal computers are able to transmit and
receive at the higher rate. Since communication at
the slower rate requires a greater amount of time to
download the same amount of data, the “Turbo” rate
should normally be selected.
If the PC is unable to establish communication with
the PhD Ultra at the higher communication rate, the
software is designed to “time out” the attempt, and
display a message on the computer monitor
indicating that the software is “unable to
communicate with instrument”.
Note: At least one additional attempt to
download data should be made before making a
decision to modify the communication rate.
Check all connections before making a second
attempt.
Selecting the “Standard” rate allows successful
communication with nearly all personal computers.
Pressing the “+” and “
-
” toggles the communication
rate setting between turbo and standard.
pn
Note: Both the PhD Ultra
and
the Datalink
software must be modified when a change is
made to the communication rate.
If the instrument is set to one rate while the software
is set to the other, proper communication will not be
possible. The software communication rate setting
can be modified through the “PC Setup” screen as
discussed in the PhD Ultra Datalink manual.
To quit and save the new settings press and hold
the “CAL” button. Release the “CAL” button when
the instrument instructs you to release it. The
screen will then show that the datalogger
adjustments have been saved. Pressing the mode
button at any point in the procedure will return the
settings to their former levels. To proceed to other
adjustments, press and release the “CAL” button at
any time.
4.5.3.5 Clear datalogger memory via push-
buttons
To clear the datalogger memory, first enter the
datalogger adjust mode as discussed in section
4.5.3.1. Then press and release the CAL button
until the following screen is shown:
The PhD Ultra can store the monitoring results for
up to 3,600 data intervals in instrument memory at
any time. When monitoring data is downloaded to a
personal computer, the entire contents of the
memory are transmitted. That means the amount of
time required for downloading is dependent on the
amount of recorded information in the instrument
memory. Once monitoring data has been
successfully downloaded to the PC, there is usually
no reason to retain it in instrument memory.
Caution:
Make sure that any session
information that will be needed later is safely
downloaded and stored prior to clearing the
instrument memory. Once session data has
been cleared from the datalogger memory, it will
no longer be retrievable.
Press the “Alarm” button to erase data. The
instrument will display a screen asking you to
confirm that you wish to proceed.
Press the “+” button to proceed with clearing the
datalogger. The instrument will display a screen
indicating that the instrument is erasing monitoring
records.
A screen will announce when the datalogger has
been erased.
Note: This procedure only clears data recorded
during monitoring sessions. Alarm settings,
calibration adjustments, user names and
locations and feature settings are not affected
by this procedure.


