25
Mounting the pedals
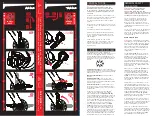
fig. 1
fig. 2
5. Mounting the pedals
The left pedal only fits the left hand crank, the right hand pedal only to the right
hand crank. The crank arms are marked with clear labels for this reason. Not
paying attention to the left and right pedal markings and forcibly mounting the
pedals will inevitably damage the thread on the pedal crank! (fig. 1)
The last step before conducting your final checks and taking your bike for a test ride is mounting your pedals. You will find the
pedals in the accessory box of your new bike.
Identify the right and left pedal. They will be clearly marked.
(fig. 2)
fig. 3
fig. 4
Screw the right pedal on the right crank
(drive side) clockwise by hand into the
thread.
(fig. 3-4)
fig. 5
fig. 6
Screw the left pedal to the left crank
counter-clockwise by hand into the
thread.
(fig. 5-6)
Afterwards, carefully tighten the pedal
with the appropriate tool. It should be
screwed firmly, but without much effort.
Depending on the pedal, you will need
either a 15 mm wrench or a 6 mm or
8 mm Allen key. All the tool variants
mentioned are included in the supplied
minitool.
(fig. 7-8)
fig. 7
fig. 8
After the first ride, the pedals should be checked again and tightened if necessary. A loose pedal will soon lead to crank damage.
Содержание City
Страница 1: ...Assembly Instructions for City Bicycles ...


