background image

INSTALLATION MANUAL

ENGLISH

12) AUTOMATION OPERATION
Since the automation system can be remotely controlled by means of a radio 
control device or a Start button, and therefore out of sight, all safety devices 
must be frequently checked in order to ensure their perfect efficiency. In 
the event of any anomalous operation, request immediate assistance from 
qualified personnel.
Children  must  be  kept  at  a  safe  distance  from  the  automation  operation 
area.

13) CONTROL
The  automation  system  allows  motor-driven  gate  opening  and  closing 
operations to be carried out. Various types of control are provided (manual, 
radio control, magnetic card access control etc.) depending on the installa-
tion requirements and characteristics. See the specific instructions for the 
various control systems. All automation system users must be instructed on 
automation control and operation.

14) MAINTENANCE
Before  carrying  out  any  maintenance  to  the  installation,  disconnect  the 
mains power supply. 
•  Periodically  check  that  hinge-pivots  are  in  good  condition  and 

properly greased. 

• 

Grease the pin on the foundation case every two years, using the appro-
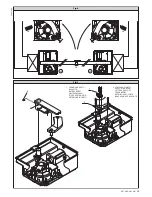
priate greaser (C) located on the lever (A) as shown in Fig.9.


The type of grease recommended is:  R

ocol

 F

oodlube

 M

ultipaste

.

•  Occasionally clean the photocell optical components.
•  Have  a  qualified  technician  (installer)  check  the  correct  setting  of  the 

electric clutch.

•  If the power supply cable is damaged, it must be replaced by the manu-

facturer or its technical assistance service, or else by a suitably qualified 
person, in order to prevent any risk.

•  When any operational malfunction is found, and not resolved, disconnect 

the mains power supply and request the assistance of a qualified technician 
(installer). When automation is out of order, activate the manual release 
to allow the opening and closing operations to be carried out manually.

15) NOISE
The aerial noise produced by the gearmotor under normal operating condi-
tions is constant and does not exceed 70dB(A).

16) SCRAPPING
Materials must be disposed of in conformity with the current regulations. 
In case of scrapping, the automation devices do not entail any particular 
risks or danger.  In case of recovered materials, these should be sorted out 
by type (electrical components, copper, aluminium, plastic etc.).

17) DISMANTLING
When the automation system is disassembled to be reassembled on another 
site, proceed as follows: 
•  Disconnect the power supply and the entire electrical installation. 
•  Remove the gearmotor from its fixing base. 
•  Disassemble the control panel, if separate, and all installation compo-

nents.

•  In the case where some of the components cannot be removed or are
  damaged, they must be replaced. 

18) MALFUNCTION: CAUSES AND REMEDIES
When any operational malfunction is found, and not resolved, discon-
nect the mains power supply and request the assistance of a qualified 
technician (installer).
When automation is out of order, activate the manual release to allow the 
opening and closing operations to be carried out manually.
During this period of time, keep the lock in the closed position by means of 
a chain and padlock.

18.1) The gate does not open. The motor does not turn.
a)  Check that the photocells or electric edges are not dirty, or impregnated, 

or misaligned. Proceed accordingly.

b)  Check  that  the  electronic  appliance  is  correctly  supplied.  Check  the 

integrity of the fuses.

c)  Check that the individual devices operate correctly.
d)  If the control unit does not work, it must be replaced.
  In the case where the above-mentioned checks give no results, contact 

an authorised customer service centre.

If the supply cable is damaged, it must be replaced by the manufacturer, 
by its technical service center or, in any case, by a qualified technician 
so as to avoid any risk.

18.2) The gate does not open. The actuator vibrates but there is no 
movement.
a)  Check that the capacitor is connected to the motor running terminals.
b)  Check that the common wire of the motor (light blue) is correctly con-

nected.

c)  Disconnect and reconnect the mains power supply. The first Start command 

must open. Should the actuator move to the closing function, reverse the 
respective running connections.

d)  Manually help the leaf opening operation. If the leaf opens, check whether 

there are any mechanical problems. In the case where the above-men-
tioned checks give no results, increase the torque in the control unit and, 
if necessary, contact a qualified technician.

WARNINGS. Correct operation of the actuator is only guaranteed when 
the data specified in this manual are respected. 
The company cannot be held responsible for any damage caused by 
failure to observe the installation standards and directives specified 
in the present manual.

The descriptions and illustrations contained in the present manual are 
not binding. The Company reserves the right to make any alterations 
deemed appropriate for the technical, manufacturing and commercial 
improvement of the product, while leaving the essential product fea-
tures unchanged, at any time and without undertaking to update the 
present publication.

14

 -


ELI-250 - Ver. 08

D811232_08

Содержание ELI-250

Страница 1: ...O PARA CANCELAS BATIENTES AUTOMATIZAÇÃO ELECTROMECNICA SUBTERRNEA PARA PORTÕES COM BATENTE ELI 250 GB F D E P ISTRUZIONI D USO E DI INSTALLAZIONE INSTALLATION AND USER S MANUAL INSTRUCTIONS D UTILISATION ET D INSTALLATION INSTALLATIONS UND GEBRAUCHSANLEITUNG INSTRUCCIONES DE USO Y DE INSTALACION INSTRUÇÕES DE USO E DE INSTALAÇÃO Via Lago di Vico 44 36015 Schio VI Tel naz 0445 696511 Tel int 39 044...

Страница 2: ... ELI 250 Ver 08 D811232_08 ...

Страница 3: ...arte sporgente della leva perno Per sbloccare inserire la chiave nel triangolo di sblocco e ruotare la chiave verso l indicazione del lucchetto aperto per circa 90 fig 1 Se l anta è dotata di elettroserratura sbloccare anche l elettroserratura Spingere manualmente l anta per aprire chiudere il cancello Per ripristinare l operazione motorizzata riposizionare il cancello allineato con la leva che po...

Страница 4: ...rotruding section of the lever pivot To release insert the key in the release triangle and turn it by about 90 in the direction shown by the open padlock symbol fig 1 If the leaf is equipped with an electric lock release the electric lock as well To open close the gate push it manually To restore motor driven operation reposition the gate by ali gning it with the lever bearing the lock unit and tu...

Страница 5: ...us le portail sur la partie saillante du levier pivot Per effectuer le déblocage enfoncer la clé dans le triangle de déblocage et tourner la clé vers l indication du cadenas ouvert pour environ 90 fig 1 Si le vantail est doté d électroserrure débloquer aussi l électroserrure Pousser le vantail manuellement pour ouvrir fermer le portail Pour rétablir le fonctionnement motorisé repositionner le port...

Страница 6: ...or auf dem hervorragenden Bestandteil der Einheit Hebel Zapfen Zur Entsperrung ist der Schlüssel in das Entsperrungsdreieck einzusetzen und um ca 90 in die Richtung des angezeigten offenen Vorhängeschlosses zu drehen Abb 1 Sofern der Flügel über ein Elektroschloß verfügt muß auch das Elektro schloß entsperrt werden Den Flügel von Hand drücken um das Tor zu öffnen bzw zu schließen Um den Motorbetri...

Страница 7: ... la palanca perno Para desbloquear hay que insertar la llave en el triángulo de desbloqueo y girarla hacia la indicación del candado abierto unos 90 fig 1 Si la hoja está dotada de electrocerradura ésta también tiene que desbloquearse Empujar manualmente la hoja para abrir y cerrar la cancela Para restablecer la operación motorizada hay que volver a alinear la cancela con la palanca de accionamien...

Страница 8: ...have no triângulo de desbloqueio e girar a mesma em direção da indicação de cadeado aberto por aproximadamente 90 fig 1 Se a folha do portão for dotada de fechadura eléctrica desbloquear também a fechadura eléctrica Empurrar manualmente a folha do portão para abrir fechar o mesmo Para retornar à operação motorizada reposicionar o portão alinhado com a alavanca que tem o conjunto de bloqueio e gira...

Страница 9: ...dell automazione un interruttore o un magnetotermico onnipolare con distanza di apertura dei contatti uguale o superiore a 3 5 mm Verificare che a monte della rete di alimentazione vi sia un interruttore differenziale con soglia da 0 03A Verificare se l impianto di terra è realizzato correttamente collegare tutte le parti metalliche della chiusura porte cancelli ecc e tutti i componenti dell impia...

Страница 10: ...tilizzando i 4 dadi precedentemente tolti Avvitare le viti VR fig 7 e rispettivi controdadi alle staffe finecorsa ed individuare la posizione di fissaggio destra o sinistra fig 8 Fissare le staffe dei finecorsa meccanici utilizzando le viti M8 in dota zione fig 7 Montare i particolari della leva di collegamento motore perno nella sequenza corretta indicata in fig 9 Nel caso la posizione assunta da...

Страница 11: ...eriali che vengano separati per tipologia parti elettriche rame alluminio plastica ecc 17 SMANTELLAMENTO Nel caso l automazione venga smontata per essere poi rimontata in altro sito bisogna Togliere l alimentazione e scollegare tutto l impianto elettrico Togliere il motoriduttore dalla base di fissaggio Smontare il quadro di comando se separato e tutti i componenti del l installazione Nel caso alc...

Страница 12: ...olar or magnetothermal switch on the mains power supply having a contact opening distance equal to or greater than 3 5 mm Check that a differential switch with a 0 03A threshold is fitted just before the power supply mains Check that earthing is carried out correctly connect all metal parts for closure doors gates etc and all system components provided with an earth terminal Fitallthesafetydevices...

Страница 13: ...r pivot connecting lever components following the correct sequence given in fig 9 In the case where the position of the levers interferes with the assembly of the components supply the motors with current by means of the control unit until the levers reach the required position Fig 9 insert the greaser C into the threaded hole of the lever A The type of grease recommended is Rocol Foodlube Multipa...

Страница 14: ...lectrical installation Remove the gearmotor from its fixing base Disassemble the control panel if separate and all installation compo nents In the case where some of the components cannot be removed or are damaged they must be replaced 18 MALFUNCTION CAUSES AND REMEDIES When any operational malfunction is found and not resolved discon nect the mains power supply and request the assistance of a qua...

Страница 15: ...9 05 CEE et modifications successives Couperl alimentationélectriqueavantd effectuern importequelleintervention sur l installation Débrancher aussi les éventuelles batteries de secours Prévoir sur la ligne d alimentation de la motorisation un interrupteur ou un magnétothermique omnipolaire avec distance d ouverture des contacts égale ou supérieure à 3 5 mm Vérifier qu en amont de la ligne d alimen...

Страница 16: ...t en butée dans l arrêt central Aligner parfaitement le groupe des leviers montés au gond Si on utilise une cale la souder d abord au vantail puis souder le groupe des leviers à la cale Vérifier le fonctionnement du vantail Si on ne monte pas le motoréducteur monter le couvercle de la caisse de fondation et le fixer avec les vis spéciales À ce point le portail s ouvre et se ferme manuellement Il r...

Страница 17: ...activer le déblocage manuel pour permettre l ouverture et la fermeture manuelle 15 BRUIT Le bruit aérien produit par le motoréducteur dans des conditions d utilisation normales est constant et ne dépasse pas 70dB A 16 DÉMOLITION L élimination des matériaux doit être faite en respectant les normes en vi gueur En cas de démolition de la motorisation il n existe aucun danger ou risque particulier dér...

Страница 18: ...Sie dieVersorgungsleitung der Anlage mit einem Schalter oder allpoligen magnetthermischen Schutzschalter mit einem Kontaktabstand von mindestens 3 5 mm Der Versorgungsleitung muß ein Fehlerstromschutzschalter mit einer Schwelle von 0 03A vorgeschaltet sein Prüfen Sie den Erdungsanschluß Alle Metallteile der Schließvorrichtung Türen Tore usw und alle Anlagenkomponenten mit Erdungsklemme anschließen...

Страница 19: ...ndamentkasten ist in den Abb 6 und 8 gekennzeichnet Zur Verankerung dienen die vorher entfernten vier Muttern Die Schrauben VR Abb 7 mit den entsprechenden Kontermuttern auf die Endanschlagsbügel schrauben und die richtige Befestigungsposition auf der rechten oder linken Seite suchen Abb 8 Die Bügel der mechanischen Endanschläge mit den beiliegenden selbst schneidenden Schrauben M8 befestigen Abb ...

Страница 20: ...ert von 70dB A 16 VERSCHROTTUNG Die Materialien sind unter Beachtung der einschlägigen Vorschriften zu entsorgen Bei der Verschrottung gehen von der Anlage keine besonderen Gefahren oder Risiken aus Werden die Materialien wiederverwertet sollten sie nach Arten getrennt werden elektrische Komponenten Kupfer Aluminium Plastik usw 17 ABBAU Wird die Anlage abgebaut um sie an einem anderen Ort erneut z...

Страница 21: ...r el suministro de corriente antes de efectuar cualquier intervención en la instalación Desconectar también eventuales baterías tampón si las hay Prever en la red de alimentación del automatismo un interruptor o un magnetotérmicoomnipolarconunadistanciadeaberturadeloscontactos igual o superior a 3 5 mm Verificar que antes de la red de alimentación haya un interruptor dife rencial con un umbral de ...

Страница 22: ...interpondrá entre el grupo palancas unidas y la hoja de la cancela como muestra la fig 5 Colocar las hojas de manera que queden cerradas y tocando el retén central Alinear perfectamente el grupo palancas unidas al quicio Si se usa un elemento de espesor soldarlo antes a la hoja y después soldar el grupo palancas al elemento de espesor Verificar el funcionamiento de la hoja Si no se inserta el moto...

Страница 23: ... de servicio activar el dispositivo de desbloqueo manual para permitir la apertura y el cierre manuales 15 RUIDO El ruido aéreo producido por el motorreductor en condiciones normales de utilización es constante y no supera los 70dB A 16 DEMOLICIÓN La eliminación de los materiales debe hacerse respetando las normas vi gentes En el caso de demolición de un automatismo no existen particulares peligro...

Страница 24: ...rede de alimentação da automatização um interruptor ou um magnetotérmicoomnipolarcomdistânciadeaberturadoscontactosigual ou superior a 3 5 mm Verifique que a montante da rede de alimentação haja um interruptor diferencial com limite de 0 03A Verifique se a instalação de terra foi realizada correctamente ligue todas as partes metálicas de fecho portas portões etc e todos os compo nentes da instalaç...

Страница 25: ...ARA A INSTALAÇÃO PORTUGUÊS Verificar o funcionamento da folha do portão Se não for inserido o motoredutor montar a tampa da caixa de fundação e fixá la com os respectivos parafusos Neste ponto o portão abre se e fecha se manualmente Falta posicionar o motoredutor 7 MONTAGEM MOTOREDUTOR Tirar as porcas do fundo da caixa com a chave CH19 O motoredutor fixa se à caixa de fundação na posição indicada ...

Страница 26: ...16 DEMOLIÇÃO Aeliminaçãodosmateriaisdeveserfeitarespeitando seasnormasvigentes Em caso de demolição da automatização não existem perigos particulares ou riscos derivantes da própria automatização É oportuno no caso da recuperação dos materiais que os mesmos sejam separados por tipologia partes eléctricas cobre alumínio plástico etc 17 DESMANTELAMENTO Caso a automatização seja desmontada para ser r...

Страница 27: ...Fig 1 Fig 2 AL S Fre M E M D Fte I Qr 3x1mm2 4x1 5mm 2 4x1 5mm 2 4x1mm 2 2x1mm 2 4x1mm 2 2x1mm2 2x1 5mm2 2x1 5mm2 3x1 5mm2 RG58 Fri CF Fti CF T D ELI 250 Ver 08 27 D811232_08 ...

Страница 28: ...Fig 4 Fig 3 Fig 6 Fig 7 Fig 5 180 S VR 500 400 336 420 70 145 min 70 D D 28 ELI 250 Ver 08 D811232_08 ...

Страница 29: ... 1 FERMO D ARRESTO BACKSTOP BUTEE D ARRET HALTEANSCHLAG TOPE DE DETENCIÓN RETÉM DE BLOQUEIO 2 STAFFA SUPPORTO SUPPORT BRACKET PATTE DE SUPPORT TRAGEBÜGEL ESTRIBO DE SOPORTE BRAÇADEIRA DE SUPORTE 1 2 A C ELI 250 Ver 08 29 D811232_08 ...

Страница 30: ...C L VRO L A A B B A 1 FERMO D ARRESTO BACKSTOP BUTEE D ARRET HALTEANSCHLAG TOPE DE DETENCIÓN RETÉM DE BLOQUEIO 2 STAFFA SUPPORTO SUPPORT BRACKET PATTE DE SUPPORT TRAGEBÜGEL ESTRIBO DE SOPORTE BRAÇADEIRA DE SUPORTE 30 ELI 250 Ver 08 D811232_08 ...

Страница 31: ...Fig 14 2 1 Max 90 ELI 250 Ver 08 31 D811232_08 ...

Страница 32: ......

Отзывы: