


Commissioning
EL3773
110
Version: 2.5
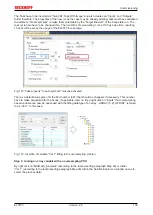
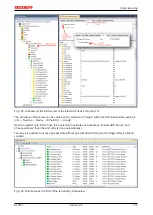
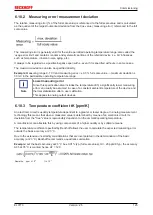
Fig. 120: Set up the link of the PLC array variable (left: for the last preceding paragraph Step 2a, right: for the
last preceding paragraph Step 2b)
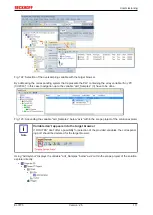
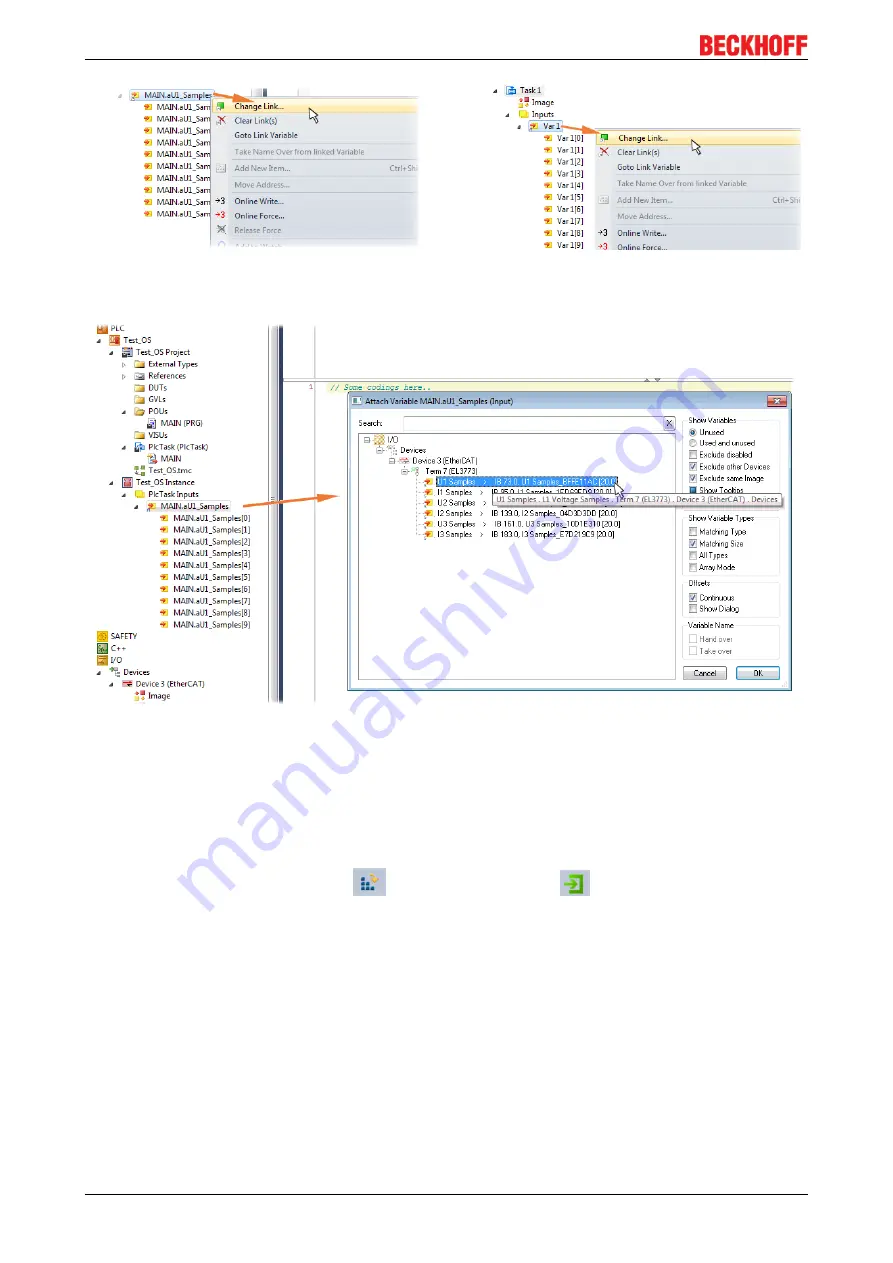
Fig. 121: Select the EL3773 PDO "L1 Voltage Samples" to create a link to the PLC array variable
„aUI_Samples“
The selection of PDO "U1 Samples" of the EL3773 for “MAIN.aUI_Samples” based by the last preceding
paragraph Step 2a as illustrated above have to be done in the same way for “Var 1” accordingly.
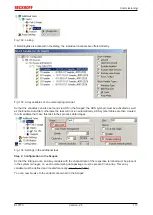
Step 4: Selection of the PLC array variable for the Y-axis of the scope
Now the configuration will be activated (
) and logged in the PLC (
), so the array variable will be
visible for the target browser of the scope for being selected.
Thereby the drop down menu will be opened by right clicking on “Axis” (A) for selection of the scope features
(B):
Содержание EL3773
Страница 1: ...Documentation EL3773 Power Monitoring Oversampling Terminal 2 5 2018 03 13 Version Date...
Страница 2: ......
Страница 6: ...Table of contents EL3773 6 Version 2 5...
Страница 39: ...Mounting and wiring EL3773 39 Version 2 5 Fig 29 Other installation positions...
Страница 41: ...Mounting and wiring EL3773 41 Version 2 5 Fig 31 Block diagram...
Страница 47: ...Commissioning EL3773 47 Version 2 5 Fig 38 Incorrect driver settings for the Ethernet port...
Страница 58: ...Commissioning EL3773 58 Version 2 5 Fig 57 EtherCAT terminal in the TwinCAT tree left TwinCAT 2 right TwinCAT 3...
Страница 147: ...Commissioning EL3773 147 Version 2 5 Fig 168 Confirming program start...


