57 / 119
0006081062_200709
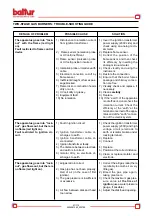
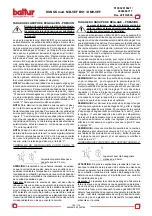
TWO-STAGE GAS BURNERS: TROUBLE-SHOOTING GUIDE
DETAILS OF PROBLEM
The apparatus goes into “lock-
out” with the flame (red light
on).
Fault restricted to flame control
device
The apparatus goes into “lock-
out”, gas flows out, but there is
no flame (red light on).
Fault restricted to ignition cir-
cuit.
The apparatus goes into “lock-
out”, gas flows out, but there is
no flame (red light on).
POSSIBLE CAUSE
1) Disturbance to ionization current
from ignition transformer.
2) Flame sensor (ionization probe
or UV cell) inefficient.
3) Flame sensor (ionization probe
or UV cell) position incorrect.
4) Ionization probe or relative earth
cable.
5) Electrical connection cut-off by
flame sensor.
6) Inefficient draught or fumes pas
-
sage blocked.
7) Flame disk or combustion heads
dirty or worn.
8) UV cell dirty or greasy.
9) Equipment fault.
10) No ionization.
1) Fault in ignition circuit.
2) Ignition transformer cable di-
scharges to earth.
3) Ignition transformer cable di-
sconnected.
4) Ignition transformer faulty.
5) The distance between electrode
and earth is incorrect.
6) Isolator dirty, so electrode di
-
scharges to earth.
1) air/gas ratio incorrect.
2) Gas pipe has not been properly
bled of air (in the case of first
ignition).
3) The gas pressure is insufficient
or excessive.
4) Air flow between disk and head
too narrow.
SOLUTION
1) Invert the ignition transformer
power supply (230V side) and
check using an analog micro-
ammeter.
2) Replace flame sensor.
3) Correct the position of the
flame sensor, and then check
its efficiency by inserting the
analog micro-ammeter.
4) Check visually and using the
instrument.
5) Restore the connection.
6) Ensure that the boiler fumes
passage and chimney connec
-
tion are free.
7) Visually check and replace, if
necessary.
8) Clean
carefully
.
9) Replace.
10) If the “earth” of the apparatus
is not efficient, do not check the
ionization current. Check the
efficiency of the “earth” at the
terminal concerned of the appa-
ratus and at the “earth” connec-
tion of the electric system.
1) Check the ignition transformer
power supply (230V) and high
voltage circuit (electrode to
earth or isolator broken under
locking terminal).
2) Replace.
3) Connect.
4) Replace.
5) Position at the correct distance.
6) Clean or replace isolator and
electrode.
1) Correct the air/gas ratio (there
is probably too much air or very
little gas).
2) Bleed the gas pipe again,
taking great care.
3) Check the maximum gas pres
-
sure value
at the time of
ignition
(use a water pressure
gauge, if possible).
4) Adjust the disk/head opening.
Содержание BGN 200 LX
Страница 27: ...54 119 0006081062_200709 Notes on the programmer Programmer sequence Output signals on terminal...
Страница 35: ...98 119 0006081062_200709...
Страница 36: ...99 119 0006081062_200709...
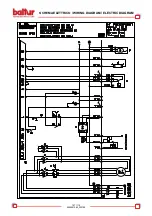
Страница 44: ...107 119 0006081062_200709 SCHEMA ELETTRICO WIRING DIAGRAM ELECTRIC DIAGRAM...
Страница 45: ...108 119 0006081062_200709 SCHEMA ELETTRICO WIRING DIAGRAM ELECTRIC DIAGRAM...
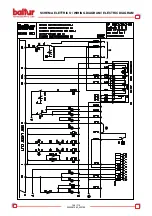
Страница 46: ...109 119 0006081062_200709 SCHEMA ELETTRICO WIRING DIAGRAM ELECTRIC DIAGRAM...
Страница 47: ...110 119 0006081062_200709 SCHEMA ELETTRICO WIRING DIAGRAM ELECTRIC DIAGRAM...
Страница 48: ...111 119 0006081062_200709 SCHEMA ELETTRICO WIRING DIAGRAM ELECTRIC DIAGRAM...
Страница 49: ...112 119 0006081062_200709 SCHEMA ELETTRICO WIRING DIAGRAM ELECTRIC DIAGRAM...
Страница 50: ...113 119 0006081062_200709 SCHEMA ELETTRICO WIRING DIAGRAM ELECTRIC DIAGRAM...
Страница 51: ...114 119 0006081062_200709 SCHEMA ELETTRICO WIRING DIAGRAM ELECTRIC DIAGRAM...
Страница 52: ...115 119 0006081062_200709 SCHEMA ELETTRICO WIRING DIAGRAM ELECTRIC DIAGRAM...
Страница 53: ...116 119 0006081062_200709 SCHEMA ELETTRICO WIRING DIAGRAM ELECTRIC DIAGRAM...
Страница 54: ...117 119 0006081062_200709 SCHEMA ELETTRICO WIRING DIAGRAM ELECTRIC DIAGRAM...
Страница 55: ...118 119 0006081062_200709 SCHEMA ELETTRICO WIRING DIAGRAM ELECTRIC DIAGRAM...
Страница 56: ...119 119 0006081062_200709 SCHEMA ELETTRICO WIRING DIAGRAM ELECTRIC DIAGRAM...

